Vortech 2006-2010 6.1L Jeep SRT8 User Manual
Page 19
P/N: 4CK020-010 v6.0, 02/17/2012
©2012 Vortech Engineering, Inc
All Rights Reserved, Intl. Copr. Secured
9
1. Using thread sealant, install 1/2" NPT 90° to
3/4 hose barb fitting into the Bottom of the
reservoir and one straight 1/2" NPT to 3/4
hose barb fitting into the top of the supplied
plastic reservoir.
2. Attach the water reservoir bracket to the res-
ervoir using 1/4-20 x .5" cap screws.
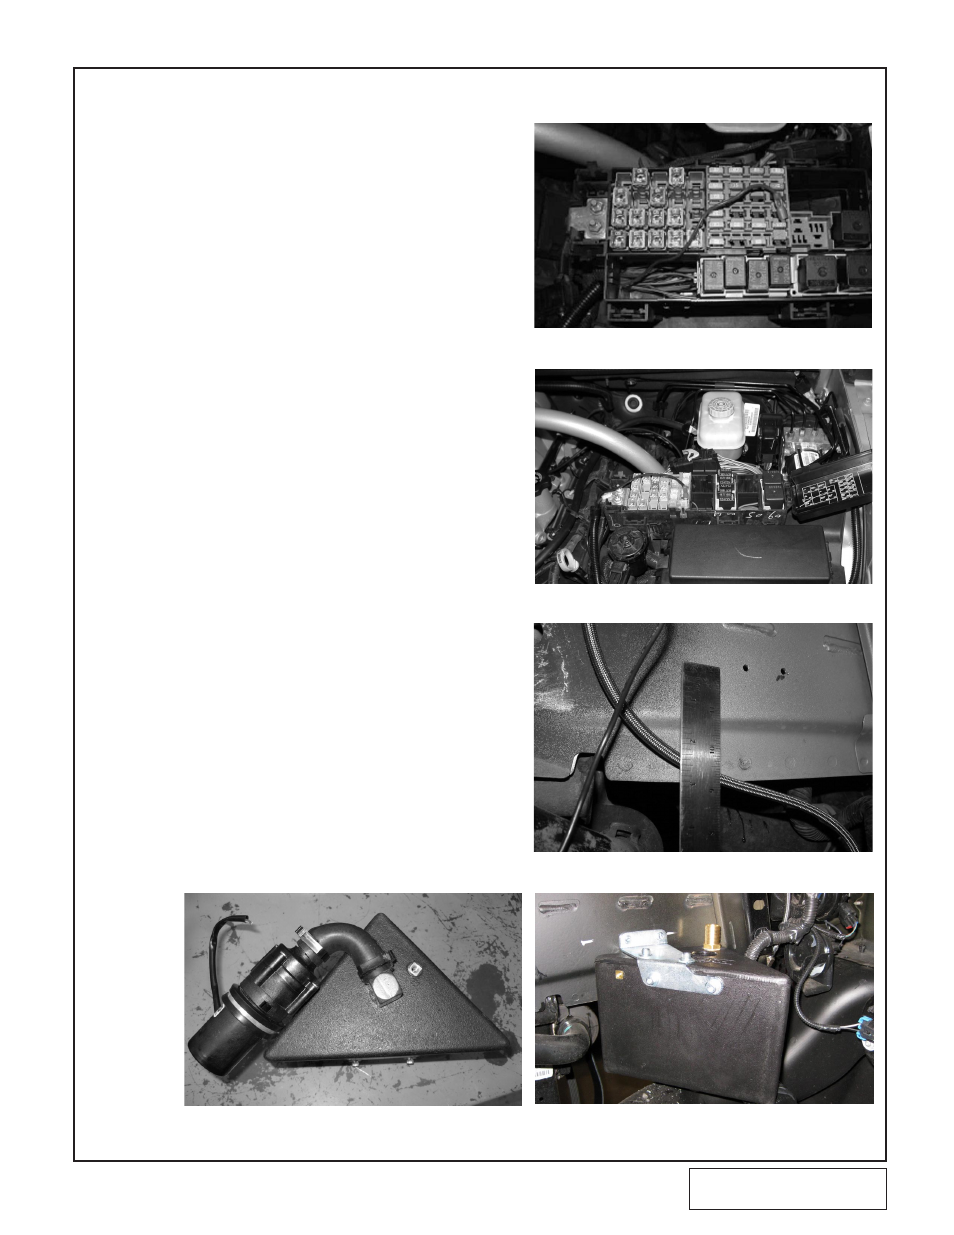
3. Attach pump to reservoir using the supplied
clamp and ¼-20 screw in the orientation
shown in Fig. 7B-e. Attach pump inlet to the
bottom reservoir fitting using the supplied 90°
hose and two nylon clamps.
4. Position the reservoir on the passenger side
frame rail below the old air box location.
5. With the tank as far forward as possible mea-
sure 3 inches up from the bottom of the rail
and mark the hole for drilling.
6. Drill two 11/64" holes for the supplied #12
sheet metal screws, install and tighten.
7. Cut off pump plug leaving as much wire con-
nected to the pump as possible. Locate
ground (brown) wire and attach a length of
supplied black wire. Attach wire to sheet
metal screw used to mount reservoir using
the supplied ring terminal.
8. Connect a section of hose to the top of the
reservoir and run it to the straight fitting
installed in the upper hole of the CAC.
9. Connect the supplied fuse holder (lengthened
with the supplied wire if necessary) to the
water pump power wire using a butt connec-
tor. Route the water pump power wire across
the bottom of the radiator and up to the fuse
box and connect to fuse pictured in appropri-
ate figure, using the supplied fuse tap and
slide connector (
if vehicle does not have a
fuse in this area, or the water pump does
not function, connect the power wire to
any keyed power source).
7.B CAC RESERVOIR AND WATER PUMP ASSEMBLY AND INSTALLATION
Fig. 7B-a (2008-2009)
Fig. 7B-b (2005-2007)
Fig. 7B-c
Fig. 7B-d
Fig. 7B-e