Bolo tine maintenance, A warning, A. checking tines for wear – Troy-Bilt 8 HP User Manual
Page 50: B. single tine replacement, C. removing and replacing tine holders, Removal steps
Attention! The text in this document has been recognized automatically. To view the original document, you can use the "Original mode".
Bolo Tine maintenance
A WARNING
To help avoid personal injury, stop
the engine, remove the electric
start key, disconnect the spark
plug wire, and let the engine and
muffler cool before inspecting, re
moving, or replacing the tines or
tine holders.
A. Checking tines for wear
To receive maximum tilling per
formance from your tiller, the Boio
Tines must be in good condition.
At every 30 operating hours you
should check the tines for damage
or excessive wear and replace
them if needed.
The tines are the “business end”
of the machine and will wear with
use. How quickly they wear de
pends a great deal on soil condi
tions. Sandy or stony soil, for
instance, will cause faster wear
than clay or loam soils.
As tines wear, they become
shorter, narrower and more pointed
(Photo 6-39). When badly worn,
the depth at which they till and the
amount of earth turned is greatly
reduced. Worn tines may dig only
3 to 5-inches deep, even though
you adjust the Depth Regulator
Lever to the maximum depth. In
comparison, new tines will dig a
full 6 to 8-inches deep. This loss of
tilling depth is a sure sign that your
tines need replacing.
Also, as tines wear shorter, they
will leave an increasingly wider gap
in the middle of the tilled row. This
wider gap makes for needless extra
work when you overlap your rows.
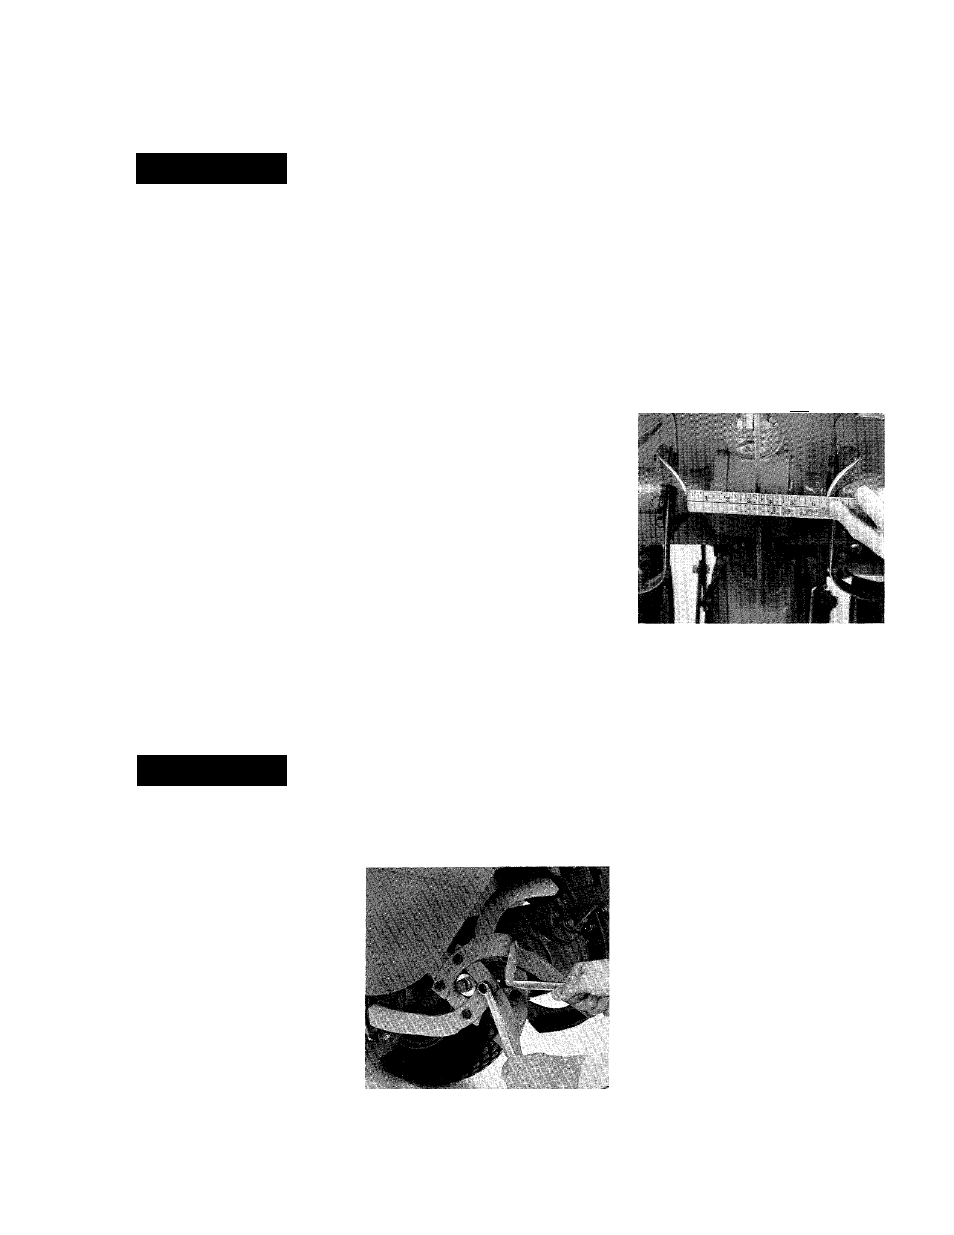
New tines will usually have just a
3-inch gap between the tips of the
innermost tines. It’s time to replace
your tines when this gap widens to
5-inches or more (Photo 6-40).
Tines can be replaced individu
ally or as a complete set (tine sets
come with easy-to-follow assembly
instructions). See your separate
Parts Catalog for tine replacement
ordering information.
6-39: Check for tine wear.
I’——
6-40: Replace tines when gap be
tween inner tines is 5-inches or more.
B. Single tine replacement
A WARNING
The tines or tine hood edges may
be sharp. Wear thick gloves to
protect your hands from cuts or
scrapes.
1. Place the Wheels/Tines/PTO
Drive Lever in “NEUTRAL”, the
Wheel Speed Lever in either “FAST”
or “SLOW”, and the Tines/PTO
Clutch Lever in “ENGAGE”.
2. Gently tilt the tiller forward until
the engine is resting on the ground.
3. Raise the hood flap and secure
it in place with a piece of string or
a rubber band.
4. Before removing a tine, carefully
note in which direction the bent tip
is pointing. The new tine must be
installed in the same direction.
5. Use two 9/16-inch wrenches to
remove the two bolts and hex nuts
that secure the tine to the tine
holder mounting plate (Photo 6-41).
If a nut is stubborn, squirt some
penetrating oil on it and allow the
oil to soak in.
6-41: Removing a single tine.
48
6. Install the new tine in the same
direction as the old one, making
sure that the sharp edge of the
tine will enter the soil first when
the tiller moves forward. Replace
the bolts and nuts and tighten
them securely.
C. Removing and replacing
tine holders
The 16 Bolo Tines are held in
place by tine holders that are
bolted to the left and right sides of
the tine shaft. The following steps
explain how to remove and replace
the tines and holders as complete
assemblies.
Removal Steps:
1. Follow steps 1-3 of the pre
vious “Single Tine Replacement”
instructions.