To operate the tiller, A warning, To begin tilling – Troy-Bilt 8 HP User Manual
Page 22
Attention! The text in this document has been recognized automatically. To view the original document, you can use the "Original mode".
To operate the tiller
Now that you are familiar with
the operation of your engine, foi-
low these steps for operating your
tiller. When first practicing with
your tiller, please leave the Tines/
PTO Clutch Lever in the “DISEN
GAGE” position and put the Wheel
Speed Lever in the “SLOW” wheel
speed position.
A
WARNING
To avoid personal injury, keep
hands, feet, legs and clothing away
from the revolving tines.
To begin tilling:
1. Start the engine by following
the previous engine starting in
structions. Be certain that the
Wheels/Tines/PTO Drive Lever is
in “NEUTRAL” before starting the
engine.
2. Test operation of Forward Inter
lock Safety System. See page 17.
3. Set the Depth Regulator Lever
to the desired digging depth and
increase the engine throttle speed
(when practicing with the tiller
leave the tines in the “TRAVEL”
position).
4. Move the Tines/PTO Clutch
Lever to the “ENGAGE” position
(when practicing with the tiller
leave the tines in the “DISEN-
■
GAGE” position).
5. For FORWARD MOTION of the
wheels and tines, squeeze and hold
one of the Forward Interlock Levers
(see Photo 3-7) against the handle
bar grip and then move the Wheels/
Tines/PTO Drive Lever down into
“FORWARD”.
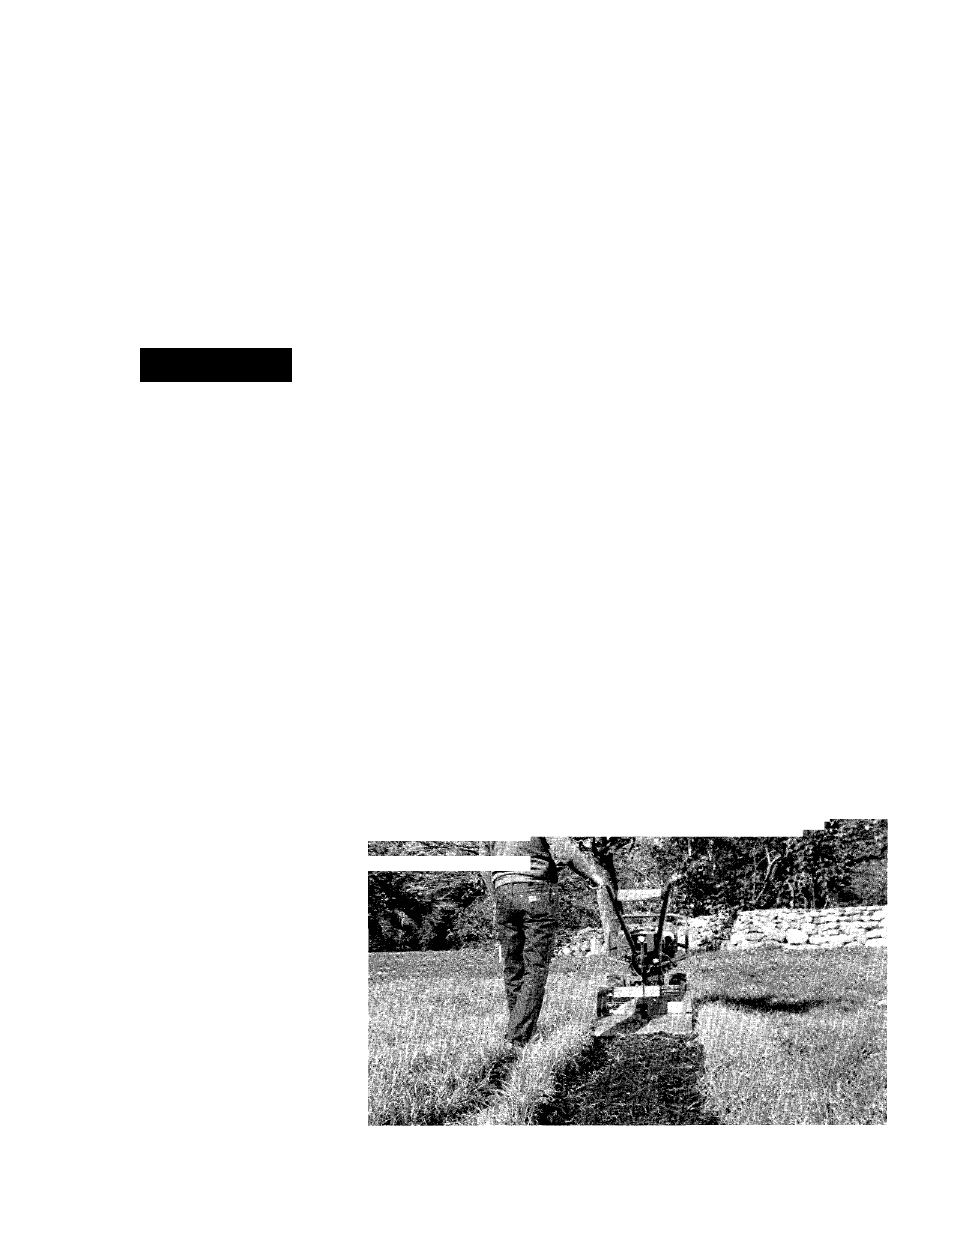
6. As the tiller moves forward, re
lax and let the wheels pull the tiller
along while the tines do the dig
ging. Walk behind and to one side
of the tiller (walk on the side that is
not yet tilled to avoid making foot
prints in the freshly tilled soil),
and lightly, but securely, grip the
handlebars with one hand. See
Photo 3-8.
Allow the machine to work at its
own pace. Pushing it forward in an
attempt to make it go faster will
only make the tiller harder to con
trol. Also, please do not push down
on the handlebars in an attempt to
force the tiller to dig deeper. Doing
so takes the weight off the wheels,
reduces traction, and causes the
tines to attempt to propel the tiller
instead of just digging. This can
cause the tiller to hop and skip
rapidly across the garden.
7. TO STOP FORWARD MOTION:
Tap or lift the Wheels/Tines/PTO
Drive Lever up to “NEUTRAL” and
then release BOTH Forward Inter
lock Levers.
8. TO STOP FORWARD MOTION
IN AN EMERGENCY: Let go of ALL
handlebar control levers (this will
shut off the engine).
9. For REVERSE MOTION:
(a) Do not till while in “REVERSE”.
(b) Put the Wheels/Tines/PTO
Drive Lever in “NEUTRAL” and
reduce the engine throttle
speed. Make sure the area be
hind you is clear.
Put the Wheel Speed Lever in
the “SLOW” position.
Put the Tines/PTO Clutch Lever
in “DISENGAGE”.
Lift the handlebars until the
tines clear the ground and then
lift and hold the Wheels/Tines/
PTO Drive Lever all the way up
(you do not need to squeeze a
Forward Interlock Lever while
in “REVERSE”).
(c)
(d)
(e)
V
if / :/
1-
1
.
£
'
" V /
■ ■ '' ■ ’'■ '***■
3-7: Squeeze one Forward Interlock
Lever before engaging Wheels/Tines/
PTO Drive Lever in “FORWARD”.
3-8: Guide tiller with one hand.
20