C. replacing the drive belt, A warning, To remove the belt – Troy-Bilt 8 HP User Manual
Page 45: To replace the drive belt
Attention! The text in this document has been recognized automatically. To view the original document, you can use the "Original mode".
MAINTENANCE AND SERVICE
C. Replacing the drive belt
A
WARNING
To help avoid personal injury, stop
the engine, remove the electric
start key, disconnect the spark
plug wire, and let the engine and
muffler cool before removing or
replacing the drive belt.
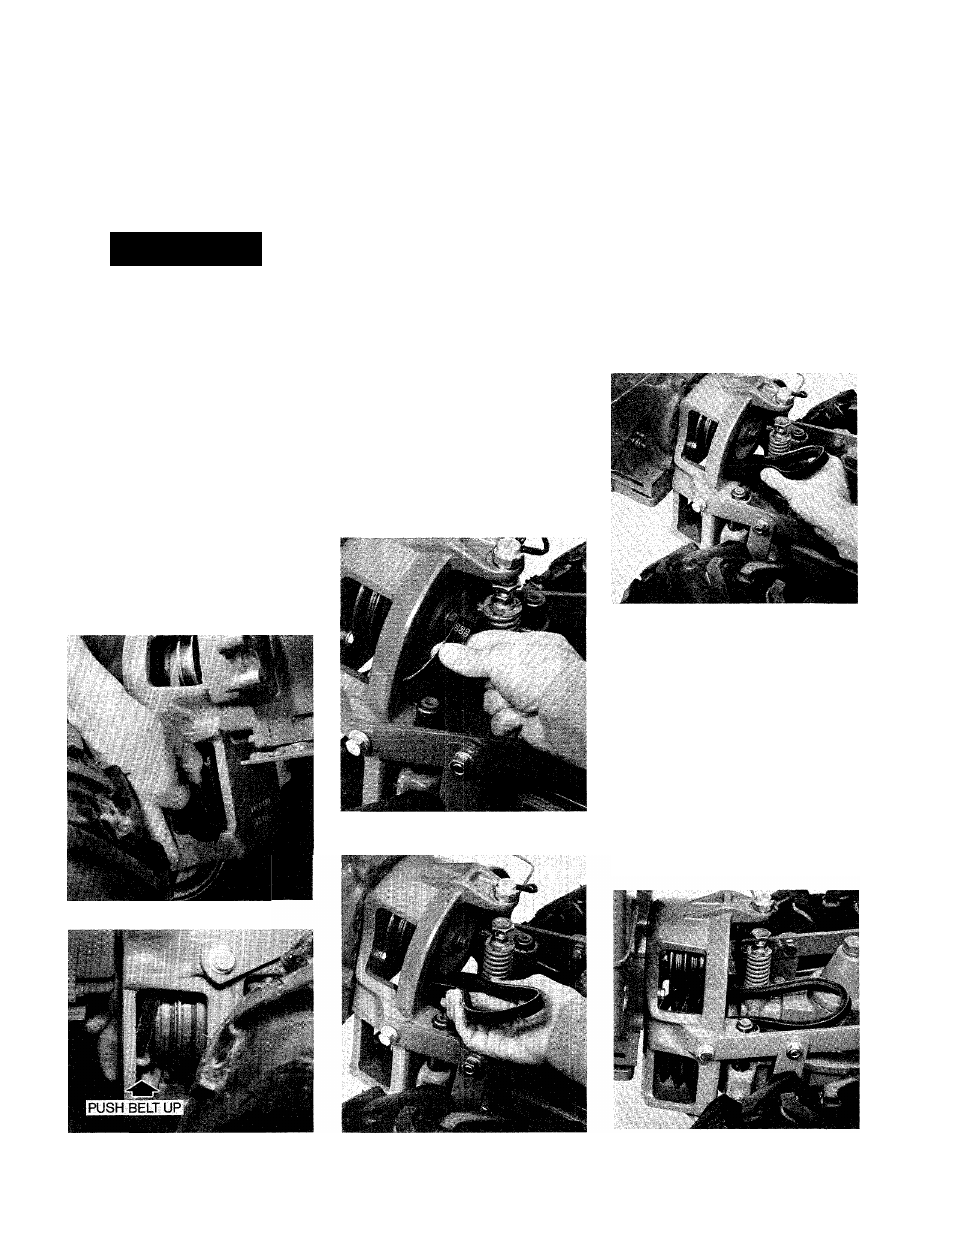
To remove the belt:
1. Place the Wheels/Tines/PTO
Drive Lever in “NEUTRAL”.
2. While kneeling on the right side
of the tiller, create slack in the belt
by reaching over to the left side of
the pulleys and pushing in on the
center of the belt with your finger.
3. Use your right hand to work the
belt down and away from the lower
pulley, in the direction of the en
gine (Photo 6-19).
4. As shown in Photo 6-20, push
the belt upward with your finger.
This will provide additional slack in
the belt.
5. Lift the top half of the belt up
and over the upper pulley and the
rubber reverse disc, moving it
down in front of the disc (Photo
6
-
21
).
6. Move the Wheels/Tines/PTO
Drive Lever down into the “FOR
WARD” position. This increases the
distance between the upper and
lower pulleys. Next lift and pull the
lower half of the belt out between
the pulleys (Photo 6-22).
6-21: Move top half of belt over pul
ley and disc.
To replace the drive belt:
1. Place the Wheels/Tines/PTO
Drive Lever in the “FORWARD”
pcsition.
2. Squeeze the belt in its middle
and insert one end in between the
pulleys (Photo 6-23).
6-23: Shift into “FORWARD” and
insert belt.
3. Push the belt forward until it is
almost ready to go down and over
the front of the lower pulley (Photo
6-24). Then work the belt down
and over the lower pulley, but do
not seat it in either of the pulley
grooves. It may be necessary to
use a blunt object (such as a wood
ruler), to help push the belt down
between the front of the pulley and
the sides of the cast iron engine
mount.
6-19: Move belt off lower pulley.
6-20: Push belt upward to create
slack.
6-22: Shift into “FORWARD” and re
move belt.
6-24: Move belt down and over lower
pulley.
43