To drain the tine attachment transmission, Drive belt, Maintenance – Troy-Bilt 8 HP User Manual
Page 43: A warning, A. checking drive belt tension, How to measure belt tension
Attention! The text in this document has been recognized automatically. To view the original document, you can use the "Original mode".
MAINTENANCE AND SERVICE
To drain the Tine Attachment
transmission:
1. The tine attachment trans
mission is not equipped with an oil
drain plug. To drain a small amount
of oil, remove the dipstick and tilt
the attachment forward (after first
uncoupling it from the Power Unit).
2. For complete draining, remove
the left side tine assembly (refer to
“Bolo Tine Maintenance” for in
structions) and then remove one of
the lower screws from the tiller
housing cover (Photo 6-12). To
speed up the draining time, re
move the dipstick to help vent
the transmission.
Drive belt
maintenance
6-12: Remove housing cover screw to
drain oil.
NOTE: There may be a disposable
plastic washer on the screw. If there
is, discard it after removing the
screw. There is no need to install a
replacement washer on the screw.
3. After all the gear oil has drained,
reinstall the housing cover screw
after first coating its threads with
non-hardening gasket sealant.
4. Be certain to refill the transmis
sion with gear oil before operating
the tiller again.
A
WARNING
To help avoid personal injury, stop
the engine, remove the electric
start key, disconnect the spark plug
wire, and let the engine and muf
fler cool before inspecting, ad
justing or replacing the drive belt.
A. Checking drive belt
tension
On a new tiller (or if a new belt is
installed), the tension on the drive
belt will probably need to be ad
justed after the first 2 hours of
operation due to initial belt wear
and seating of the belt with its pul
leys. Following the initial adjust
ment, the belt should be checked
after every 10 operating hours or
whenever it appears to be slipping
(reduced performance).
Maintaining the correct tension
on the belt is important to good
tilling performance and long belt
life. If the belt is too loose, it will
slip on the engine and transmis
sion pulleys and cause the tines
and wheels to slow down—or stop
completely—even though the en
gine is running with full power. At
the same time, a loose belt will
result in uneven wear and overheat
ing to its sidewalls. This will reduce
its driving capability and shorten
its life.
While checking the belt for
proper tension, also look for obvi
ous signs of wear such as cracks,
cuts, or fraying. If the belt is in
poor condition, it should be re
placed immediately (see “Replac
ing the Drive Beit”).
To help prolong the life of the
belt, you should:
(a) Always put the Wheels/Tines/
PTO Drive Lever in “NEUTRAL”
when the tiller is not being used.
(b) Keep the belt tension properly
adjusted.
(c) Avoid “speed shifting” between
“FORWARD” and “REVERSE”.
How to measure belt tension:
1. Before taking any measure
ments, make sure that the various
linkages and pivot points on the
Wheels/Tines/PTO Drive Lever are
clean and properly lubricated. If
there is any binding, you won’t
receive true measurements. Also,
you should have available the belt
adjustment tool that you received
with your new tiller (Figure 6-13).
BELT ADJUSTMENT TOOL
6-13: Use belt adjustment tool to
measure and adjust belt tension.
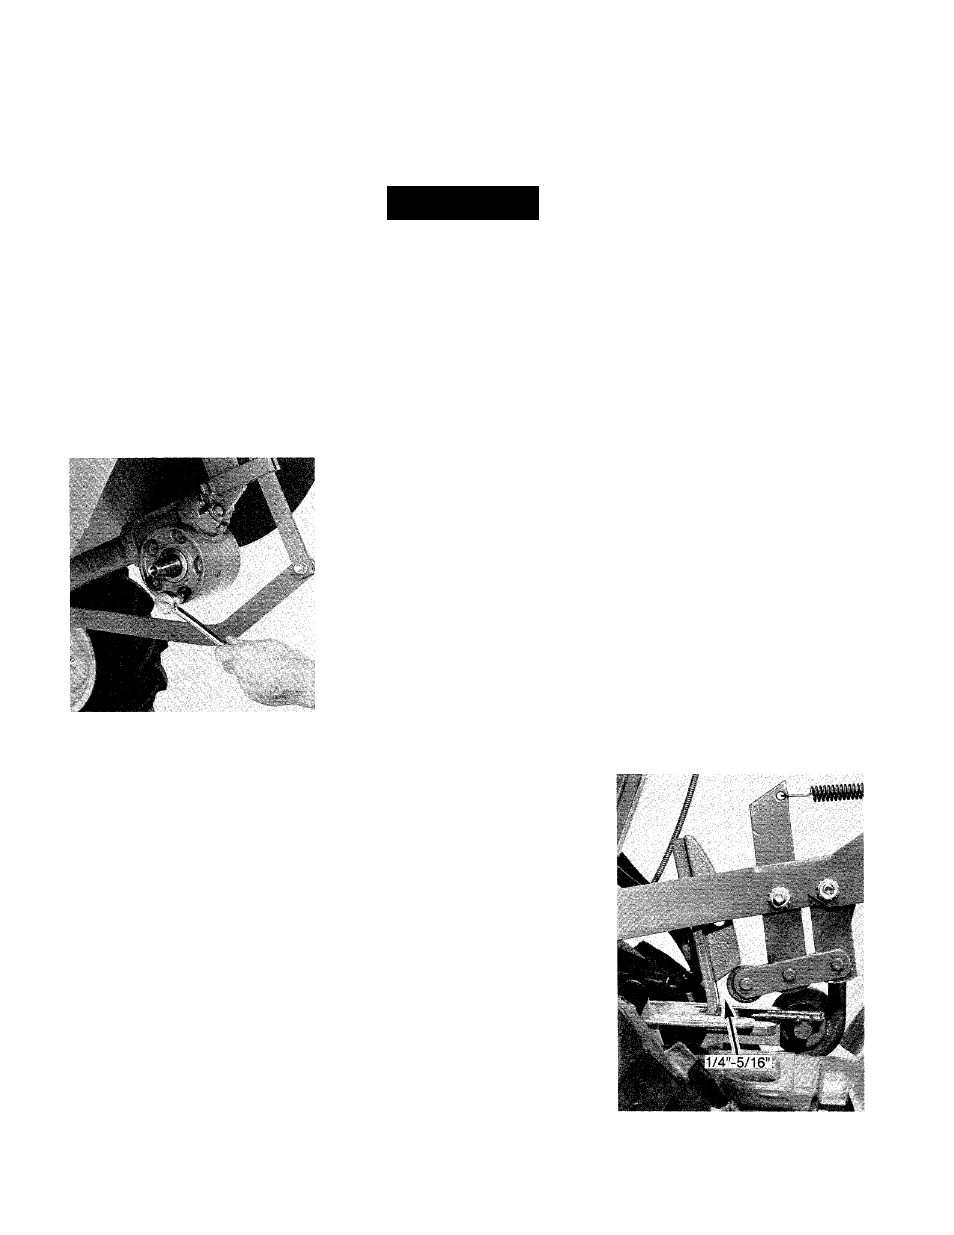
2. Move the Wheels/Tiries/PTO
Drive Lever all the way down to the
“FORWARD” position. The clutch
roller at the end of the lever should
be engaged beneath the belt ad
justment block (Photo 6-14). Be
careful not to let the clutch roller
move during the following steps. If
the roller moves, you will receive a
false reading of the belt’s tension.
6-14: Shift into “FORWARD” and
measure distance between roller and
upright bracket.
41