7 shear bolt replacement, 8 runners, 9 discharge chute removal – Ariens 932 Series User Manual
Page 40: Shear bolt replacement -7, Runners -7, Discharge chute removai -7, Auger/impeller - discharge chute
Attention! The text in this document has been recognized automatically. To view the original document, you can use the "Original mode".
Auger/Impeller - Discharge Chute
6.7 Shear Bolt Replacement
IMPORTANT: Use only Ariens Shear Bolts for
replacement. Use of any other type of shear
bolt may result In severe damage to unit.
Occasionally an object may enter auger/
impeller housing and jam auger, breaking
shear bolts which secure auger to shaft. This
allows auger to turn freely on shaft, preventing
damage to gear drive.
To replace shear bolt, slide auger outward and
align hole in shaft with hole in auger (holes in
shaft for shear bolts line up). Drive new shear
bolt through hole (if old shear bolt was broken,
this will drive remaining part from shaft), and
secure with nut.
6.8 Runners
A
CAUTION: Adjust auger/impeller hous
ing height to clear gravel or crushed
rock surfaces.
Runners should be adjusted as conditions re
quire. Raising or lowering runners controls
distance scraper blade is held above surface
being cleared. When operating machine on
gravel surface, lower runners so that housing
will not pick up gravel. On concrete, blacktop,
or packed down snow surfaces, raise runners
so scraper blade scrapes clean. To reduce
tendency of housing to ride up over heavy, wet,
or hard-packed snow, remove runners and in
stall with narrow edge down.
1. Runner
2. Adjusting Hardware
3. Auger Housing
Figure 6-7: Runners
Position Sno-Thro on a flat, level surface. Ad
just runners by inserting a spacer of desired
thickness under center of scraper blade,
loosen hardware, slide runners to flat surface
and tighten hardware.
Note: Above method keeps housing level by ad
justing runners equally. Uneven runners make
machine difficult to steer and result in uneven
clearing.
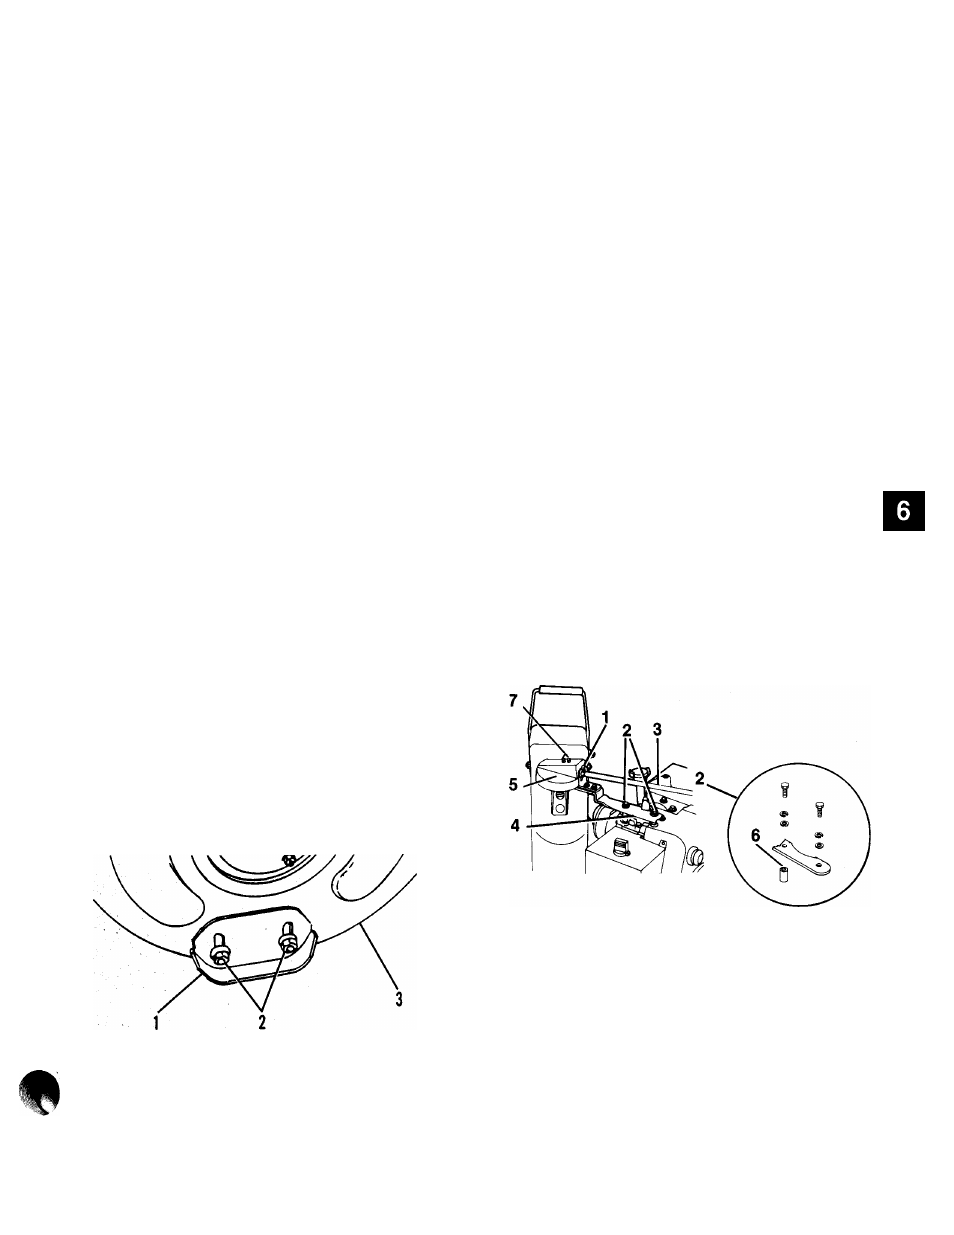
6.9 Discharge Chute Removal
On models with discharge chute crank rod
going through handlebar panel, remove hair
pin from discharge chute crank rod and slide
rod out through handlebar panel. Remove hard
ware attaching bracket to engine/motor and lift
discharge chute off auger/impeller housing.
Remove gear cover by removing two taptites
on cover.
Remove flat gear by removing nut securing car
riage bolt to center of flat gear.
Remove pinion gear by removing push nut that
secures pinion gear to gear bracket and slide
pinion gear out of gear bracket.
1. Hair Pin
2. Mounting Hardware
3. Discharge Chute Crank Rod
4. Brace
5. Gear Cover
6. Spacer
7. Taptites
Figure 6-8: Discharge Chute (Models with
crank through handlebar panel)
6-7