2 attachment clutch, 3 attachment clutch adjustment, 2 attachment clutch -6 – Ariens 932 Series User Manual
Page 12: 3 attachment clutch adjustment -6, Handlebars and clutch controls
Attention! The text in this document has been recognized automatically. To view the original document, you can use the "Original mode".
Handlebars and Clutch Controls
2.1 Introduction
A
WARNING: Remove wire from spark
plug before attempting any repair or
adjustment procedures.
When unit is tipped to perform service pro
cedures in this section, remove enough fuei so
that no spiilage wiil occur, block securely, and
remove bottom cover.
A
WARNING: Gasoline is highly flam
mable and its vapors are explosive.
Handle with care.
2.2 Attachment Clutch
On models with spring and chain, remove push
nuts, screws and pin holding clutch handle and
handle pivot to upper handlebar. Remove pivot
and disconnect clutch handle from chain and
connector.
Disconnect chain and clutch spring from lever.
Check parts for wear or replacement.
Assemble using reverse procedure and adjust
according to instructions in Attachment
Clutch Adjustment Section.
On models with adjustment strap, remove
push nuts and pin holding clutch lever to
handlebar. Remove lever and disconnect
clutch cable from adjustment strap.
Disconnect adjustment strap and clutch
spring from attachment clutch arm.
On models with bails, remove bail from
handlebar by removing push nuts.
Check parts for wear or replacement.
Assemble using reverse procedure and adjust
according to instructions in Attachment
Clutch Adjustment Section.
2.3 Attachment Clutch Adjustment
On models with spring and chain, adjust by
connecting spring to a chain link so chain is
snug, but so that attachment idler drops away
from attachment belt with Clutch Handle all
the way away from handlebar.
On models with adjustment strap, select and
mark a hold in adjustment strap that will pro
vide a slight amount of slack in cable with At
tachment Clutch all the way away from
handlebar. Unhook spring, place cable end
through hole selected above and while lifting
up on attachment clutch arm, connect spring.
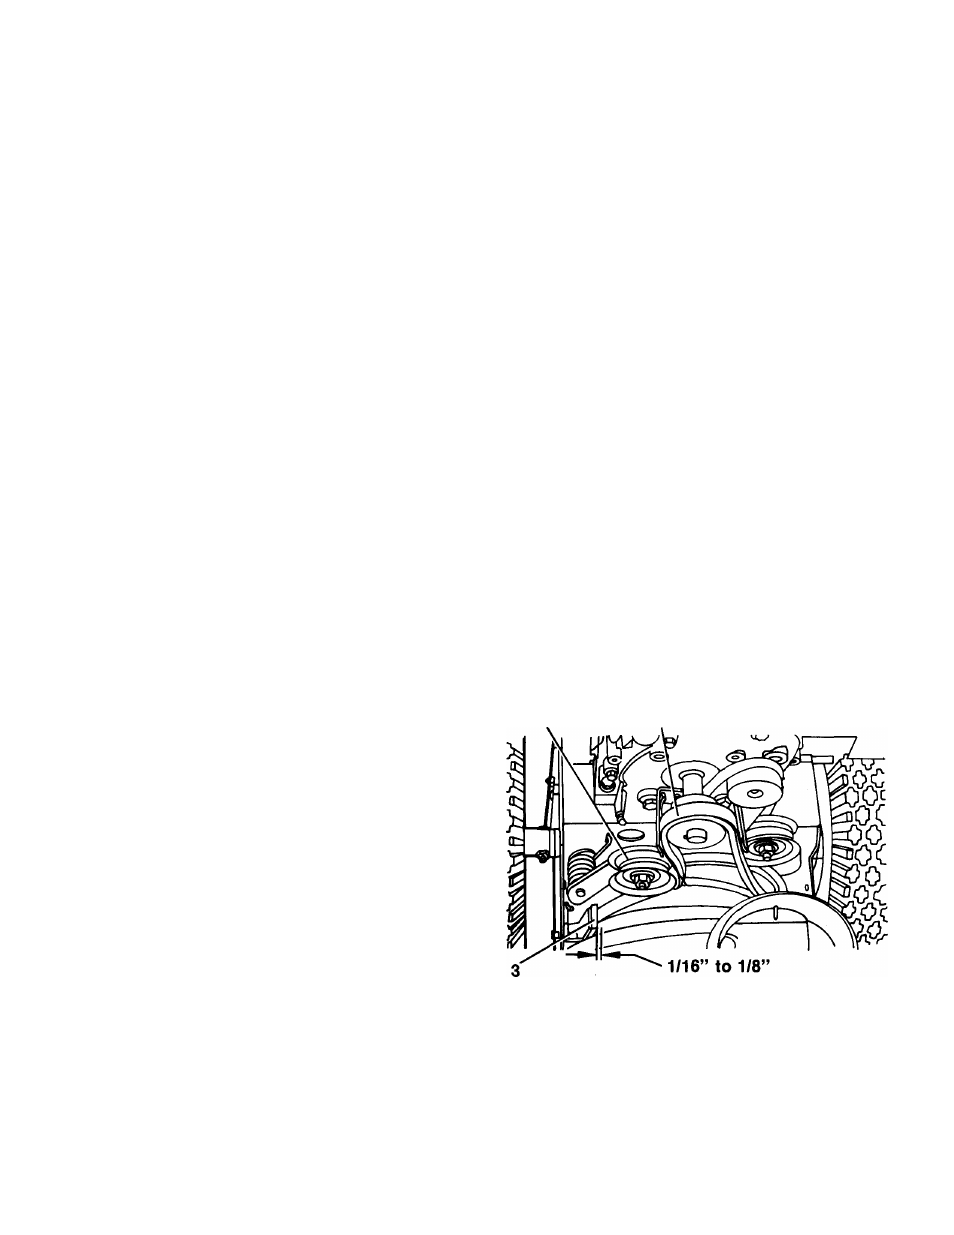
A
WARNING: When clutch is engaged,
impeller brake disengages. If brake is
not 1/16” to 1/8” from belt when
disengaged,
refer
to
Attachment
Clutch/Impeller Brake Section.
i
1. Attachment Belt Idler
2. Attactment Drive Belt
3. Brake Shoe
Figure 2-4: Attachment Clutch Adjustment
2-6