Sears 113.298141 User Manual
Page 9
Attention! The text in this document has been recognized automatically. To view the original document, you can use the "Original mode".
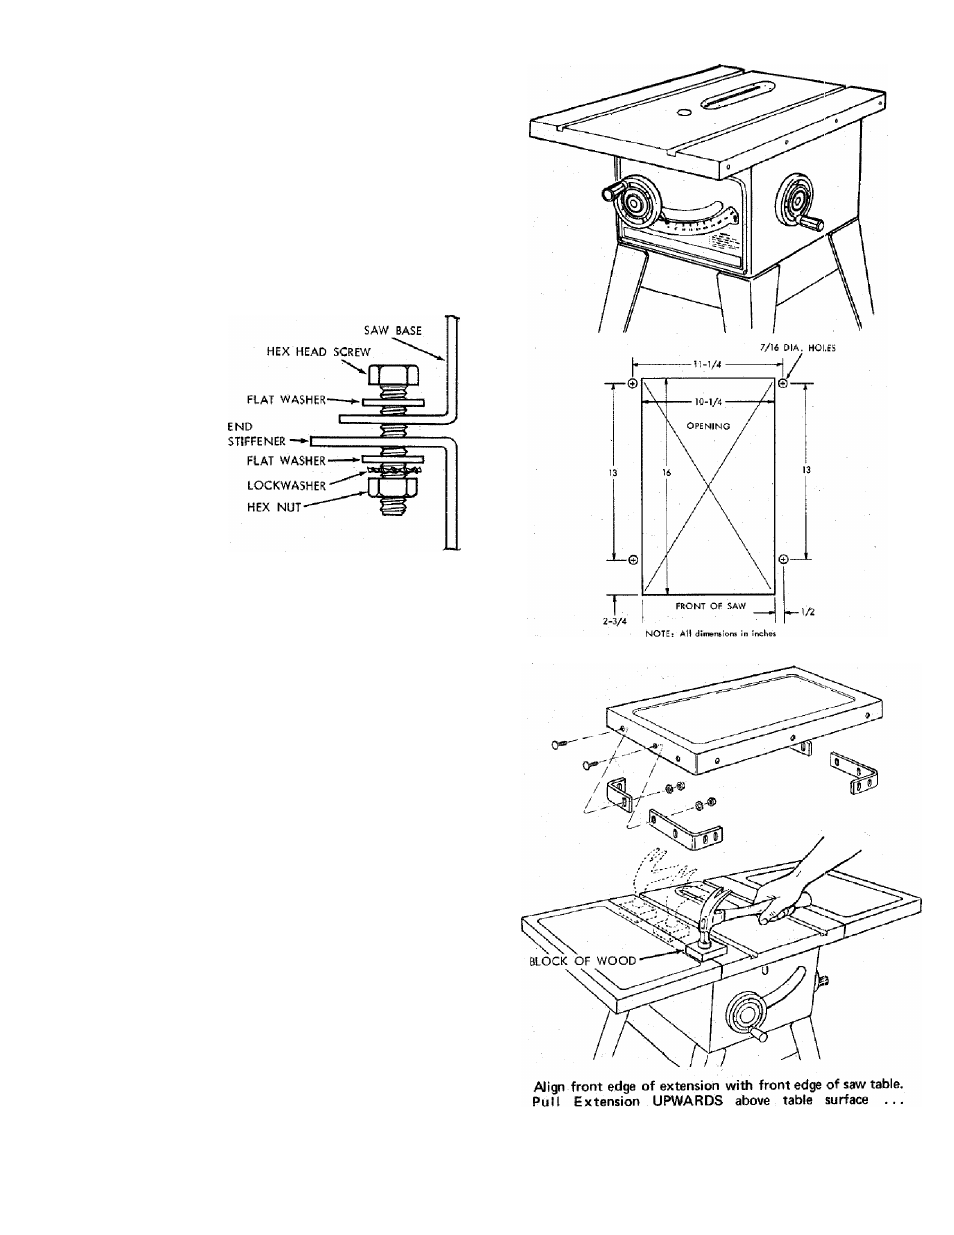
MOUNTING SAW
1. From among rtie loose parts, find the following
hardware:
4 Hex Head Screws, 5/16 - 18 x 1-1/4 in. long.
4 Hex Nuts, 5/16 -18 {approx, dia. of hole 5/16 in.)
4 Lockwashers, 5/16 in. External Type (approx, dia. of
hole, 5/16 in.)
8 Flat Washers, (dia. of hole 11/32 in.)
Z Place saw on legs so that holes in bottom of saw line up
with holes in top of legs.
3. install screws, washers, lockwashers and nuts as shown.
If you mount the saw on any other bench, make sure that
there is an opening in thejtop of the bench the same size as
the opening in the bottom of the saw so that the sawdust
can drop through. Recommended working height is 33 to
37 inches from the top of the saw table to the floor.
ATTACHING AND ASSEMBLING TABLE EXTENSIONS
If you received Table Extensions with your saw (two
furnished with Model No. 113.298031) or one furnished
with Model No. 113.298151) attach them at this time.
If you have only one Table Extension, it may be attached
to either side.
NOTE: When the Table Extension is attached to the left
side, it offers more support to the workpiece, especially
when crosscutting or mitering long boards. When attached
to the right side, it offers more support when cutting wide
panels.
If you attach the Extension to the left side, be sure to
construct the Auxiliary Fence/Work Support and Push
Block shown in "Basic Saw Operation" section.
1.
From among the loose parts find the following
hardware. NOTE: Double number of hardware If
assembling extensions for Model 113.298031.
2
Corner Support Brackets
2 Corner Stiffener Brackets
8 Truss Hd. Screws 1 /4-20 x 1
8
Ext. Lockwashers 1/4
8
Hex Nut 1/4-20
4
Hex Hd. Screws 5/16-18 x 1-1/4
4
Ext. Lockwasher 5/16
4
Hex Nut 5/16-18
Assemble brackets with hardware as listed.
Insert 5/16-18 X 1-1/4 in. long screws through holes in
EXTENSION
then
through
table.
Install
flat
washer,
lockwashers, and screw
on
the nuts . . . DO NOT
TIGHTEN.
SLIGHTLY TIGHTEN SCREWS using 1/2 in. wrench.
Using small block of hardwood and hammer, tap extension
DOWNWARDS at front, center & rear, until it is EVEN
with table surface .. . TIGHTEN SCREWS.