Sears 113.298141 User Manual
Page 27
Attention! The text in this document has been recognized automatically. To view the original document, you can use the "Original mode".
When "WIDTH OF RIP" is 2 in.
PUSH STICK to feed the work.
to 6 in. wide USE THE
When WIDTH OF RIP is N A R R O W E R than 2 in., the push
stick CANNOT be used because the guard will interfere ., .
USE
the
A U X I L I A R Y
FENCE/WORK
SUPPORT
and
PUSH BLOCK.
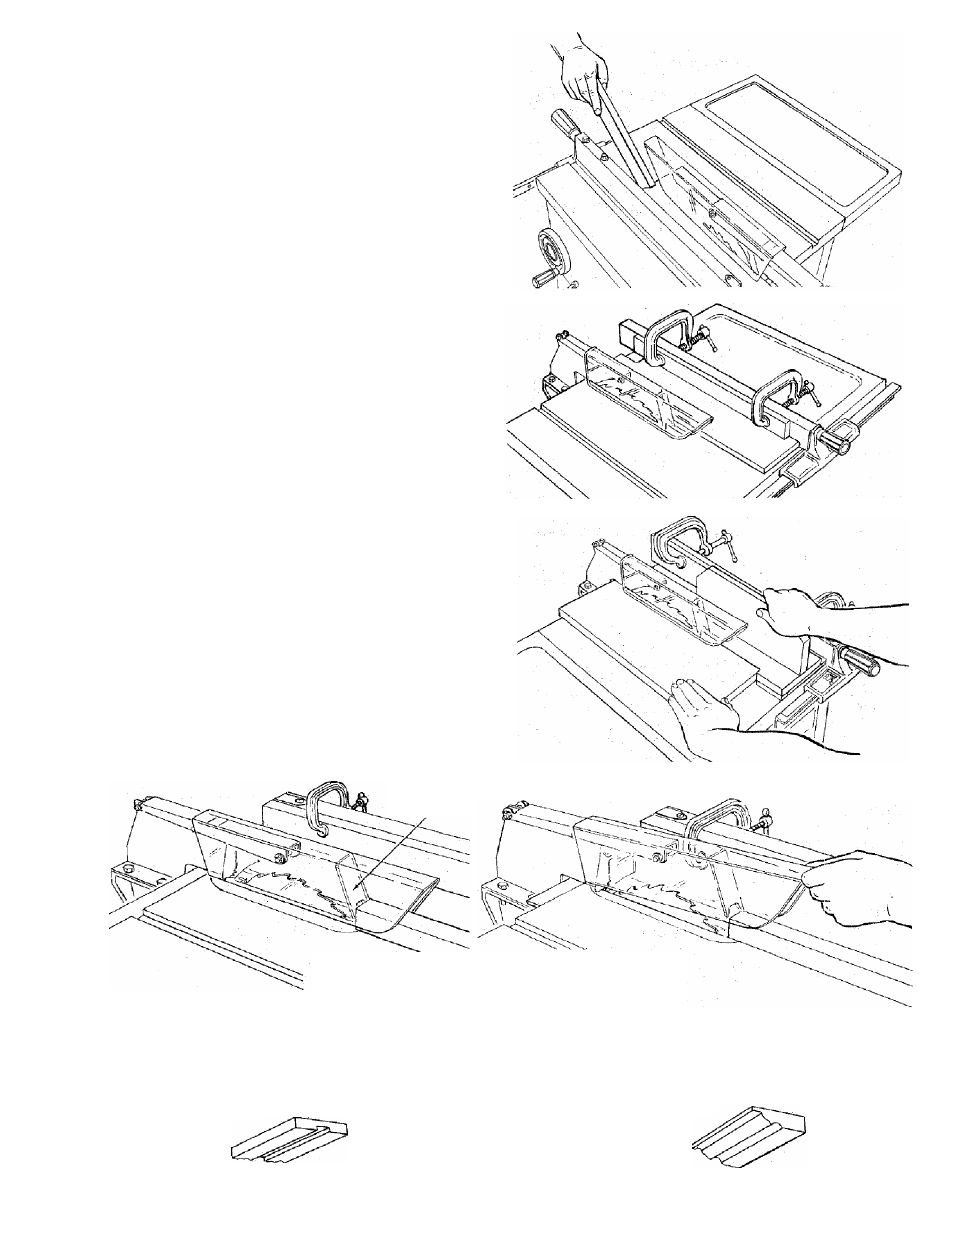
Attach Auxiliary Fence/Work Support to rip fence with
two "C" clannps.
Feed the workpiece by hand along the A U X I L I A R Y
FENCE until the end is approx. 1 in. past the front edge of
the table. Continue to feed using the PUSH BLOCK.
Hold the workpiece in position and install the PUSH
B L O C K b y sliding it on top of the A U X I L I A R Y
FENCE/WORK SUPPORT (This May Raise Guard).
BAFFLE
Narrow strips thicker than the Auxiliary Fence/Work
Support may enter the guard and strike the baffle.
CAREFULLY raise guard only enough to clear the
workpiece. Use PUSH BLOCK to complete cut.
PLOUGHING AND MOLDING
PLOUGHING is grooving with the grain the long way of the
workpiece, using the fence. USE proper holddowns and
feed devices.
MOLDING is shaping the workpiece with the grain the long
way of the workpiece, using the fence. Use proper
holddowns and feed devices.
27