Sears 113.298141 User Manual
Page 15
Attention! The text in this document has been recognized automatically. To view the original document, you can use the "Original mode".
9.
Raise blade all the way up . .. make Sure it is square
with table.
10. Raise Blade Guard ... lift up both ANTIKICKBACK
PAWLS ... insert one of the SETSCREW WRENCHES
in the notches to hold the pawls out of the way.
11. Lay blade of square or other straightedge alongside of
blade.
12. Loosen Hex Head Screw in GUARD SUPPORT and
move spreader so that it touches blade of square
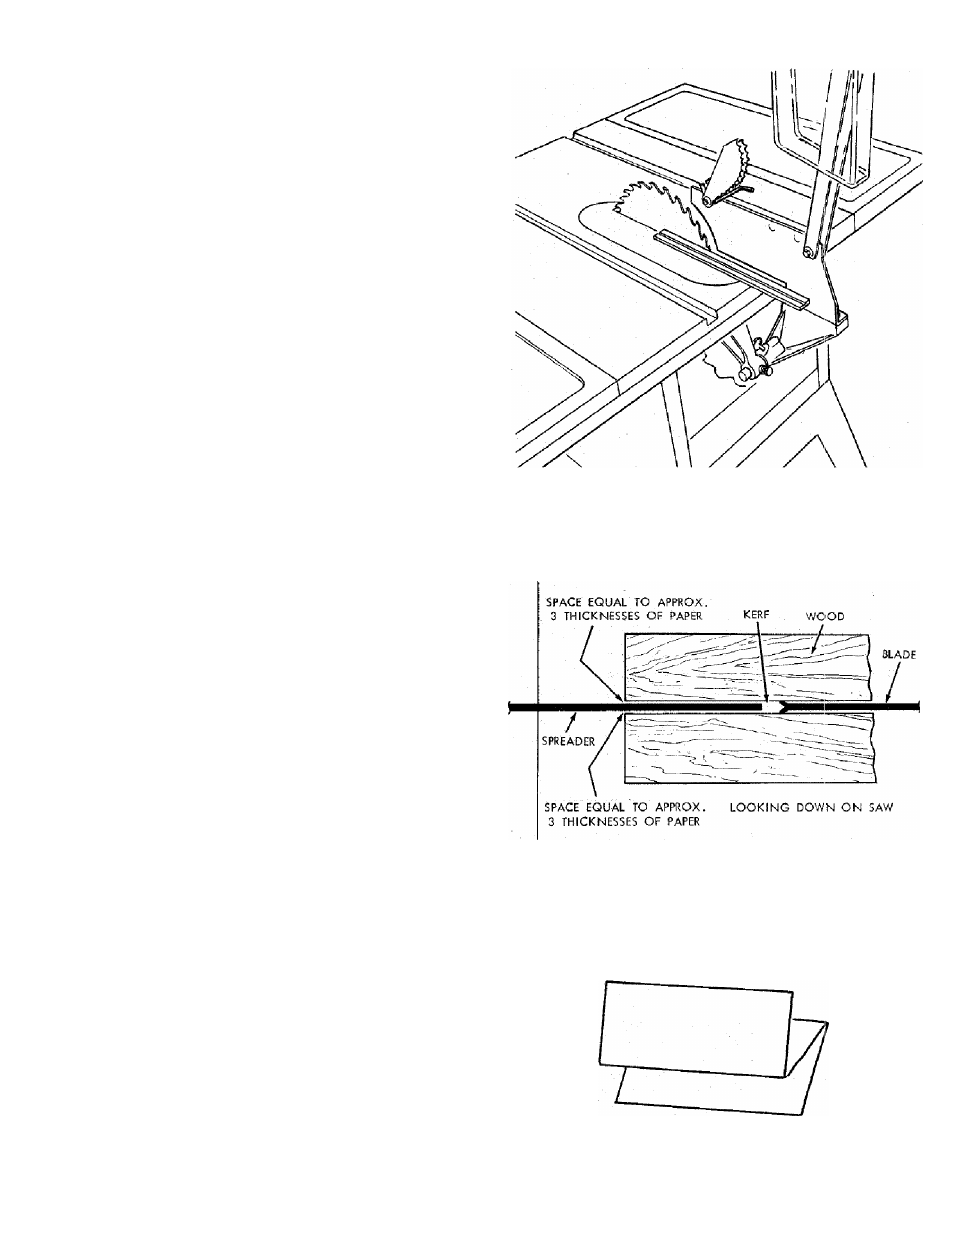
.. . tighten screw.
13. NOTE: The spreader is now square with the table and
approximately in line with the sawblade. The spreader
requires further adjustment to align it PARALLEL to
the blade and in the MIDDLE of the cut (KERF) made
by the sawblade.
14.
IMPORTANT:
The
SPREADER
must
always
be
PARALLEL to the sawblade and in the MIDDLE of the
cut (KERF) made by the sawblade.
NOTE: The spreader is thinner than the width of the
KERF by approximately six thicknesses of paper.
15. Make two folds in a small piece ( 6 x 6 in.) of ordinary
NEWSPAPER making three thicknesses.
The folded paper will be used as a "spacing gauge".
15