Sears 113.298141 User Manual
Page 30
Attention! The text in this document has been recognized automatically. To view the original document, you can use the "Original mode".
6.
If tooth does not touch the same amount ... the:
mechanism underneath must be adjusted to make the
blade PARALLEL to GROOVE.
_
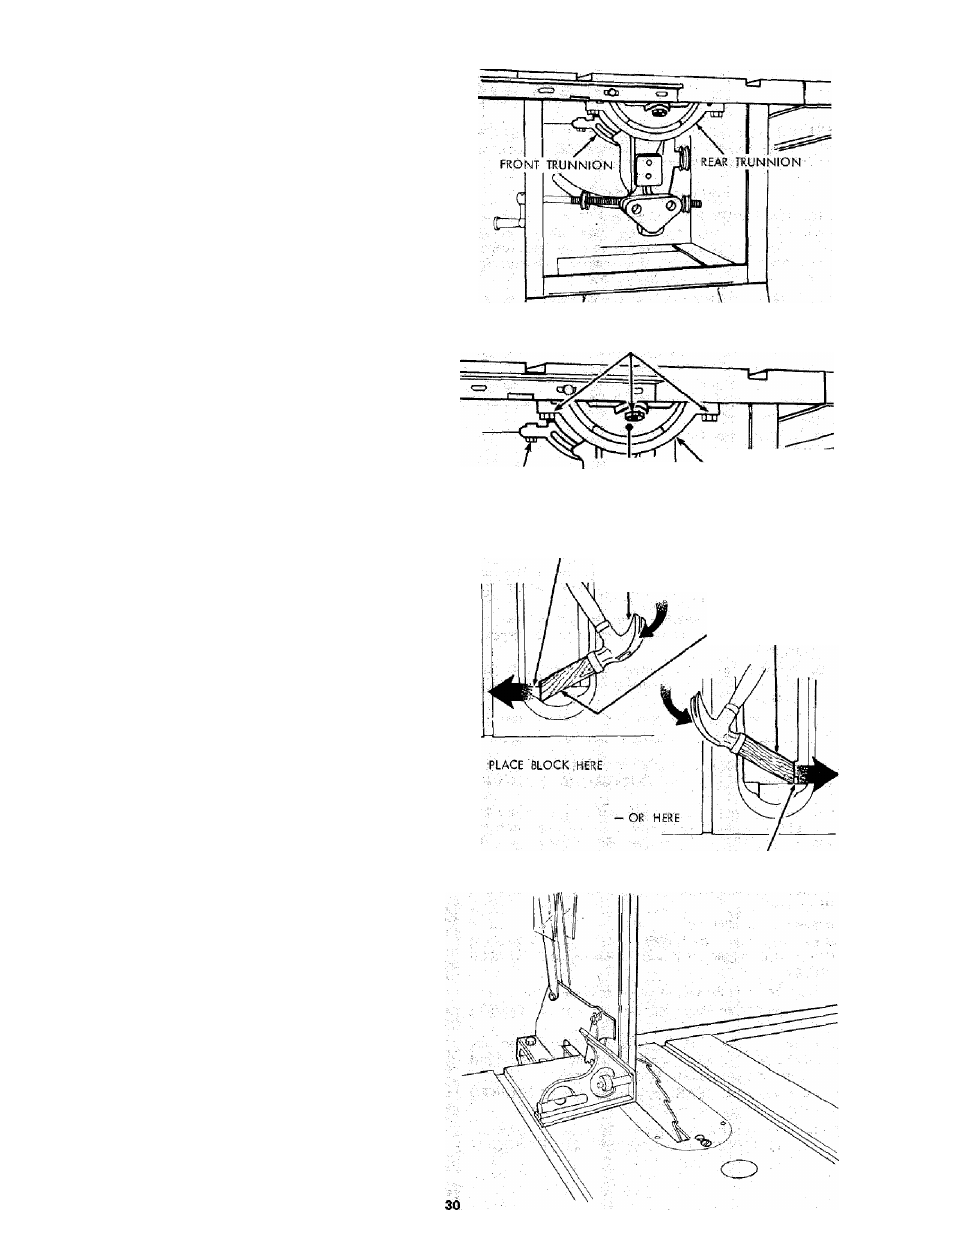
A.
Rear trunnion must be moved TOWARD the
combination square if there is a space between
; marked tooth and end of square in step 4.
B.
Rear trunnion rnust be moved A W A Y from the
square if marked tooth pushes square out of
position in the groove.
7. Loosen all three screws that hold the rear trunnion and
all three screws that hold the front trunnion.
NOTE: All six screws can be rjSached through back of saw.
Use a 9/16-in. wrench. To reach left-hand front trunnion
screw, tilt blade to 45°. After loosening screws reposition
blade at 90°. i
REAR-TRUNNION
SCREWS
P I '
left
-
hand
’
RIGHT-HAND <
: (BEI^ND HERE)
FRONT-TRUNNION SCREWS
8.
Using a wood block and mallet as shown, move rear
trunnion to right or left as required to realign the blade.
If necessary, shift front trunnion in similar manner; but
do NOT move front trunnion unless necessary. Recheck
the ajignrnent with the square, then securely retighten
all six trunnion screws.
EDGE OF
trunnion
-
f-CLAW HAMMER
WOOD BLOCK
REAR OF SAW
EDGE
OF
CRADLE .
BLADE TILT, OR SaUARENESS
OF BLADE TO TABLE
90° (SQUARE) and 45° (BEVEL) STOP COLLARS
When the bevel pointer is polnting directly to the "O" mark
on the bevel scale, the sawblade .should make a SQUARE
cut 90° to the table.
To check for SQUARENESS:
.
-
WARNING: FOR YOUR OWN SAFETY, TURN SWITCH
"OFF" AND REMOVE PLUG FROM POWER SOURCE
OUTLET.
1. Raise blade all the way UR . . . raise blade guard.
2.
Place the square against blade. Make sure square is not
touching the TIP of one of the saw TEETH.