Figure 5 – Tuffy Security 274 User Manual
Page 8
Page 8 of 10 - 3/14/2011 – Rev10/15/2012
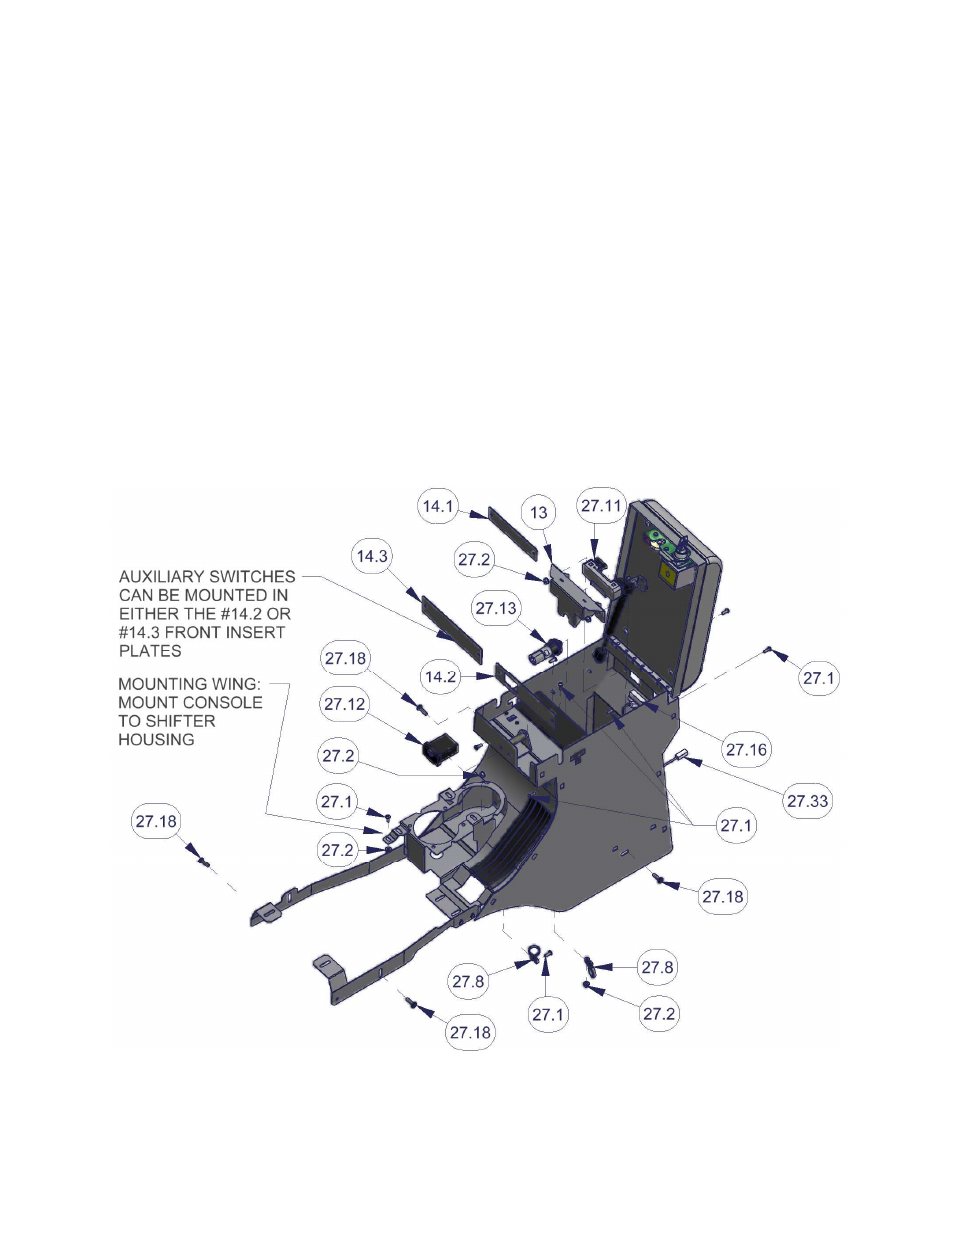
52. Remove any item propping the rear of the console up and start the (2) original OEM mounting torx screws through the
holes in the sides and at the rear of the Tuffy console (Illustrated #27.18 – Fig 5). Do not tighten them all the way.
(See Fig 5)
53. Align the mounting wing on the front of the console with the retainer clip slot in the shifter housing. Install (1) #10-32
X ½” Phillips screw (#27.1) and (1) #10-32 hexwasher nut (#27.2). Do not tighten the hardware at this time.
(Illustrated in Fig 5)
54. If the vehicle is not equipped with the electric rear window switches (#27.11 – Fig 5) then install the 14.1 Rear Window
Switch Blank Cover. Install with (2) #10-32 X ½” Phillips screw (#27.1) and (2) #10-32 hexwasher nut (#27.2).
Tighten. (Fig 5)
55. If the vehicle is equipped with the electric rear window switches (#27.11 – Fig 5) install them in the Tuffy console
using the provided #13 Rear Window Switch cover. Make sure the tabs on the top and bottom of the switches are
inserted in the corresponding slots in the Switch cover. The bottom retainer wings on the #13 Switch cover can be
gently bent open to allow the switches to drop in, then gently bend the wings back to securely hold the switches from
moving within the Switch cover. Plug in the switches to the window switch wire harness inside the console
compartment. Install the switches with #13 Switch cover into the rear of the console and fasten with (2) #10-32 X ½”
Phillips screws (#27.1) and (2) #10-32 hexwasher nuts (#27.2). Test the switches to make sure they work correctly.
(Fig 5)
FIGURE 5
56. Make sure the 4wd transfer case shifter is in neutral or 4HI, the transmission can be in park, and the emergency brake
is activated (pulled up). Be sure vehicle will not roll.