Attention – Tuffy Security 274 User Manual
Page 2
Page 2 of 10 - 3/14/2011 – Rev10/15/2012
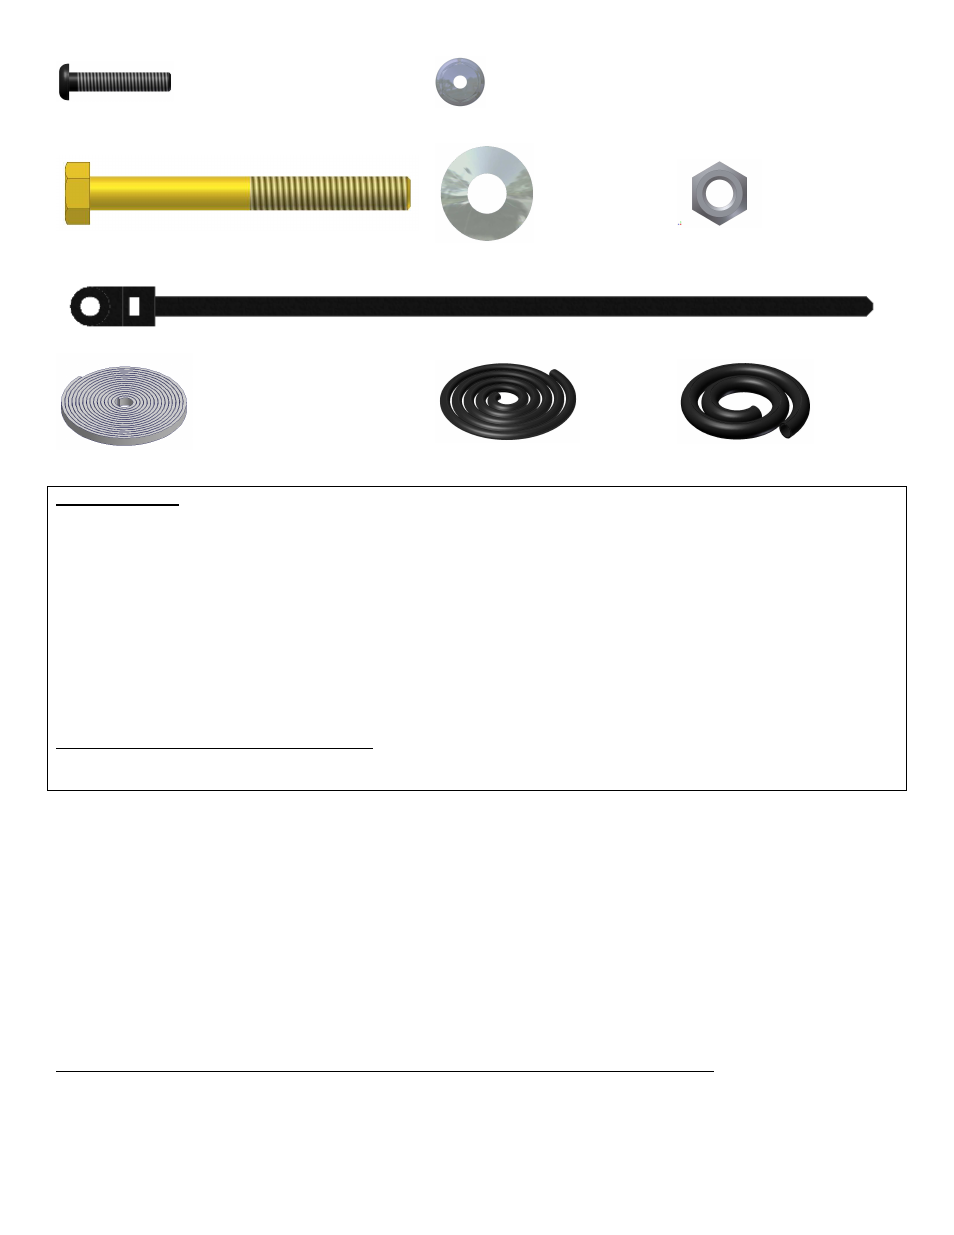
#27.3 – (2) #6-32 X 3/4” ALLEN HEAD SCREW
#27.4 – (2) #6-32 NYLOCK
NUTS
#27.5 - (2) 5/16-18 x 3” BOLT
#27.6 - (4) 5/16” WASHERS
#27.7 - (2) 5/16-18 NYLOCK
NUTS
#27.8 – (2) MOUNTING HEAD ZIP TIES
RUBBER SEAL
RUBBER EDGE TRIM
ELECTRICAL WIRE LOOM
TOOLS NEEDED
•
18MM Socket and ratchet (To remove seats)
•
T-30 Torx bit or driver (To remove OEM console)
•
Flat Head Screwdriver (If OEM console has electric window switches in the rear)
•
#2 Phillips head screw driver (Short and Long)
•
3/8” Socket and socket wrench and/or open end wrench
•
11/32” Socket and socket wrench and/or wrench
•
3/32” Allen head wrench or bit driver
•
Pliers
•
Wire cutters (Optional)
•
Plastic Trim removal tool (Optional)
Tools for optional additional mounting security
•
½” Socket and ratchet
•
½” Open end wrench
ATTENTION:
•
THIS CONSOLE WAS DESIGNED FOR A STOCK OEM VEHICLE, ANY MODIFICATIONS
MADE MAY AFFECT THE FIT INCLUDING: CARPET REMOVAL/CHANGES, LIFT KITS,
SEATS, ETC.
•
FREQUENT LUBRICATION IS NECESSARY ON THE LOCKING SYSTEM -
The pushbutton lock
contains an “O” ring seal to protect the interior from dust and water. If this mechanism is not lubricated regularly it will
become difficult to operate and it may not return to its home position preventing the key from operating the lock. If this
happens simply pull up on the pushbutton to manually bring it back to its home position. Lubricate the pushbutton
with a light lubricant such as silicone spray. The pushbutton may have to be periodically disassembled and cleaned.
PLEASE READ ALL INSTRUCTIONS THOROUGHLY BEFORE STARTING INSTALLATION.
1. IMPORTANT! Make sure the vehicle is parked on a flat surface and place stops behind the wheels to prevent it from
rolling. During the installation the vehicle will need to have the emergency brake deactivated, and the 4wd transfer
case, Automatic, and manual transmission placed in neutral.