Figure 6 – Tuffy Security 240 User Manual
Page 9
Page 9 of 10 - 122006 – Rev 070811
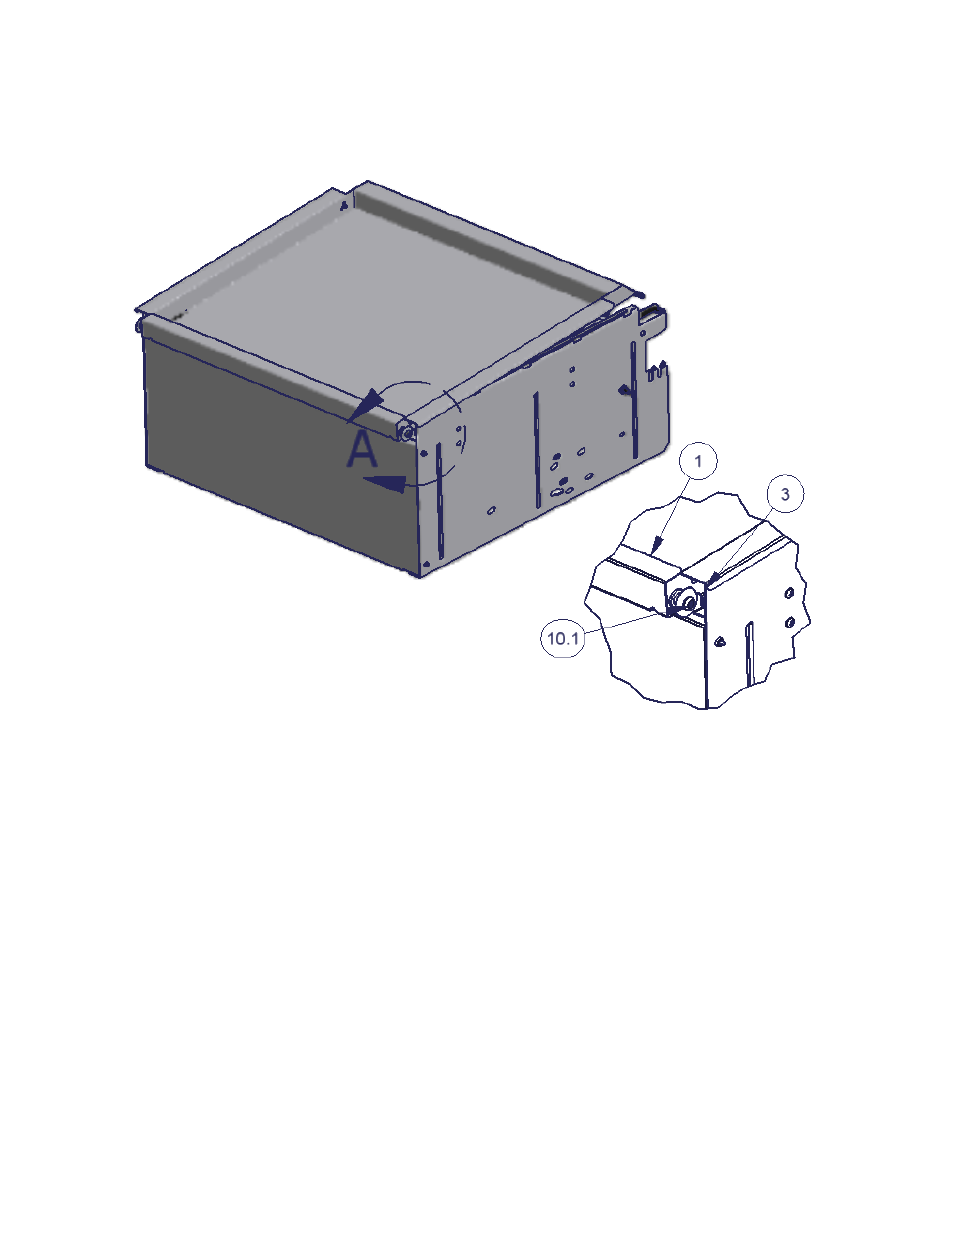
39. Install the lid #1 by placing it on the enclosure assembly so the welded studs with bolts #10.1 are overlapping the
enclosure toward the front of the vehicle. The end of the lid #1 with the Tuffy logo should face the rear of the vehicle.
Then pull the lid assembly toward the rear of the vehicle till it stops while guiding the welded studs into the slots on the
side panels #3 and #4. (See Figure 6)
Figure 6
See also other documents in the category Tuffy Security For the car:
- 082 (2 pages)
- 089 Manual (3 pages)
- 089 Installation Manual (1 page)
- 101 (2 pages)
- 073 (3 pages)
- 198 (2 pages)
- 189 (1 page)
- 292 (2 pages)
- 282-BTL (1 page)
- 137 (2 pages)
- 295 (3 pages)
- 862 (2 pages)
- 863 (3 pages)
- 311 (2 pages)
- 312 (2 pages)
- 046 (3 pages)
- 145 (4 pages)
- 131 (2 pages)
- 297 (3 pages)
- 296 (3 pages)
- 238 (2 pages)
- 058 (3 pages)
- 219 (2 pages)
- 195 (2 pages)
- 144 (2 pages)
- 274 (10 pages)
- 139 (3 pages)
- 157 (10 pages)
- 052 (2 pages)
- 164 (1 page)
- 104 (1 page)
- 043 (1 page)
- 027 (2 pages)
- 035 (2 pages)
- 108 (2 pages)
- 149 (2 pages)
- 049 (2 pages)
- 036 (2 pages)
- 160 (3 pages)
- 289 (2 pages)
- 287 (3 pages)
- 283 (3 pages)
- 309 (2 pages)
- 182 (2 pages)