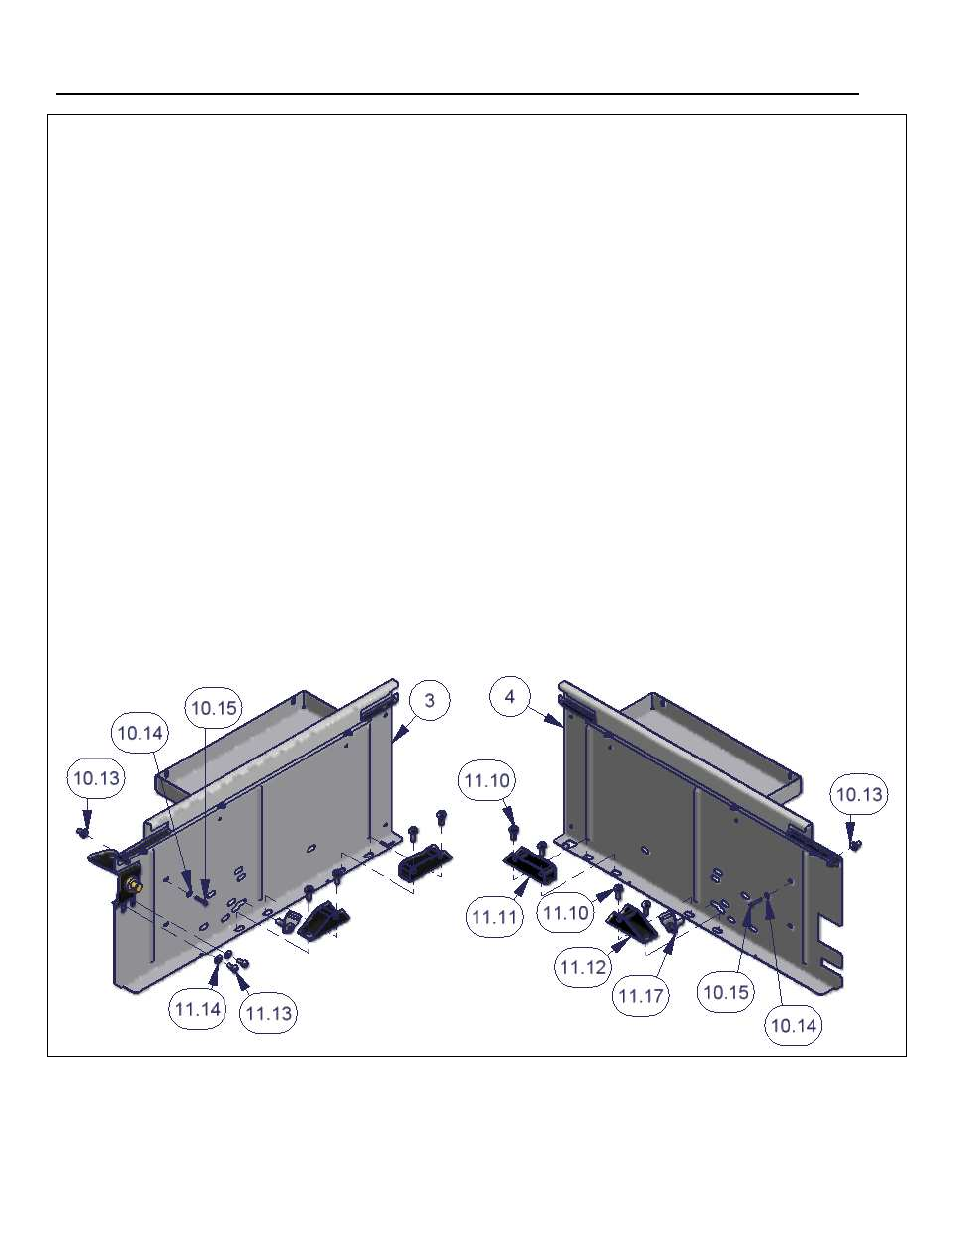
Figure 4a – Tuffy Security 240 User Manual
Page 5
Page 5 of 10 - 122006 – Rev 070811
Follow the specific instructions below for the vehicle where the enclosure will be mounted
Jeep Wrangler TJ 2003-2006 & LJ
7. Remove the factory rear seat bolts #11.10 and brackets #11.11 & 11.12 attached to the floor. Save the bolts #11.10
they will be reused. (See Figure 4a)
8. Remove the factory rear seat belts #11.17. Tip: These can be zip tied to roll bar for storage. (See Figure 4a)
9. Remove the factory bolts #11.13 & #11.14 washers which secure the rear door striker to the vehicle tub. These will
be reused. (See Figure 4a)
10. Locate the holes in the tub on the right and left (Optional) side corresponding with holes in both side panels where
screw #10.15 is illustrated. There is a rubber plug in the tub which will need to be removed and the carpet will need to
be cut where the screw will pass through. (See Figure 4a)
11. Insert the rubber well nuts #10.13 in the right and left (optional) sides behind the carpet. (See Figure 4a)
Tip: it is easiest to only start all the mounting hardware a few turns then come back and tighten them down.
12. Place the right #4 & left #3 panel in the vehicle and fasten them to the well nuts #10.13 previously inserted into the tub
using #10.14 washers and #10.15 screws. (See Figure 4a)
13. Reinstall at least (4) of the original seat bracket mounting bolts #11.10 into there original location to secure the right
and left panels to the floor of the vehicle tub. (See Figure 4a)
14. Reinstall the original bolts #11.13 and original #11.14 washers to secure the rear door striker assembly and the left
panel #3 to the vehicle tub. (See Figure 4a)
15. Skip below to step 37.
Figure 4a