Top Flite TOPA0150 User Manual
Page 55
❏
5. Allow the paint to dry. Since Testors is not fuel
proof, it must be sealed with fuelproof paint. Remove
the control surfaces. Paint all parts of the model that
were painted with Testors with two very light coats of
LustreKote crystal clear (TOPQ7200).
❏
6. After the clear has dried, temporarily rejoin the
control surfaces to the model with the hinges. Cut the
decals from the included decal sheet and place them
on the model where shown on the kit box. For larger
decals, peel the decal from its backing, then dip it in
a solution of warm water and soap (about five or six
drops of liquid dish soap per quart of water). This will
aid in positioning the decal and eliminate air bubbles.
Place the decal on the model, slide it into position,
then squeegee the water out from underneath with a
rubber squeegee or a piece of soft balsa. Some
small wrinkles can be removed with a little heat from
a heat gun.
❏
7. Apply panel lines with a Top Flite Panel Line
Pen (TOPQ25210). Draw the various hatches and
rivets with a Top Flite
Scale Template (TOPR2187).
Specialized templates can be made from sheets of
plastic. Use a flexible straightedge such as a plastic
strip or a thin, metal ruler to apply the panel lines.
Apply a few strips of vinyl tape to the underside of
your straightedge. This will raise it slightly off the
surface, so the ink from the panel line pen will not
“bleed” underneath.
❏
8. After the panel lines and decals have been
applied, remove the control surfaces and apply a
light
mist coat of LustreKote flat clear (TOPQ7199) to all
parts of the model. A light mist is required so that the
panel lines will not run. After the mist coat has been
applied, spray on an additional coat of flat clear.
❏
9. After the canopy has been cut out and trimmed
to fit the fuse, carefully sand the edges with 400-grit
sandpaper, then wash the canopy in warm,
soapy water.
❏
10. Mask the clear areas of the canopy. Use a
pencil to simultaneously press the tape into the
corners while marking guidelines for trimming.
❏
11. Use a hobby knife to trim the masking tape
along the pencil-drawn guide lines, then peel off the
excess tape.
❏
12. Mask the rest of the clear areas of the canopy
the same way and cover the inside of the canopy
with tape or paper to protect it from over spray.
❏ ❏
13. Paint the canopy. In the case of our prototype
model on the kit box cover, the canopy was painted with
Testors paint to match the rest of the model. After the
Testors dries, apply a
light mist coat of LustreKote flat
clear to fuelproof the Testors.
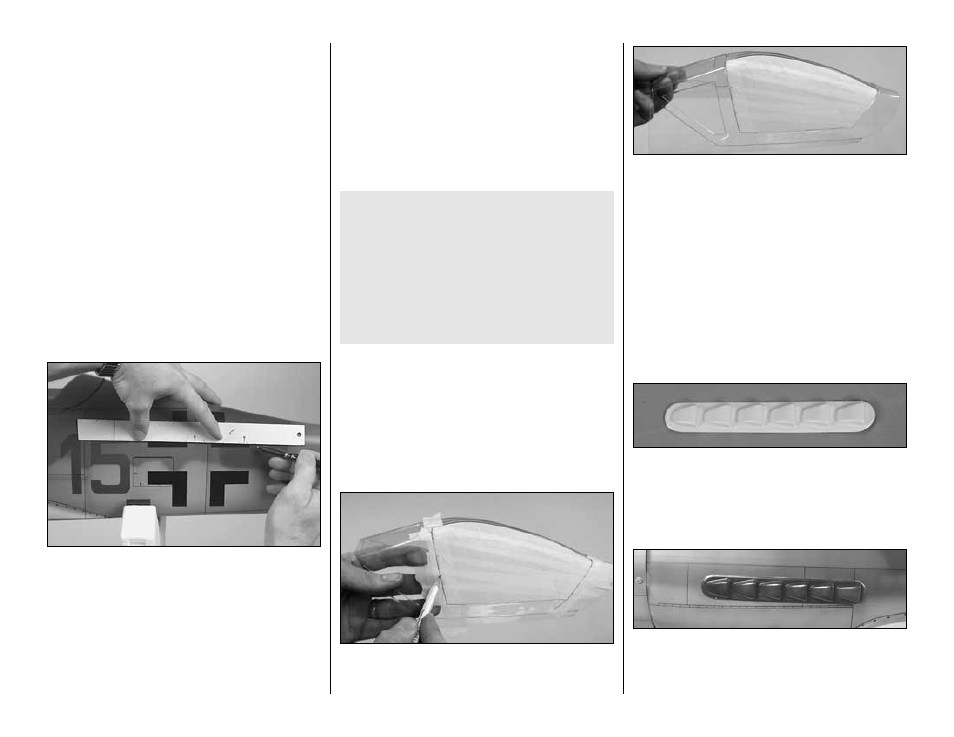
Exhaust stacks
❏
1. Cut out both molded ABS exhaust stacks as shown.
❏
2. Paint the exhaust stacks. You could paint them a
burnt, golden brown to match a full-size Focke-Wulf, or
just paint them flat black. If the paint you are using is not
fuelproof, coat the exhaust stacks with fuelproof paint.
❏
3. The same way you did the machine gun cover,
position the exhaust stacks on the fuse and trim
around them with a felt-tip pen. Cut the covering from
the fuse and glue the exhaust stacks into position.
Do not spray LustreKote directly on the canopy.
Eventually, LustreKote will curl the butyrate plastic
that the canopy is made of. If you are following
these instructions and are painting the model with
Testors, it will serve as a barrier, so if misted on
lightly over the Testors, LustreKote will not distort
the plastic. If you are not using Testors paint,
select another type of paint that will not react with
butyrate such as Pactra Formula-U or Chevron.
Details for painting the canopy follow.
-55-