Top Flite TOPA0150 User Manual
Page 53
❏
1. Use a dust brush, compressed air or a Top Flite
Tack Cloth to remove balsa dust from the model.
Thoroughly clean your work area, removing any balsa
dust or particles that could get underneath the covering
and mess up your finish. Get out your covering tools
and “gear up” your work shop for covering.
❏
2. Cover the control surfaces first (rudder,
elevators, ailerons and flaps—if used). It may be
helpful to mark which elevator and aileron is the right
and left in an inconspicuous location.
❏
3. Cover the wing. Begin with the belly pan, then
the bottom of both panels, then the top of both
panels. Cover the aileron and flap hatches.
❏
4. Cover the fuse. Use your own preferences on
the exact covering sequence. Usually it’s best to first
cover the bottom, then the sides, then the top of the
fuse. If you are going to paint the covering as has
been described, consider priming, then painting the
wing fillet instead of covering it.
Machine gun cover
Note: If you are finishing your model by painting
over MonoKote or glass cloth, glue the machine gun
cover to the model before painting. If you are going
for an entirely MonoKote-covered finish, paint the
machine gun cover first, then glue it to the model
after it has been covered.
❏
1. Position the machine gun cover on the fuse (with
the aft edge aligned with the middle of former 6B).
❏
2. Use a felt-tip pen to draw the outline of the
machine gun cover onto the covering.
❏
3. Use a sharp hobby knife to
carefully cut the
covering from the model slightly inside the lines you
marked. Remove any ink left on the covering with
denatured alcohol.
❏
4. Remove the covering from the fuse, so the
machine gun cover will be glued to bare balsa.
❏
5. Glue the machine gun cover into position. If you
have not yet painted the model, you could use thin or
medium CA to glue the machine gun cover on. If the
machine gun cover is already painted, it may be
safer to use “canopy glue” (such as J & Z Products Z
R/C 56) that will not damage the finish and can be
removed with water.
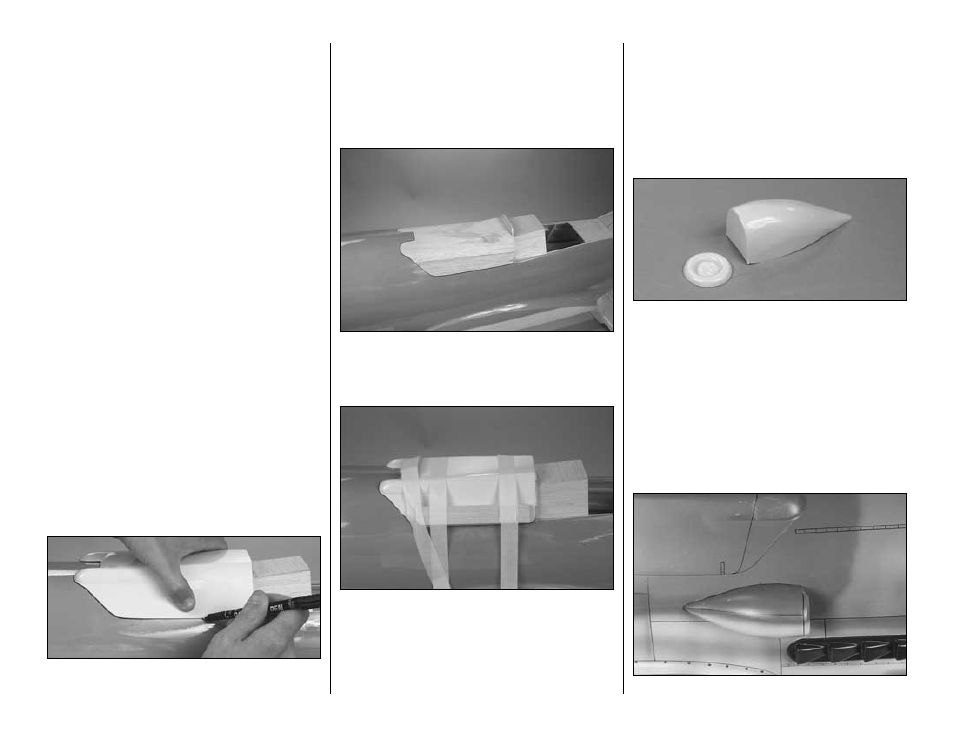
Supercharger intake
Note: Just the same as the machine gun cover, if
you are finishing your model by painting over
MonoKote or glass cloth, glue the supercharger
intake to the model before painting. If you are going
for an entirely MonoKote-covered finish, paint the
supercharger intake first, then glue it to the model.
❏
1. Cut out the two parts of the molded ABS
supercharger intake.
❏
2. Glue the super charger intake together with CA.
Use automotive Bondo filler or plastic filler to fill the
seam between the two parts. Test fit the
supercharger intake to the fuse. Trim as necessary
for a good fit.
❏
3. The same as you did for the machine gun cover,
trim the covering from the fuse around the
supercharger intake and remove the covering.
❏
4. Glue the supercharger intake into position.
-53-