Top Flite TOPA0150 User Manual
Page 48
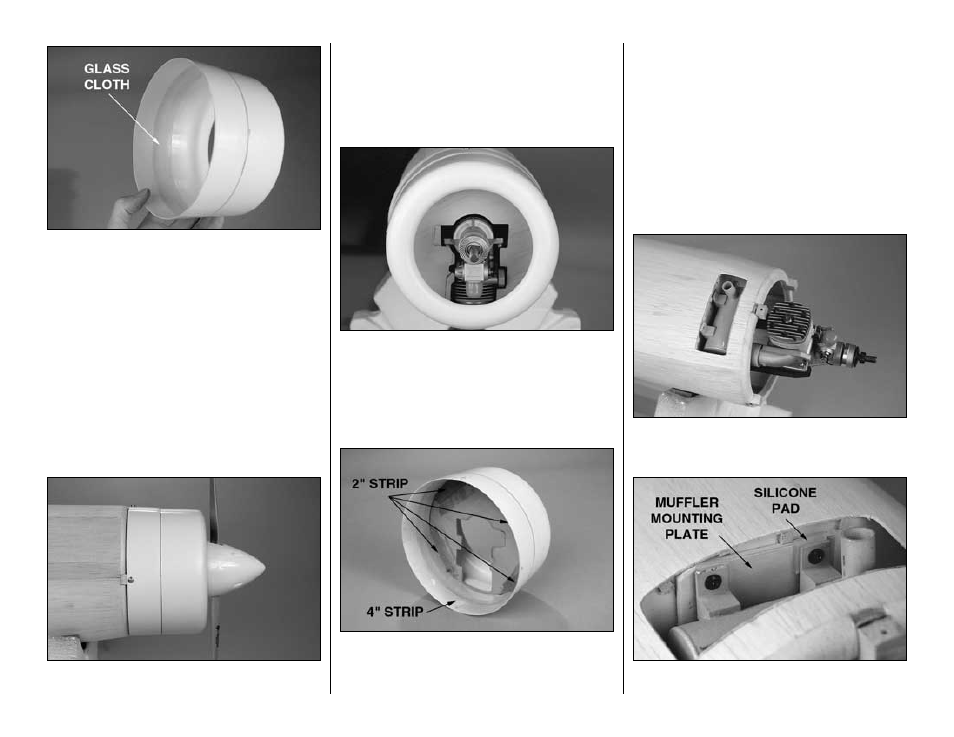
❏
7. While the epoxy on the cowl mount blocks is
hardening, reinforce the seam between the cowl
front and rear with a 1" wide strip of glass cloth and
30-minute epoxy.
Note: The inside of the cowl must
be
thoroughly scuffed with coarse sandpaper for
the epoxy to adhere.
❏
8. Mount the engine to the firewall. Position the
cowl on the fuse over the cowl mount blocks. Mount
a spinner and a prop to your engine. Align the cowl
so there is adequate spacing between the front of
the cowl and the propeller and between the back of
the cowl and the fuse. Trim the aft edge of the cowl if
necessary. Once the correct alignment has been
achieved, tape the cowl into position.You can see the
correct cowl alignment in the following photo.
❏
9. Drill 3/32" holes through the cowl and the cowl
mount blocks. Remove the cowl and enlarge the holes
in the cowl only with a 1/8" bit. Test mount the cowl to
the fuse with four #4 x 3/8" screws and #4 washers.
❏
10. Remove the cowl. Harden the threads in the
cowl mount blocks by adding a few drops of thin CA
to each hole.
❏
11. A pattern is supplied on the plan to make a
baffle from 1/8" lite-ply (not supplied) to direct
incoming air over the head of the engine. The cutout
fits the O.S. Max .61 FX engine. If you are using a
different engine, you will have to trim the baffle to fit
your setup. Make the baffle, then use medium CA to
tack-glue it to the inside of the cowl.
❏
12. Test fit the cowl to the fuse, trimming the baffle
as necessary until it fits around your engine. Once
you have achieved a good fit, use 30-minute epoxy
to glue four 2" long strips of 1" glass cloth to the cowl
and the baffle. Glue a 4" strip of glass cloth across
the aft edge of the bottom of the cowl. Glue three 1"
strips over the three remaining cowl attachment
screw holes inside the cowl.
Mount the muffler
❏
1. While the epoxy from the previous step is
curing, attach the header and muffler to the engine.
On our prototype, we cut 3/16" from the exhaust
header to allow the muffler to fit.
❏
2. Cut an opening in the bottom of the fuse to
accommodate the muffler and to allow adequate air flow.
Mount the engine to the fuse with the muffler attached.
❏
3. Use leftover 1/8" and 1/16" ply to make a 3/16"
thick
muffler mounting plate as shown on the plan.
-48-