Top Flite TOPA0150 User Manual
Page 49
Mark the location of the holes in the muffler for the
mounting screws onto the plate, then remove the
plate and drill 3/32" holes for the screws. Reinstall
the plate, glue it to F-2, then mount the muffler to the
plate with the screws and the silicone pads included
with the muffler.
❏
4. Remove the muffler. Harden the threads in the
muffler mounting plate by adding a few drops of thin
CA to each hole.
❏
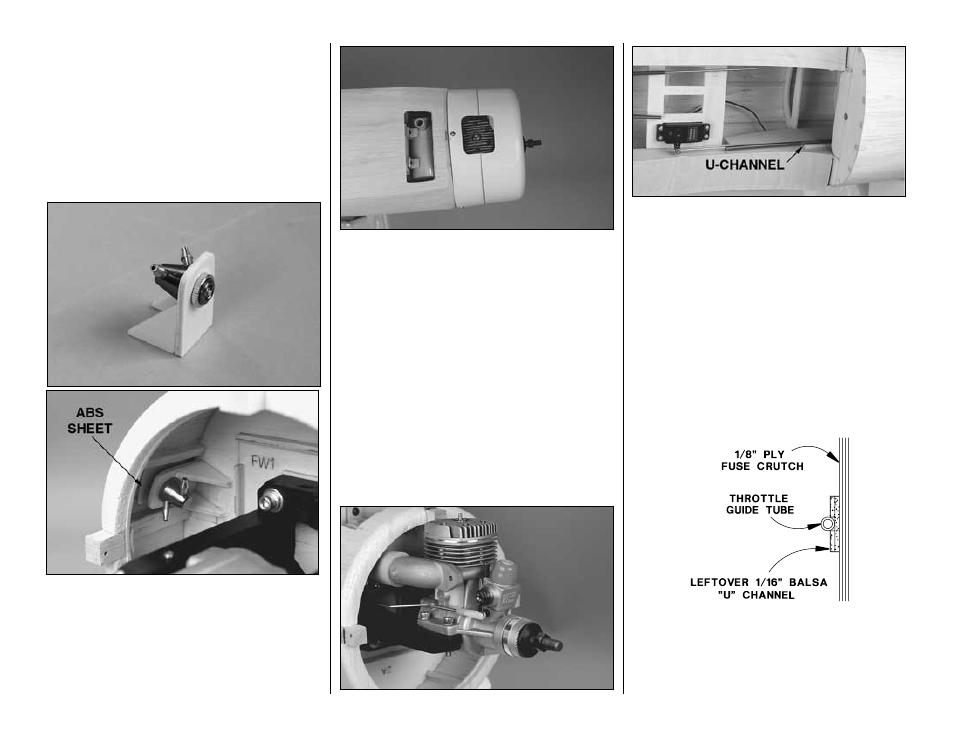
5. If you are going to use a fuel filler valve, mount the
valve at this time. We made a mount for a Great Planes
Fuel Filler Valve and mounted it to the front of former 2
inside the fuse. Cut a hole through the sheeting in
alignment with the filler valve. Reinforce the 1/16" balsa
sheeting with a small sheet of leftover ABS or 1/32"
plywood glued to the inside of the sheeting. Securely
glue the filler valve mount into position.
❏
6. Cut an air passage in the bottom of the cowl
under the head of the engine and additional holes as
necessary to access the needle valve and other
accessories as required.
The model is nearly ready to final sand and cover,
but before doing so let’s take care of a few final
details...
Hook up the throttle
Refer to these photos to hook up the throttle.
❏
1. Mount your throttle servo to the servo tray with
the screws included with the servo.
❏
2. Drill a 3/16" hole through the firewall right next
to the left fuse crutch that is in alignment with the
arm on your carburetor, then connect the carb arm to
the throttle servo with a .074" wire pushrod, a 3/16"
guide tube, a nylon clevis and a screw-lock pushrod
connector supplied with this kit. If your setup is
different, or if you prefer, you could substitute the
supplied hardware and use your own equipment to
hook up the throttle (such as a throttle cable). Make
certain the screw in the screw-lock pushrod
connector does not protrude below the wing fillet
base - it’s close, but should not be a problem).
❏
3. Support the guide tube near the servo with a
“U” channel made from strips of leftover 1/16" balsa
glued to the fuse crutch and the guide tube.
❏
4. Mount the elevator and rudder servos to the
servo tray with the screws included with the servos.
-49-