Top Flite TOPA0150 User Manual
Page 18
❏
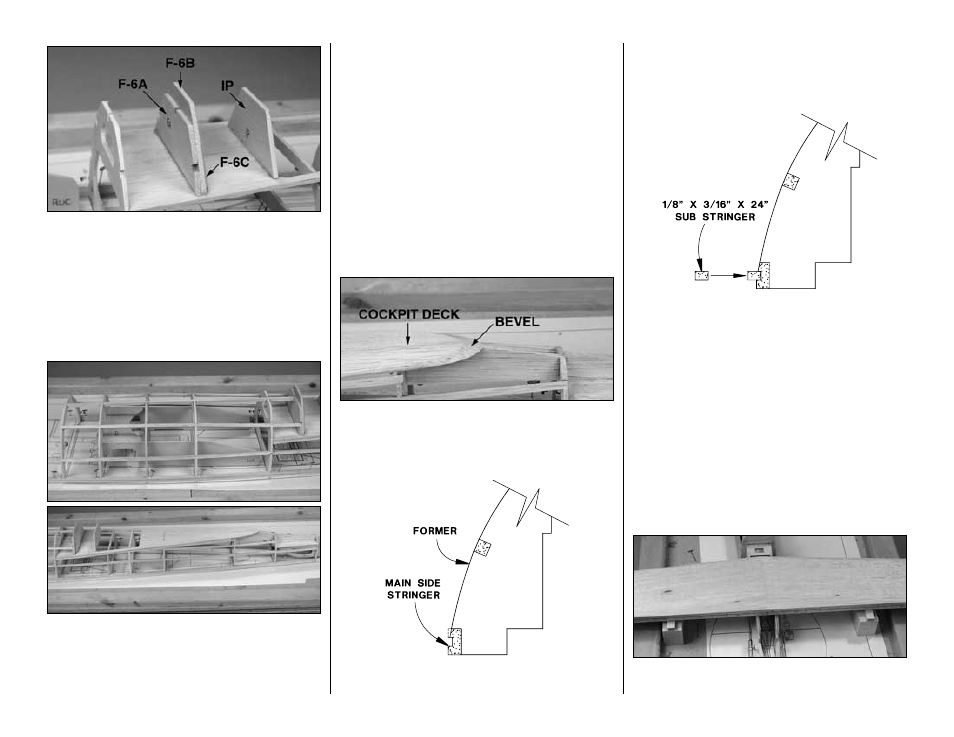
12. Glue together die-cut 1/8" balsa formers
F-6A,
F-6B and F-6C, then glue them into the notch in the
cockpit deck. Glue the die-cut 1/8" balsa
instrument
panel (IP) to the cockpit deck. Note that the
instrument panel and the F-6 assembly are
perpendicular to the building board, not to the
cockpit deck.
Now for the real fun part...
❏
13. Use a total of seven 3/16" x 3/16" x 30" balsa
sticks for the
stringers in the top half of the fuselage.
Without using any glue, start by fitting two stringers
into the top three notches of F-1 to F-6D (you’ll have
about a half of a stringer leftover). Next, fit two more
stringers into the notches of F-5A to F-9A
(immediately under the cockpit deck) on both sides
of the fuse (you’ll have two half-stringers leftover).
Then, fit the two leftover pieces into the notches of F-
8A to F-10A on both sides of the fuse. And finally, fit
three more stringers into the notches of F-1 to F-11A
on both sides of the fuse. They will have to be spliced
together at the notch in F-5A. Add former
F-1A to the
assembly as you are fitting the stringers to the front
of the fuse.
❏
14. After the stringers and former F-1A have been
fitted, glue them into position. Use a builder’s square
to make certain F-1A is perpendicular to the
building board.
❏
15. Bevel the edges of the cockpit deck to match
the shape of the fuselage and the angle of the spine.
Sand all of the stringers and the sub deck even with
the formers.
❏
16. Temporarily remove the T-pins from the main
stringers and take the fuse top off the building board.
Sand the main stringers to match the angle of the
formers. Replace the fuse top on the building board,
holding it down with T-pins.
❏
17. Glue the five 1/8" x 3/16" x 24"
sub stringers
into the groove of the main stringers. Make sure
none of the T-pins are protruding in the groove which
would interfere with the fit of the sub stringers.
Before we can sheet the fuse top, the stab and fin
must be glued into position.
Mount the stab and fin
❏
1. Position the stab on the stab base. Taking
careful measurements, make certain the stab is
centered, side-to-side, on the stab bases. Place a
weight on top of the stab to hold it down.
❏
2. Measure the distance from the bottom of the
stab at both tips down to the building board. If the
-18-