Top Flite TOPA0150 User Manual
Page 40
❏ ❏
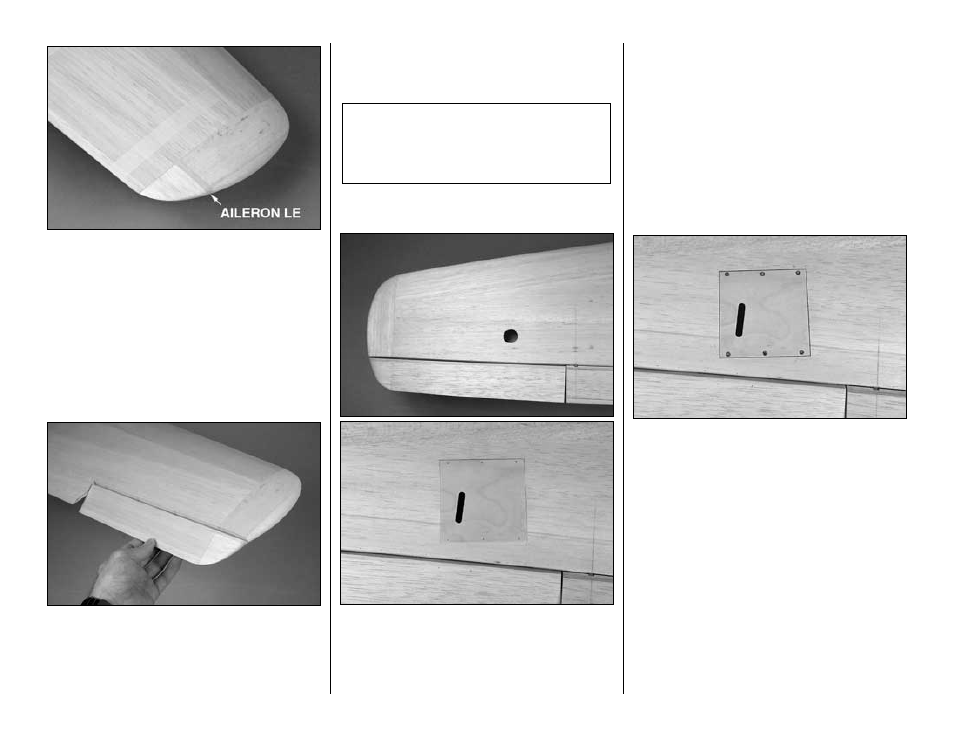
3. Use masking tape to securely tape the
aileron to the wing with the tips in alignment. Shape
the aileron LE in the tip area even with the wing tip
and the aileron tip.
❏ ❏
4. Remove the aileron. Use the “T-pin and
straightedge” technique to mark centerlines down
the LE of the aileron and the outer TE. Cut the hinge
slots, then test fit the aileron to the wing with the
hinges. Make adjustments where necessary.
❏ ❏
5. Bevel the LE of the aileron for control throw.
Make certain you can achieve 11/16" of up and down
throw as described on page 58 of the manual.
❏
6. Return to step 1 and build the other aileron.
Hook up the flaps and ailerons
❏
1. Cut a small hole in the
bottom wing sheeting 8"
from where the sheeting meets the right wing tip.
Carefully enlarge the opening until you can just fit one
of the die-cut 1/16" plywood
hatches. Hint: As you
“zero-in” on the opening, use the hatch itself as a
template for trimming the edges of the balsa sheeting.
❏
2. With the hatch in the wing, drill 1/16" holes
through the punch marks in the hatch and through
the servo rails. Remove the hatch. Enlarge the holes
in the hatch only with a 3/32" drill. Use a Dremel
#178 cutting bit to countersink the holes in the hatch
for the #2 x 3/8" flat head screws.
❏
3. Use a straightedge and a
new #11 blade to
carefully trim the edges of the opening so there will
be approximately 1/32" clearance all the way around.
Use thin or medium CA to glue the wing sheeting to
the ribs and the rails (remember, we instructed you
earlier not to glue the sheeting to the ribs and rails in
this area). Add a few drops of thin CA to the
holes in
the rails and allow to fully dry. Temporarily mount the
hatch with six #2 x 3/8" flat head screws.
❏
4. Mount the other aileron hatch and both flap
hatches to the wing the same way. Make certain the
hatches are positioned as shown on the wing plan.
Note: All the die-cut 1/16" plywood hatches are
the same and are interchangeable,
except for
the
left flap hatch, which is noted “LF” on the die
sheet. Reference the plan for the correct
orientation of the hatches and servos.
-40-