Top Flite TOPA0150 User Manual
Page 50
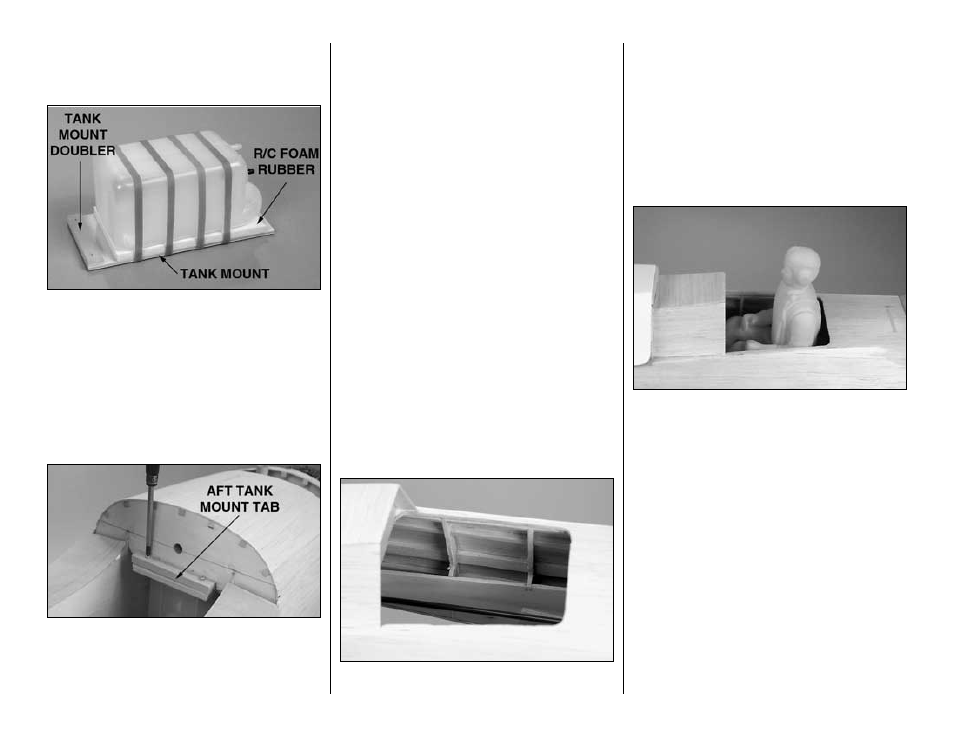
Install the fuel tank
Refer to this photo for the following two steps.
❏
1. Glue the die-cut 1/8" plywood
tank mount
doubler along the aft edge of the top of the die-cut
1/8" plywood
tank mount.
❏
2. Assemble the fuel tank according to the
instructions that came with the tank (we used a GP.
14 oz tank, GPMQ1406). Mount the tank to the tank
mount with rubber bands and a sheet of R/C foam
rubber in between.
Refer to this photo for the following two steps.
❏
3. Cut the
aft tank mount tab to a length of 2-3/4"
from the last piece of 1/4" x 3/8" basswood (leftover
from the servo hatch rails in the wing). Drill two 3/32"
holes through the tab 1/4" from both ends. Glue the
tab to former F-4 where shown on the plan.
❏
4. Fit the front of the tank mount under the forward
tank mount tab on the back of the firewall. Use the holes
in the aft tank mount tab as a guide to drill two 1/16"
holes through the tank mount. Mount the tank mount to
the aft tank mount tab with two #2 x 1/2" screws. Drill
1/4" (or 15/64" for a perfect fit) holes through the firewall
for the fuel lines.
Now you’ve got a secure, yet readily removable tank
mounting system for inspecting your fuel tank and
lines whenever necessary. While we’re installing
“tanks”, go ahead and install the air tank for the
retracts (if you’re installing retracts).
❏
5. Connect the air line to the air tank for the
retracts. Mount the tank to the cockpit deck inside the
fuse as shown on the plan using RTV silicon cement.
This installation is secure, yet not permanent in case
the tank needs to be removed.
Test fit the cockpit kit
If you are not installing the Top Flite scale cockpit
kit, skip this section. You may make your own,
scale appearing cockpit from balsa, ply and/or
thin cardboard (from breakfast cereal boxes).
❏
1. Cut out formers 6 & 7 along the lines you
marked previously.
❏
2. Cut out the cockpit kit according to the
instructions that came with it and test fit it into the
fuselage. Make adjustments where necessary so all
the parts fit. Make sure none of the radio
components (receiver, battery pack, on/off switch,
etc.) you are going to install will interfere with the
cockpit kit when it’s permanently glued into position
later on.
❏
3. While you’re working on the cockpit kit, now is a
good time to assemble and test fit your pilot. We
used a Top Flite 1/7th scale WWII pilot (TOPQ9000).
You can install just the upper part of the body, or glue
his legs and feet on and install the full body.
❏
4. The cockpit kit and pilot can be painted and
glued into position at any time before the canopy is
permanently glued to the fuse.
-50-