Top Flite TOPA0150 User Manual
Page 41
❏
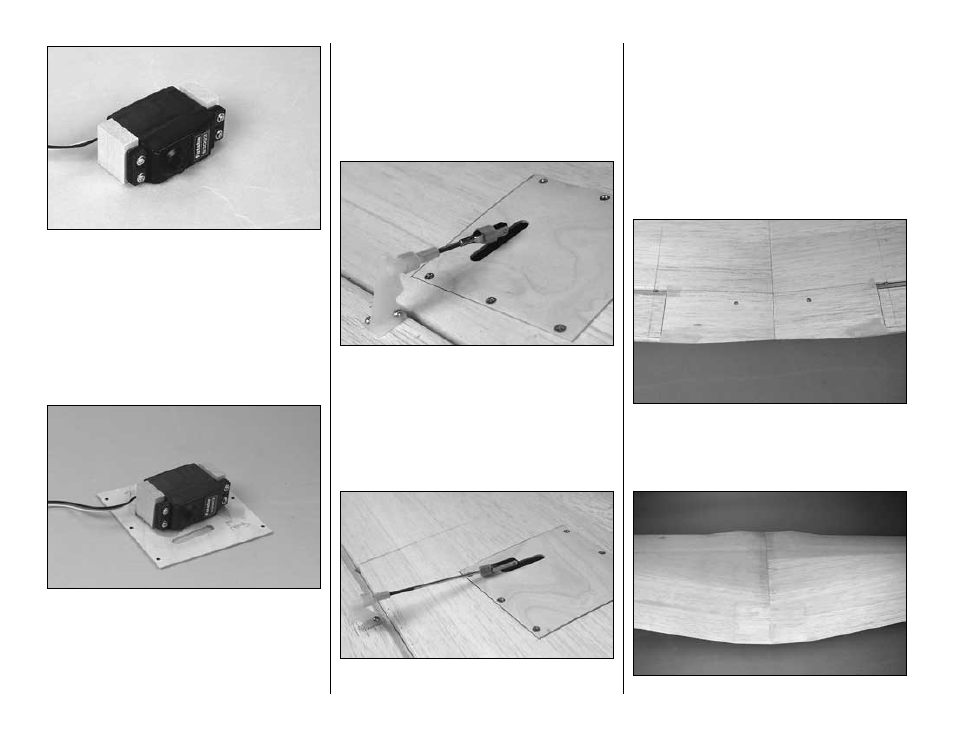
5. This will show the
right aileron, so refer to the
right aileron servo and hatch on the wing plan for the
correct orientation of the servo. Use the screws that
came with your servo to mount the aileron servo to
two 5/16" x 3/4" x 7/8" basswood
servo mount
blocks. There should be an approximately 1/32"
clearance between the blocks and the servo, and
between the servo and the hatch.
Hint: Use leftover
1/32" plywood or cardstock as shims under the servo
and between the servo and the blocks when drilling
the holes into the blocks.
❏
6. Use 30-minute epoxy to glue the servo mount
blocks to the
right aileron hatch. Make certain the
servo is positioned so the servo arm will be
centered and aligned with the slot in the hatch.
Note: The basswood servo mount blocks are porous
and rapidly absorb epoxy. After applying the first coat
of epoxy to the mount blocks, wait a few minutes and
apply an additional coat. You will see that in between
coats, most or all of the epoxy will have soaked in,
leaving little behind for gluing. Do this procedure a
few times until a thick coat of epoxy remains.
❏
7. Mount the left aileron servo and both flap
servos to the hatches the same way.
❏
8. Install a long servo arm on the right aileron
servo. Mount the right aileron hatch in the wing.
Connect the servo to the aileron with the hardware
shown on the plan. Add a few drops of thin CA to the
holes in the aileron and the horn mount plate for the
#2 x 3/8" screws.
❏
9. Connect the left aileron servo to the left aileron
the same way.
❏
10. Make the pushrods and connect the flap
servos to the flaps. Glue a small block of leftover
balsa inside the flap where the aft #2 x 3/8" screw
goes through the bottom flap skin. The same as the
elevators and rudder, use a T-pin to poke several
holes in the bottom flap skin where the flap control
horn mounts to the flap. Harden the area by adding
a few drops of thin CA to the holes. Allow the CA to
dry, then sand smooth. Note that the flap control
horn is mounted “backwards.”
Finish the wing
❏
1. Use leftover 1/16" balsa to sheet the bottom of
the center section of the wing between the flaps. Use
the holes in the wing bolt plate as a guide to cut
holes in the bottom sheeting.
❏
2. Sheet the top of the center section of the wing.
-41-