Top Flite TOPA0150 User Manual
Page 47
❏
11. Sheet the other side of the belly pan and add
the paper wing bolt tube and the belly pan block.
❏
12. Blend both sides of the belly pan to the wing
and the fuse with sandable balsa filler. Sand the filler
after it dries.
Assemble the cowl
❏
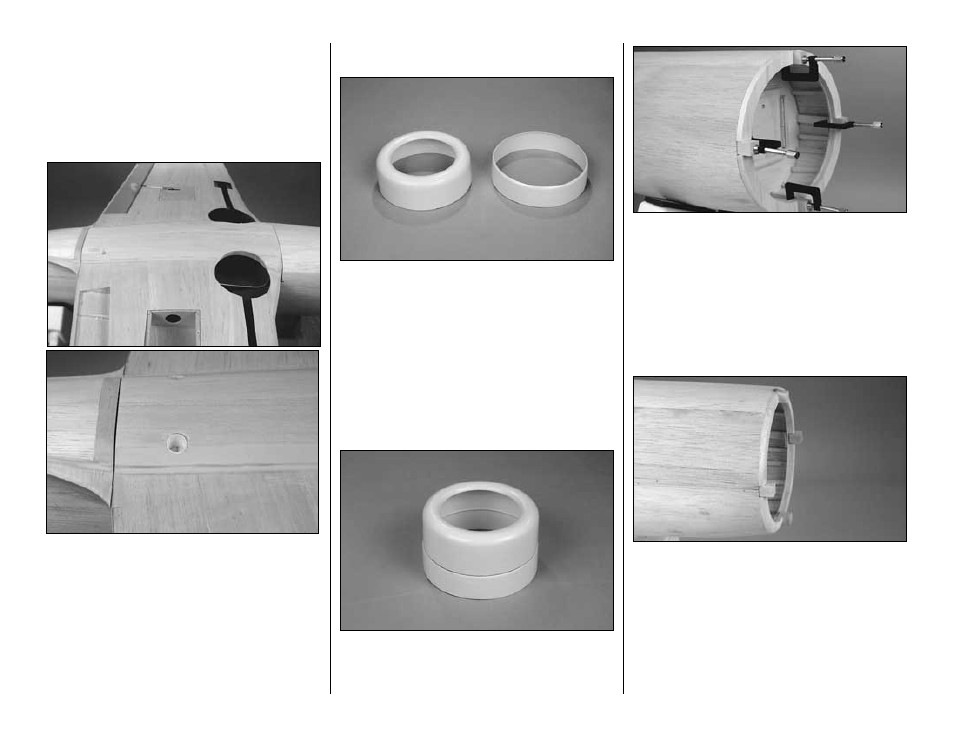
1. Use curved-tip scissors to trim the molded ABS
forward and aft cowl halves along the molded in
cutlines. The cutlines are most easily seen from
the inside.
❏
2. Use 150-grit sandpaper to
thoroughly sand the
seams all the way around both cowl halves where
they will be glued together.
❏
3. Place the forward cowl over the aft cowl and
glue them together with thin or medium CA. Use only
a small amount of CA accelerator if necessary. Too
much CA accelerator can soften the plastic.
❏
4. Temporarily clamp the 1/2" x 1/2" x 5/8" maple
cowl mount blocks to former W-1 in the “3, 6, 9 &
12" positions as shown on the plan. Cut both die-cut
1/4" balsa
cowl rings into two halves. Trim the cowl
rings as necessary so they fit between the cowl
mount blocks. Glue the cowl rings to F-1.
❏
5. Remove the cowl mount blocks. Sand the cowl
rings even with the fuse sheeting, then round them
as shown on the plan.
❏
6. Slightly round the cowl mount blocks to match the
curvature of the cowl. Glue the cowl mount blocks to the
fuse between the cowl rings with 30-minute epoxy.
Note: Be certain the cowl mount blocks are positioned
so the cowl will fit over them. An additional 1/32"
clearance at each cowl mount block should be allowed
to accommodate the glass cloth that will be added to
the inside of the cowl later. You don’t want to have to
“stretch” the cowl by forcing it over the cowl mount
blocks if they are spaced too far apart.
-47-