Top Flite TOPA0150 User Manual
Page 46
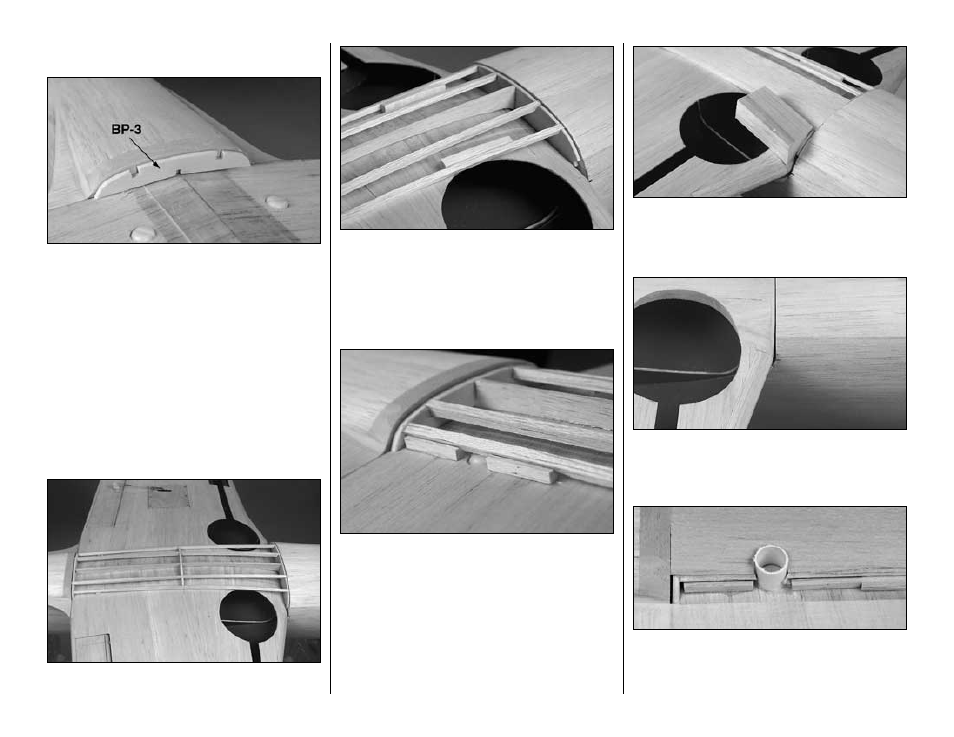
Build the belly pan
❏
1. Position the die-cut 1/8" plywood
belly pan
formers BP-1 and BP-3 on the bottom of the wing
up against the fuse where shown on the plan. If
necessary, trim the tops of the formers so they are
1/16" shorter than the fuse bottom to accommodate
the 1/16" belly pan sheeting.
❏
2. Glue BP-1 and BP-3 and the die-cut 1/8" balsa
belly pan spine to the bottom of the wing. Be certain
you don’t inadvertently glue the formers to the fuse,
and be certain to leave a 3/32" gap between BP-3 and
the fuse and a 1/16" gap between BP-1 and the fuse.
❏
3. Glue
BP-2 to the bottom of the wing where
determined by the notch near the middle of the spine.
❏
4. Cut the four stringers for the belly pan from two 3/16"
x 3/16" x 30" balsa sticks and glue them into position.
❏
5. Glue two pieces of leftover 1/4" x 3/8" balsa to
the bottom wing sheeting and to the stringers over
the wheel wells. This will support the belly pan
sheeting after it is trimmed even with the wheel wells.
❏
6. Glue pieces of leftover 3/16" x 3/16" balsa to the
stringers and to the bottom of the wing on both sides
of the wing bolts. This will tie the stringers together
after the holes are cut for the wing bolts.
❏
7. Sheet one side of the belly pan with a 1/16" x
3" x 30" balsa sheet. The sheet extends from the
center of the belly pan spine to the outer stringer
(and can be seen in following photos).
❏
8. Carve the bottom of one of the 1" x 1-1/4" x 3"
balsa
belly pan blocks to fit the wing when placed
on the forward belly pan former and the wing. Glue
the block into position.
❏
9. Finish shaping the belly pan block to match the
fuse bottom, the belly pan and the wheel opening.
Trim the belly pan block and the belly pan sheeting
and stringers to reopen the wheel well.
❏
10. Trim the belly pan sheeting and stringer as
necessary to accommodate the 9/16"
paper wing bolt
tube. Cut 1" from the tube and use thick or medium CA
to glue the 1" piece to the belly pan sheeting.
-46-