Top Flite TOPA0150 User Manual
Page 54
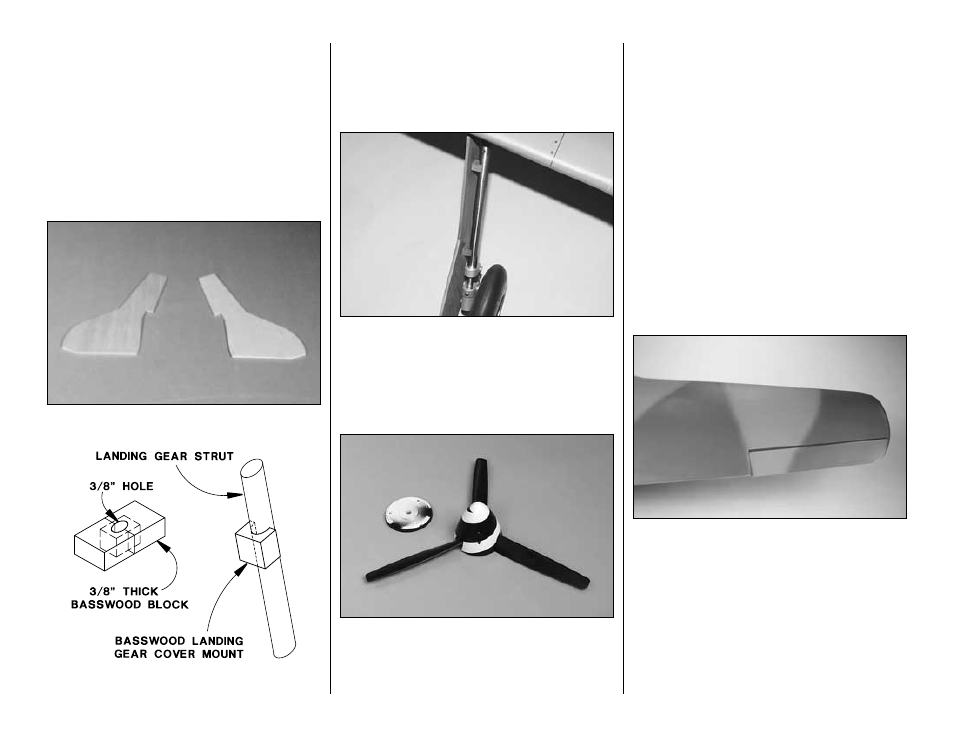
Landing gear covers
Note: The landing gear covers as featured on the kit
box cover and shown in these instructions are not
included with the kit and, if you have retractable landing
gear, are not intended to be in position for flying. This is
because the landing gear does not fully retract into the
wing, thus leaving the covers extending below the wing
creating much drag. Additionally, the landing gear
covers interfere with the belly pan. They are intended
for static display only.
❏
1. Use the pattern provided on the plan to make two
landing gear covers from 1/8" lite-ply or 1/8" balsa.
❏
2. Make two
landing gear cover mounts for each
landing gear cover as shown in the sketch from 3/8"
thick basswood. If you are using CJM retracts, start
by drilling a 3/8" hole through an approximately 3/8"
thick sheet of basswood, then cut the sheet through
the middle of the hole and trim the edges to make
two mounts.
❏
3. Glue the mounts to the inside of the wheel
covers. Cover or paint the wheel covers, then mount
them to the struts with the mounts with double-sided
tape or something similar.
Display propeller
❏
There are different ways to make a propeller and
spinner for static (non-moving/flying) display,
depending upon how much effort you want to put
forth and how accurate you wish the propeller to be.
We simply used a Du-Bro white 3" 3-blade spinner
(DUBQ3704) and a Master Airscrew 14" 3-bladed
propeller (MASQ1947). This spinner and prop are
the approximate scale size for a Focke-Wulf of this
scale, but are not the correct shape (the actual
Focke-Wulf spinner is more “blunt” and the propeller
blade tips are more rounded). Paint the spinner to
match the trim scheme you have selected.
Note: The
size of this propeller is not suitable for flying this
model. Fly your model with the appropriate size
propeller recommended by the engine manufacturer.
Painting
❏
1. Prime the cowl with LustreKote
®
white primer,
allow to dry, then wet-sand with 400-grit sandpaper.
Paint the cowl with LustreKote dove gray to match
the dove gray on the fuse. Paint the inside of the cowl
and the engine baffle flat black.
❏
2. Temporarily join the control surfaces to the
wing, stab and fin with the hinges, but do not glue the
hinges into place yet. Attach the cowl to the fuse.
This way, all patchwork of the camo trim scheme will
line up (as shown in the photo).
❏
3. Wipe the model down with a dust-free cloth and
denatured alcohol. Follow with a tack-cloth to remove
residual dust particles and lint.
❏
4. Use an airbrush to paint the model according to
the trim scheme you have selected.
-54-