Preflight – Top Flite TOPA0910 User Manual
Page 29
Adjusting the Retractab
le Landing Gear
After connecting the air lines as instr
ucted in the
instr
uctions that came with the Air Control kit, fill the
air tank to 100psi and tr
y cycling the landing gear
.
The landing gear should cycle up and do
wn freely
.
If
the
y do not, here are some troub
leshooting tips:
❏
1.
The g
ear does not mo
ve up or do
wn:
Chec
k to
be sure the control scre
ws on the v
a
riab
le r
a
te v
alv
e
are open.
❏
2.
The landing g
ear mo
ves up and do
wn b
ut is
not smooth:
When mounting the landing gear onto the
landing gear r
ails it is impor
tant that the r
ails are
e
xactly par
allel to one another
.
If not, when y
ou tighten
the scre
ws the mounting flange of the gear mechanism
can twist slightly
.T
ry
loosening the mounting scre
ws a
little and tr
y cycling the landing gear again.
If the gear
no
w w
o
rk
s
, re-tighten the scre
ws one at a time
, cycling
the gear after each scre
w is tightened.
When y
ou find
out which scre
w is pulling do
wn too hard on the
mounting flange
, slip a shim under the mounting flange
and then re-tighten the scre
w
.
❏
3.
One of the landing g
ear goes up while the
other goes do
wn:
Most lik
ely y
ou ha
ve
crossed one of
the air lines
.
❏
4.
The main landing g
ear seems to loc
k
in the
“g
ear up”
position:
The scre
w that y
ou cut to length
to hold the bottom of the landing gear door to the
str
ut can e
x
tend too f
ar into the thread, causing the
gear to bind.
Slightly loosen that scre
w and tr
y
cycling the gear again.
If it no
w w
o
rks smoothly g
rind
a little off the end of the bolt.
PREFLIGHT
Identify Y
our
Model
No matter if y
ou fly at an AMA sanctioned R/C club
site or if y
ou fly some
where on y
our o
wn, y
ou should
alw
a
ys ha
v
e
y
our name
, address
, telephone n
umber
and AMA n
umber on or inside y
our model.
It is
required
at all AMA R/C club flying sites and AMA
sanctioned flying e
v
ents
.
Fill out the identification tag
on page 35 and place it on or inside y
our model.
Char
g
e
the Batteries
F
ollo
w the batter
y charging instr
uctions that came with
y
our r
adio control system to charge the batter
ies
.Y
ou
should alw
a
ys charge y
our tr
ansmitter and receiv
er
batter
ies the night bef
ore y
ou go flying, and at other
times as recommended b
y
the r
adio man
uf
acturer
.
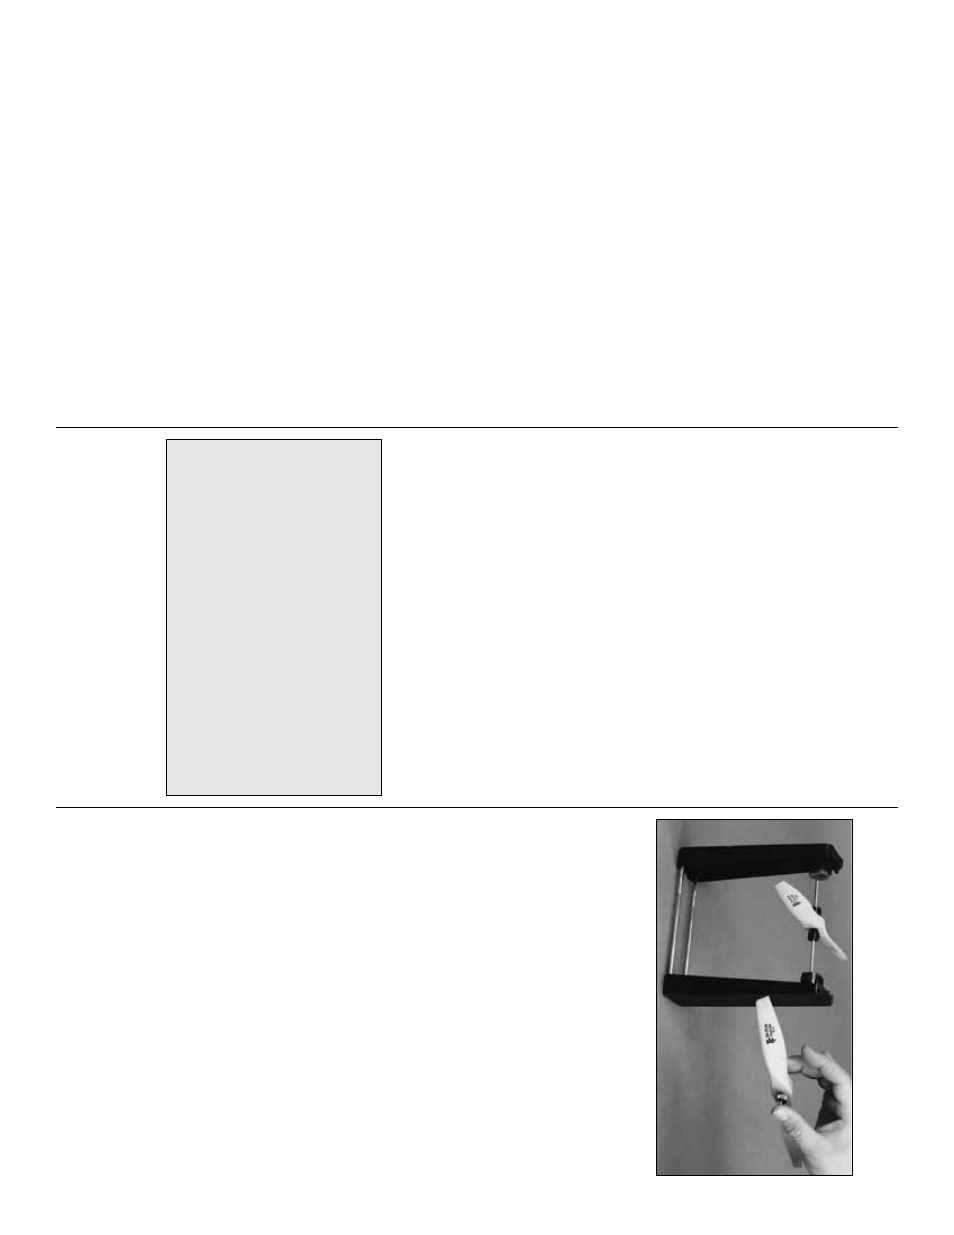
Balance Pr
opeller
s
Carefully balance y
our propellers and spare propellers
bef
ore y
ou fly
.
An unbalanced prop can be the single
most significant cause of vibr
ation that can damage
y
our model.
Not only will engine mounting scre
ws and
bolts loosen, possib
ly with disastrous eff
ect, b
u
t
vibr
ation ma
y also damage y
our r
adio receiv
er and
batter
y.
Vibr
ation can also cause y
our fuel to f
oam,
which will, in tur
n, cause y
our engine to r
un hot or quit.
W
e
use a
T
op Flite Precision Magnetic Prop Balancer
(T
OPQ5700) in the w
o
rkshop and k
eep a Great
Planes Finger
tip Prop Balancer (GPMQ5000) in our
flight bo
x.
Gr
ound Chec
k
If the engine is ne
w
,
follo
w the engine
man
ufacturer’
s instructions to break-in the
engine
.
After break-in, confir
m that the engine idles
reliab
ly
, tr
ansitions smoothly and r
apidly to full po
w
e
r
and maintains full po
w
er–indefinitely
.
A
fter y
ou r
u
n
the engine on the model, inspect the model closely
to mak
e
sure all scre
ws remained tight, the hinges
are secure
, the prop is secure and all pushrods and
connectors are secure
.
CA
UTION:
Unless the instr
uctions that came with
y
our r
adio system state diff
erently
, the
initial
charge on
ne
w
tr
ansmitter and receiv
er batter
ies
should be done f
o
r 15 hours
using the slo
w-
c
har
g
e
r that came with the radio system
.
This
will
“condition”
the batter
ies so that the ne
xt
charge ma
y be done using the f
ast-charger of y
our
choice
.
If the initial charge is done with a f
ast-
charger
, the batter
ies ma
y not reach their full
capacity and y
ou ma
y be flying with batter
ies that
are only par
tially charged.
- 29
-