Top Flite TOPA0910 User Manual
Page 11
- 11
-
hardw
are that came with the ser
v
o
.
D
rill a 1/16"
[1.6mm] hole through each of the ser
v
o
mounting
holes and into the ser
v
o
mounting r
ails
.
Inser
t and
remo
v
e
a ser
v
o
mounting scre
w into each of the
holes
.
Apply a couple drops of thin CA into the holes
to harden the threads
.
Once the glue has cured,
re-install the ser
v
o
mounting scre
ws
.
❏❏
9.
Center the ser
v
o
.
Then, install a large ser
v
o
hor
n to the ser
v
o
.
❏❏
10.
Tie the str
ing from the ser
v
o
compar
tment
to the ser
v
o
lead.
Pull the lead through the wing
e
xiting at the nacelle
.Lea
v
e
the str
ing attached to the
lead f
or no
w
.
❏❏
11.
Install the aileron ser
v
o
co
v
er to the wing
with f
our #2x 3/8"[10mm] w
ood scre
ws
.
❏❏
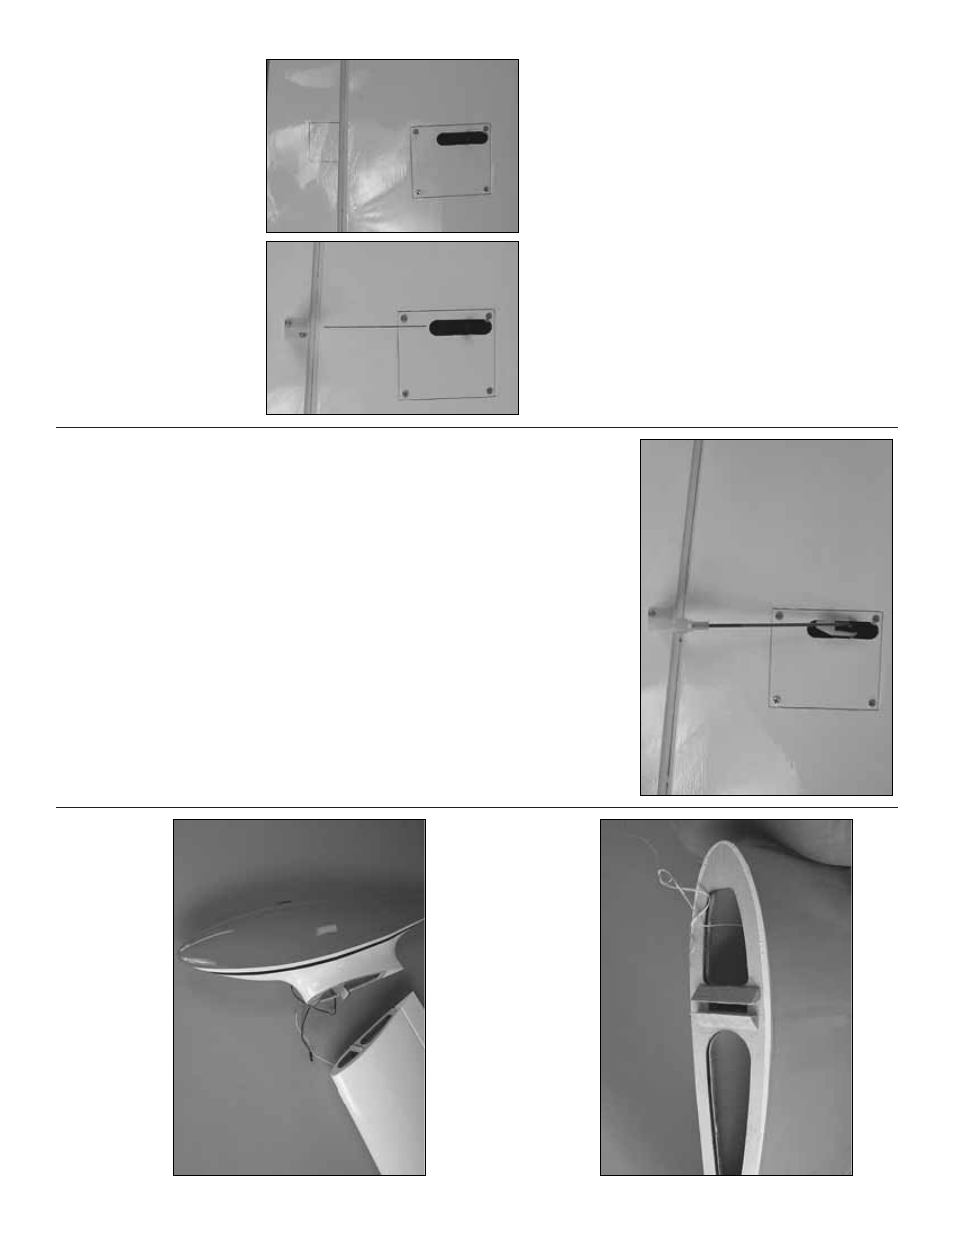
12.
Look closely under the co
v
e
ring of the aileron
and y
ou will see a plyw
ood mounting plate f
or the
control hor
n.
Place a n
ylon cle
vis on the plate in line
with the ser
v
o
ar
m.
Mar
k the location of the mounting
holes onto the aileron.
Dr
ill a 1/16" [1.6mm] hole on
the mar
ks
, dr
illing through the plyw
ood plate
b
u
t not
through the top of the aileron.
Inser
t and remo
v
e a #2
x3/8" [10mm] scre
w
into each of the holes
.
Apply a
couple drops of thin CA into the holes to harden the
threads
.
Once the glue has cured, attach the hor
n to
the aileron with tw
o #2 x 3/8" [10mm] scre
w
s
.
❏❏
13.
Scre
w a n
ylon cle
vis onto a .074 x 6" [152mm]
threaded wire 20 tur
ns
.S
lide a n
y
lon cle
v
is retainer onto
the cle
vis
.I
nstall the cle
v
is into the second hole from the
end of the control hor
n
.Then slide the silicone retainer
o
ver the cle
vis
.D
rill a 5/64" [2mm] hole in the outer hole
of the ser
vo
ar
m.
Center the ser
vo
and position the
ser
vo
ar
m as sho
wn.
Then, center the aileron.
With a
fine tip mar
ker
, mar
k
the wire where it aligns with the
outer hole of the ser
vo ar
m.
Mak
e a 90 deg
ree bend on
the mar
k.
Cut the wire so the wire is 3/8" [10mm] in
length after the bend.
Inser
t the wire into the ser
vo ar
m
and loc
k
it in place with a n
ylon F
aslink.
❏
14.
Repeat steps 1- 13 f
or the left wing panel.
Mount the
Wing
Tip to the
Wing
❏❏
1.
Glue tw
o 1/4" x1/4" x 3/4" [6mm x 6mm x
19mm] balsa tr
iangle b
loc
ks onto each side of the
slot in the wing.
❏❏
2.
Examine both wing tips to deter
mine which is
the left and the r
ight.
When installed on the wing the
tip should cur
v
e
upw
ard to
w
ards the top of the wing.
❏❏
3.
Pull the wires f
or the wing tip lights from
inside of the wing tip
.
T
ie the end of the wire to the
str
ing located on the end of the wing.
Pull the wire
through the wing e
xiting at the nacelle
.
N
ote:
at this
point all of the ser
v
o
leads and the wire f
or the light
should be at the nacelle
.