Did you know – Top Flite TOPA0704 User Manual
Page 9
9
❏
❏
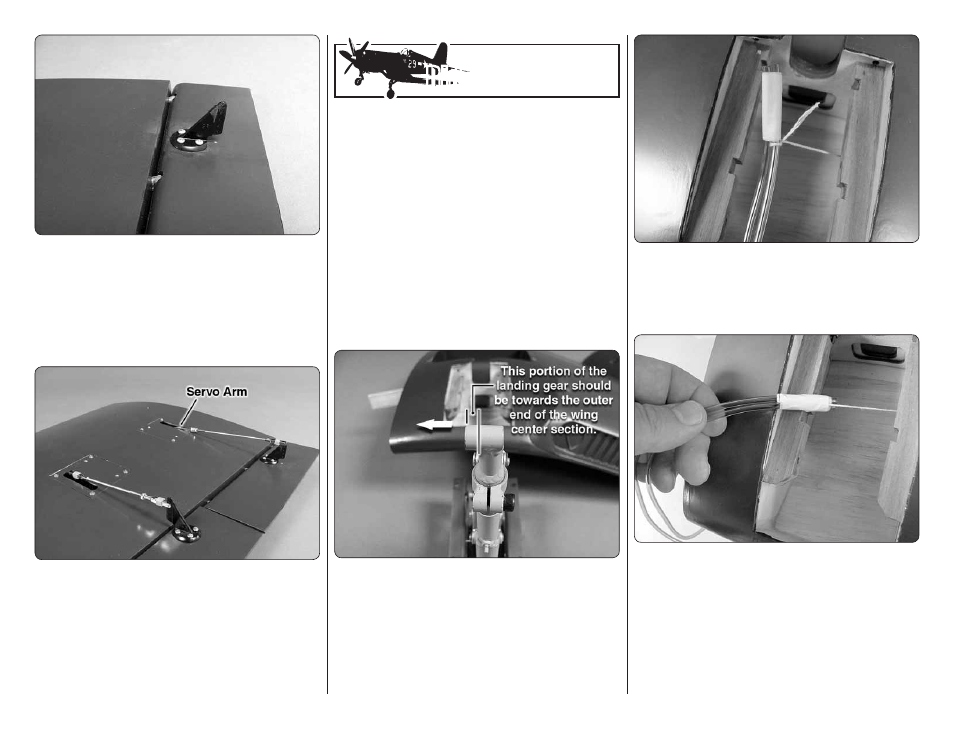
11. Install another control horn on the fl ap using
the same technique used for the aileron.
NOTE:
The
fl ap control horn should be installed as shown here.
This gives a better mechanical advantage to the servo
for operating the fl aps.
❏
❏
12. Install the fl ap servo cover, securing it with four
#2
3/8" [9.5mm] screws and #2 fl at washers
❏
❏
13. Position the fl ap to its fully retracted position
and position the servo arm so that it is rotated back
towards the trailing edge of the wing. Make the fl ap
pushrod wire assembly using the same techniques used
for the ailerons in step #8. When you have completed
the pushrod assembly install the pushrod to the fl ap
control horn and the servo arm as in step 9.
❏
14. Repeat steps 1-13 for the left wing panel.
Did You Know?…
Did You Know?…
Early in the Pacifi c War, US Navy and Marine Corps
fi ghter pilots found themselves outclassed by the
agile and well-armed Japanese A6M Zero, but even
then work was underway to provide them with better
aircraft. One of those better aircraft was the Vought
“F4U Corsair”, a rugged, powerful, and somewhat
unforgiving aircraft that featured a distinctive
inverted gull wing.
INSTALL THE MAIN LANDING GEAR
Note: Just a reminder, whenever a screw is threaded
into wood sheeting or wood blocks we recommend that
you install the screw and then remove it. Apply a drop of
thin CA glue into the hole to harden the threads. After
the glue has hardened, re-install the screw.
❏
❏
1. Before beginning your installation you need to
determine which of the landing gear is the right and
left. When installing the landing gear the longer half of
the landing gear foot should be towards the outer end
of the wing center section. Start with the installation of
the left landing gear (as viewed from the top rear) so
your work matches the photos shown here.
❏
❏
2. Cut two pieces of differently colored air line 30"
[762mm] in length. Using masking tape, tightly tape
the two lines together. Taped inside the wing is a string.
Securely tie the string around the end of one of the air
lines below the masking tape.
❏
❏
3. Pull the string forward toward the end of the two
air lines. Tape the string to the air line, keeping the string
as close to the center of the two air lines as possible. It
is a tight fi t to pull the air line through the wing so the
closer you can keep the string to the center of the two
air lines the easier it will be to pull them through the wing.