Top Flite TOPA0704 User Manual
Page 16
16
the bottom of the stabilizer. This can be a bit diffi cult.
We found it was easiest to do this with a forceps by
grabbing the head of the bolt and feeding it down into
the holes. You can also use a magnetized ball wrench
or by placing a small amount of clay into the head of
the bolt and inserting the ball wrench into it. If while
inserting the bolt it should fall into the fi berglass fairing
you can remove it through the hole in front of the fairing.
Once both bolts are in place through the stab set the
stab aside, making sure you do not dislodge the bolts.
❏
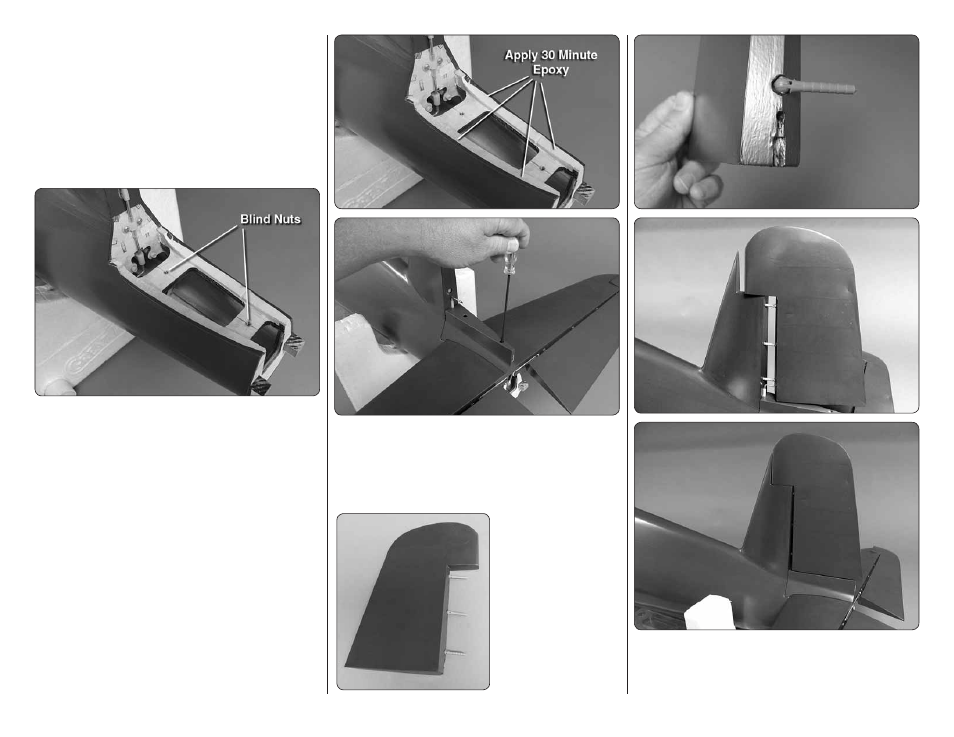
3. Next you are going to test fi t the stab to the stab
saddle to get a feel for the installation of the stab before
applying epoxy. The back of the fuselage has two blind
nuts installed in a plywood plate. The bolts in the stab will
screw into these. Before fi tting the stab to the fuselage
be sure you have a ball wrench that is not magnetized.
Using a magnetized ball wrench will likely pull the bolts
out of the stab. Place the stab onto the stab saddle.
Center the stab on the stab saddle. Then, use the ball
wrench to fi nd the head of the bolt and thread the bolt
into the blind nuts. Now that you have a feel for the
installation process remove the stab, leaving the bolts
in place in the stab, and set the stab to the side.
❏
4. Apply 30 minute epoxy to the stab saddle. Install
the stab onto the stab saddle and tighten the bolts
securing the stab to the fuselage. Clean any excess
epoxy from the fuselage and stab with a paper towel
and alcohol.
❏
5. Apply a couple of
drops of oil or Vaseline
to the center of three
hinge point hinges.
This will prevent glue
from getting into the
hinge. Apply epoxy to
one end of each hinge
and insert them into the
rudder. Once the glue
has hardened move on
to the next step.
❏
6. Apply epoxy into the small hole in the bottom of
the rudder and onto the three hinges. Insert the rudder
into the fi n. Clean any excess epoxy away with a paper
towel and alcohol. Allow the epoxy to harden.