Top Flite TOPA0704 User Manual
Page 12
12
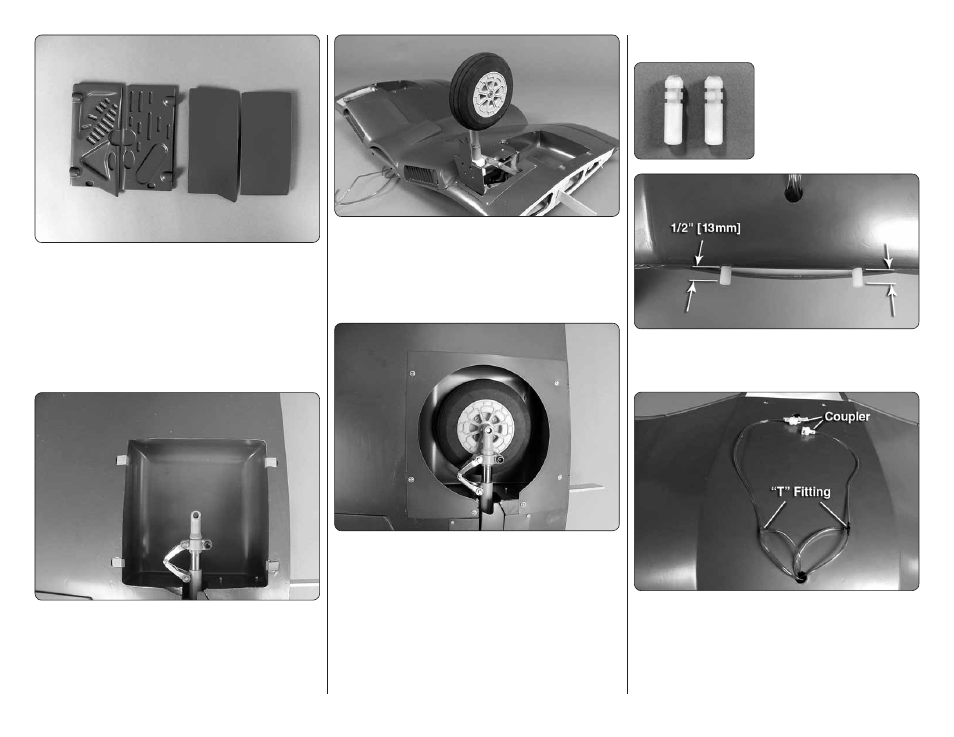
You now have a decision to make in completing the
installation of the landing gear. We have provided scale
inner doors for the more scale minded modeler. Because
of the costs and extra skill required for this we have
not engineered the installation of the doors as part of
the assembly process. We have provided the doors so
if you choose to have functional doors you will have
something to work with. If you will not be installing the
doors move on to step 15.
❏
❏
15. Locate four 3/8"
3/8"
1/4" wood blocks.
Glue them fl ush with the surface of the wing over the
openings in the wheel well.
(Do not be concerned about
the pre-drilled holes that you will cover. These holes are
for hinges if you would be installing doors).
You may
need to slightly trim the block to get a good fi t.
❏
❏
16. Using the axle and hardware that came with
the retractable landing gear, install the wheel to the
landing gear. The center hub of the wheel may need
to be opened slightly. If your axle is a bit snug open the
wheel hub with a 1/4" [ 25 mm] drill bit. Be sure you use
thread locker on the axle and axle nut.
❏
❏
17. Lower the landing gear so the wheel is in the
wheel well. Place a wheel well cover over the opening
and center the cover over the wheel and the four wood
blocks you glued in place. Be sure the wheel can be
raised and lowered without touching the cover. Drill six
1/16" [1.6 mm] holes through the cover and into the four
wood blocks and the wing at the location shown in the
photo. Secure the cover to the wing with six #2
3/8"
[9.5 mm] screws and #2 fl at washers.
❏
18. Repeat steps 6 – 17 for the left landing gear.
FINAL WING ASSEMBLY
❏
❏
1. Locate two nylon pins.
Test fi t the pins into the holes
in the leading edge of the
wing. When you are satisfi ed
with the fi t, apply epoxy to the
ribbed end of the pins and into
the holes in the wing.
Insert the pins into the holes leaving approximately 1/2"
[13mm] of the pin extending from the leading edge of
the wing.
❏
❏
2. Cut the four air lines approximately 3" [76mm]
outside of the hole in the wing. Install a “T” fi tting to the
two pink colored lines and a “T” fi tting to the two purple
lines. Install a pink and purple extension of approximately
6" [152mm] onto each of the “T’s” and then install an
air line coupler to the end of each line.