Top Flite TOPA0704 User Manual
Page 32
32
❏
16. Apply glue to the back of the ring. Install the bolt
back into the cowl ring. Tighten the bolt so the ring
tightens against the cowl ring, gluing the ring to the
cowl ring. Do this for all four rings.
❏
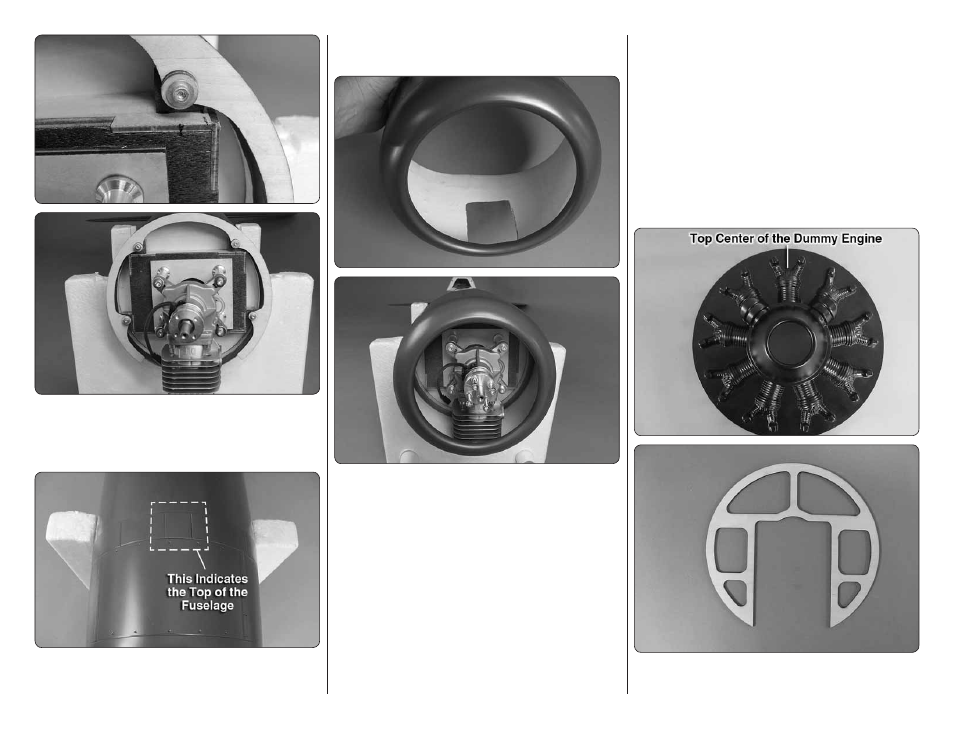
17. Position the cowl on the cowl ring so that the
small cowl fl ap is centered on the fuselage.
❏
18. With a fi ne tip felt marker trace the outline of the
cylinder head onto the inside of the cowl.
❏
19. Use a high speed rotary tool or sharp knife to
roughly cut out the area you marked. Removing this area
will provide the needed clearance to fi t the cowl to the
cowl ring. After you have removed this section of the
cowl install the cowl back onto the fuselage. You should
now have enough clearance around the cylinder head
to allow you to position the cowl so the engine shaft
is centered in the cowl. Where the cowl ring contacts
the cowl, lightly sand the cowl and clean the area with
alcohol. Position the cowl back on the cowl ring. Once
you have the cowl centered properly, carefully reach
into the front of the cowl and apply a small amount of
medium CA glue to the cowl ring to tack glue the ring
to the cowl. A micro tip on the end of the glue bottle will
help to make the process of tack gluing the cowl easier.
Use CA accelerator to quickly harden the glue. After the
glue has hardened remove the cowl from the fuselage.
A note about the cowl mounting screws.
You have
probably already noticed that with the silicone tubing
sandwiched between the plywood rings, the socket head
cap screws remain in place with the cowl ring. This will
be important and a great help to you when you mount
the cowl to the front of the fuselage once the dummy
engine is in place. For the rest of the cowl installation you
should always have the cowl mounting screws retained
in the cowl ring with approximately 1/2" [13mm] of the
threads sticking out from the back of the cowl ring.
❏
20. Locate the plastic dummy engine and the plywood
dummy engine former.