Top Flite TOPA0704 User Manual
Page 36
36
❏
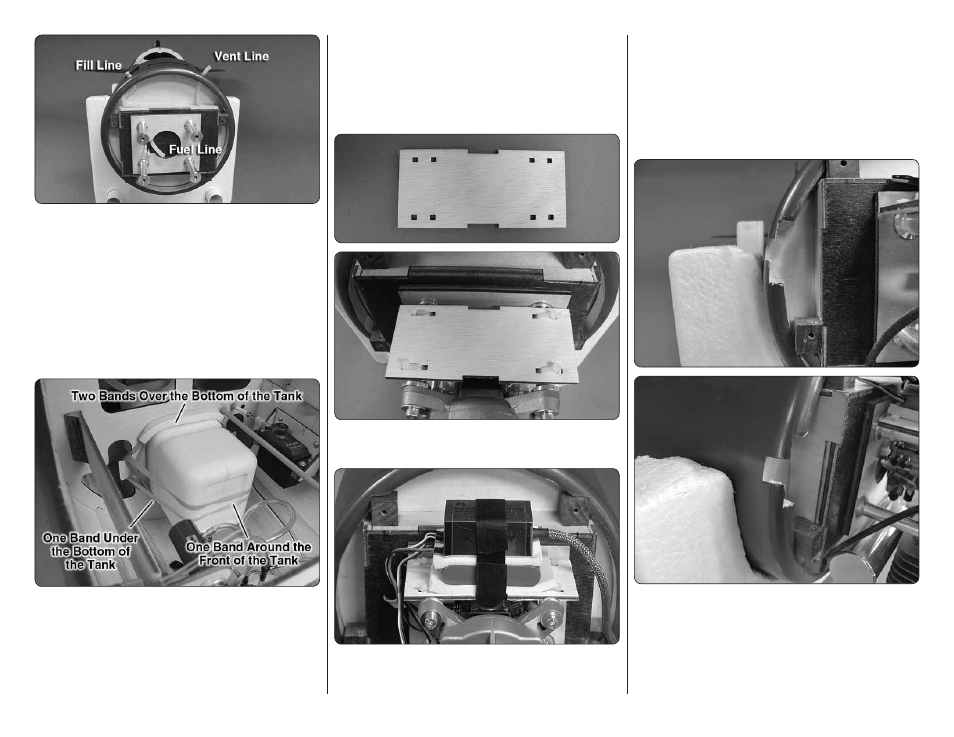
4. To install the fuel lines you will need three lengths
of 12" [305mm] fuel tubing. These will be trimmed to
length after the fuel tank is in place. Insert a line from
outside of the fuselage through the holes you drilled
and guide them inside of the fuselage as shown.
❏
5. Pull the lines into the fuselage. Install the lines onto
the proper fi ttings on the fuel tank. Once the lines are all
connected pull the lines back through the fuselage and
slide the fuel tank into position in the front of the fuselage.
Do not cut off the excess length of fuel tubing yet.
❏
6. Once the fuel tank is resting in the cradle, place
a piece of foam on the bottom of the tank. Secure the
tank with four #64 rubber bands. Two of the rubber
bands should wrap over the top of the tank, one rubber
band over the bottom of the tank and one rubber band
around the tank.
❏
7. Trim the excess fuel line from the vent and fi ll lines.
Re-install the engine onto the stand-offs. This is the last
time that you will remove the engine so when you install
it be sure to use thread locker on the bolts. Cut the fuel
line to length and slide it onto the fuel intake on the
carburetor. Install the aluminum fuel plug in the fi ll line.
❏
8. Locate the plywood accessory tray. Attach it to the
aluminum engine stand-offs with four plastic tie wraps.
❏
9. Install the ignition battery and ignition module with
foam onto the accessory tray. Hold them in place with
the Velcro
®
straps.
The next few steps refer to the installation of the ignition
switch and charge jack. The installation will require that
you glue the components to the fuselage. We chose to
do it this way to maintain as scale an appearance as
we could. We recommend you read through these steps
to become familiar with our method. Some of you may
wish to use an alternative method not requiring the
permanent installation of the components.
❏
10. Using your choice of switch harness as a guide,
cut an opening in the front of the fuselage as shown.
This is best accomplished with a sharp hobby knife and
a fl at grinding bit in a high speed motor tool.