Top Flite TOPA0704 User Manual
Page 37
37
❏
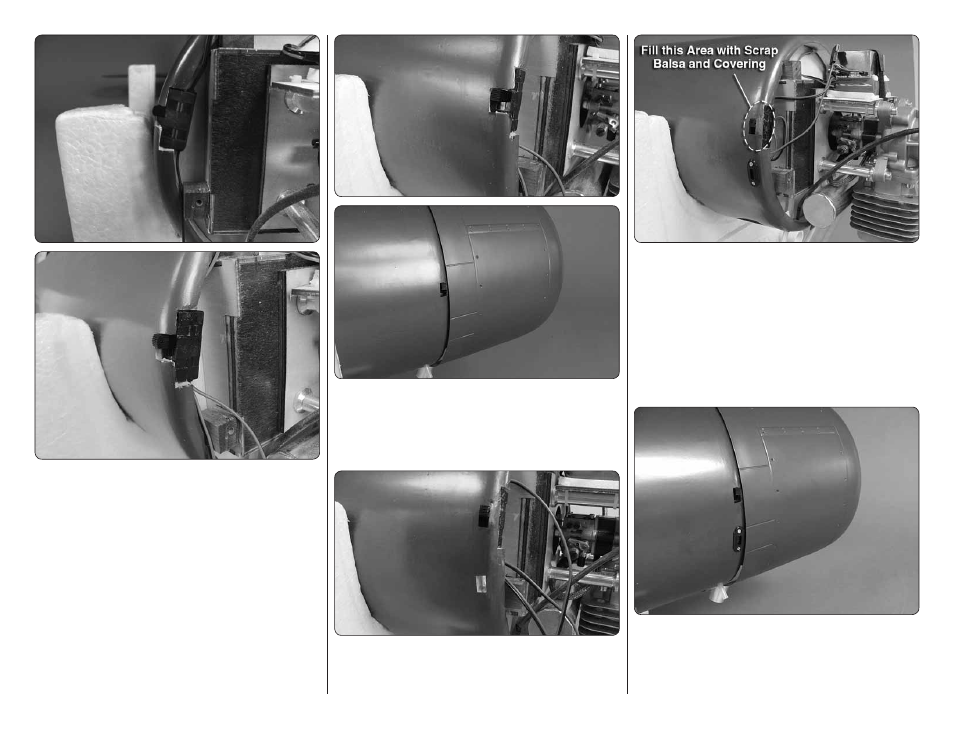
11. Remove the required material to allow the switch
to fi t in the cavity with the side of the switch resting
against the fi rewall.
❏
12. Glue the switch in place. We used 5-minute epoxy
for this. You might also consider the use of hot melt glue
for this application. As the photo shows, if you have
done a neat job of cutting the switch looks good when
the cowl is installed.
❏
13. For our charge jack we used an Ernst charge
receptacle. Like the switch, we glued it in place. Cut a
hole to fi t the charge receptacle.
❏
14. Glue the charge receptacle into the fuselage.
We also used a couple of small wood screws. Because
they are only screwed into balsa you will need to insert
the screws and then remove them and apply a couple
of drops of thin CA to harden the threads before re-
inserting the screws. From the balsa that you cut away
for the switch you might wish to glue balsa in place next
to the switch to fi ll in the empty area. You can remove the
covering from the scrap that you cut from the fuselage
and reuse it to cover the scrap balsa you glued in place.
When the cowl is installed you can see that the switch
and charge jack appear as a neat, clean installation.