Top Flite TOPA0704 User Manual
Page 24
24
❏
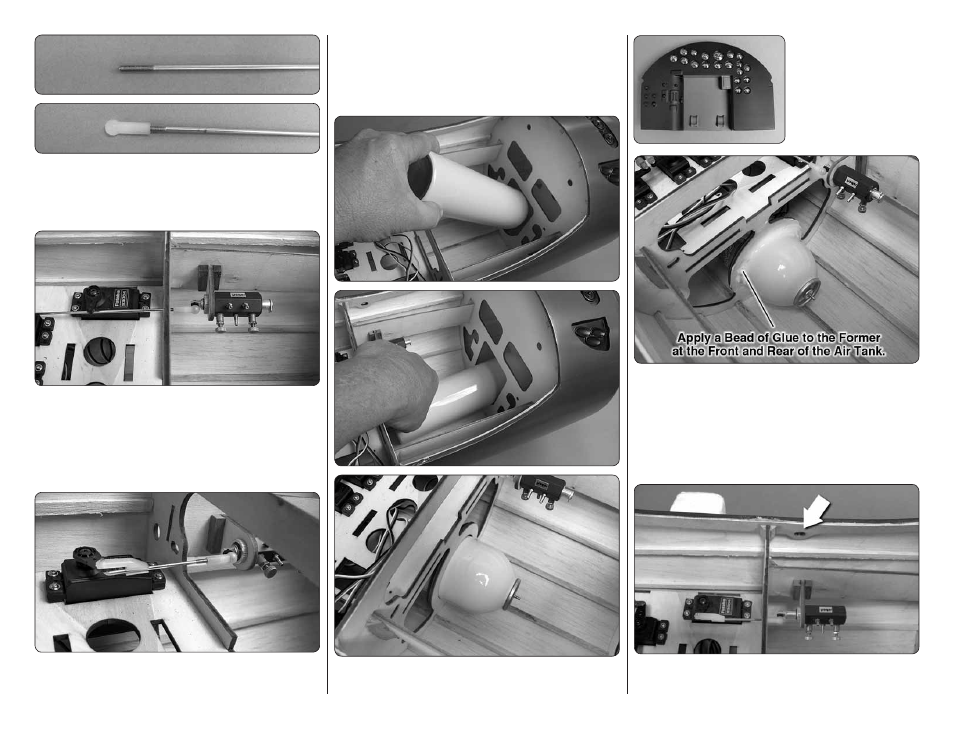
5. From a 2-56
6" [152 mm] wire pushrod, cut off
a portion of the threaded end of the wire leaving 1/2"
[13 mm] of threads on the wire. Install a nylon ball link
onto the threaded end of the wire.
❏
6. Snap the ball link onto the ball on the end of the
air control valve. Position the plywood mounting bracket
on the plywood former so that the pushrod wire is in line
with the outer hole in the servo arm. The wire should rest
on the underside of the servo arm. Glue the plywood
mounting bracket to the former.
❏
7. Push the air control arm into the valve housing and
rotate the servo arm forward towards the valve. Make a
mark on the wire where it passes under the hole in the
end of the servo arm. Make a 90 degree bend in the
wire on the mark. Cut off the excess wire 3/8" [9.5mm]
above the bend. Install the wire into the servo arm and
secure it with a nylon Faslink.
❏
8. Install the air tank into the hole under the servo tray.
❏
9 . L o c a t e t h e
instrument panel and
temporarily install it into
the front of the cockpit.
Hold it in place and then slide the air tank into position
in the support holes. You will see that the air tank makes
contact with the back of the cockpit. Glue the air tank to
the support formers with silicone or Shoe Goo,
™
leaving
about 1/8" [3.2mm] of clearance between the back of
the instrument panel and the bottom of the air tank.
Remove the instrument panel and allow the glue to dry.
❏
10. On both the left and right side of the fuselage there
is a hole that is sized to fi t the air fi ll valve. Determine