Top Flite TOPA0704 User Manual
Page 7
7
❏
❏
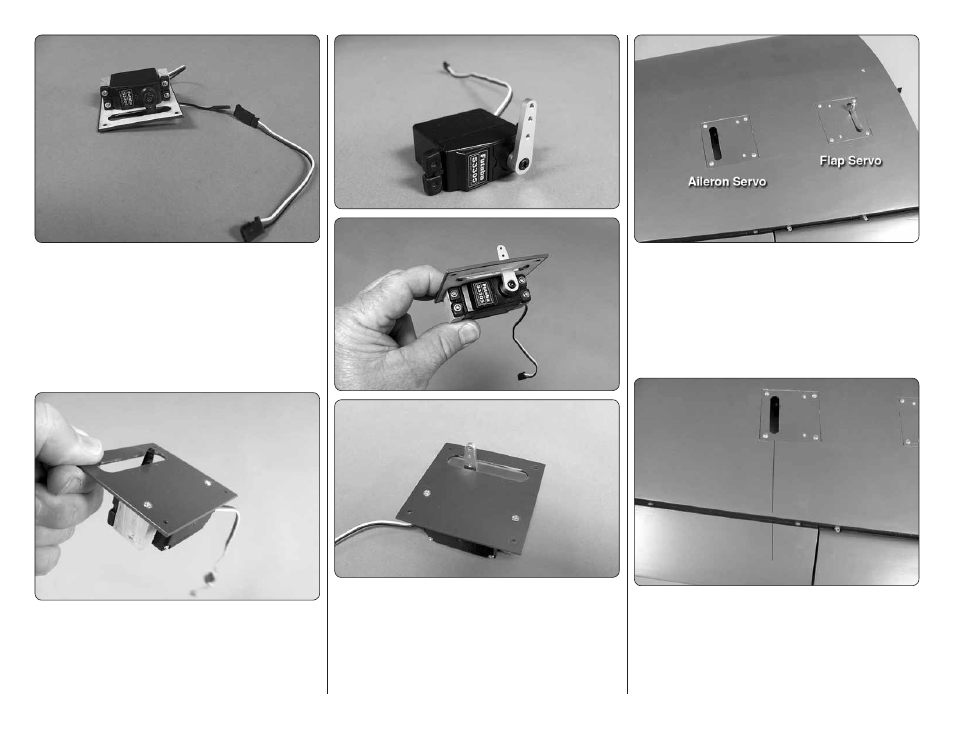
2. Remove the aileron servo cover from the
bottom of the wing. Place your servo between the servo
mounting blocks located on the bottom of the cover. Drill
a 1/16
"
[1.6mm] hole through each of the servo mounting
holes into the hardwood block. Install the servo to the
servo cover with the screws included with your servo.
Attach a 6" [152mm] servo extension to the servo lead.
Secure the lead with heat shrink tubing, tape or some
other method to assure the leads stay connected.
❏
❏
3. On the other side of the servo cover drill a 1/6"
[1.6mm] hole through the servo cover and into each
of the hardwood blocks. Secure the block to the cover
with a #2
3/8" [9.5mm] wood screw in each of the
holes you drilled.
❏
❏
4. With another servo, center the servo and install
a 1" [25mm] servo arm (FUTM2120 for Futaba servos).
Remove the fl ap servo cover from the wing and install
the servo using the same technique used for the aileron.
Be sure to install the #2
3/8" [9.5mm] wood screw in
each of the holes you drilled.
❏
❏
5. There is a string that goes through the wing and
is attached to the root rib of the wing panel. If needed,
tie the aileron servo lead to the string and then pull the
lead through the wing. (Since you are passing the lead
through a very short distance in the wing you probably
do not need to use the string). Secure the aileron servo
cover with four #2 X 3/8" [9.5mm] screws and four #2
fl at washers.
❏
❏
6. Using a fi ne tip marker draw a line from the
servo arm toward the aileron. Under the skin of the
aileron there is a plywood plate. Place a large black
nylon control horn onto the aileron so that the horn is
in line with the line you have drawn. Holes in the horn
should be positioned over the hinge line.