Fact, Dc-3, Mount the servos in the wing – Top Flite TOPA0500 User Manual
Page 45
❏
7. Accurately align the center flap with the center TE
spar and clamp it in position. Drill 1/8" holes through the
flap hinge blocks in the flap and the wing. If your drill bit
is not long enough, drill the holes as far as you can, then
remove the flap and continue drilling holes the rest of
the way through the wing.
❏
8. Remove the center flap from your wing and enlarge
the opening of the holes to accommodate the flap
hinges. Test fit your hinges in the flap and the wing.
Enlarge the holes if necessary so the hinges will fit up to
the centerline of the hinge pin.
❏
9. Bevel the LE of the flap as shown on the cross
section of the plan and test fit it to the wing with your
hinges. Test the movement of the flap and make sure
everything works.
Nice isn’t it!
Skip step 10 if you are building working flaps.
❏
10. Refer to the wing plan and build the bottom outer
flap skins the same way you built the center flap skins
using the 1/32" x 3/4" x 15" plywood strip and 3/32" and
1/16" leftover balsa. Glue the bottom outer flap skins to
the wing the same as the center flap skin. Proceed to
Mount the servos in the wing
.
❏
11. Refer to the wing plan and build the outer flaps
the same way you built the center flap using the 1/32" x
3/4" x 15" plywood strip and 3/32" and 1/16" leftover
balsa. Temporarily fit the outer flaps to the wing with the
hinges the same as you did the center flap.
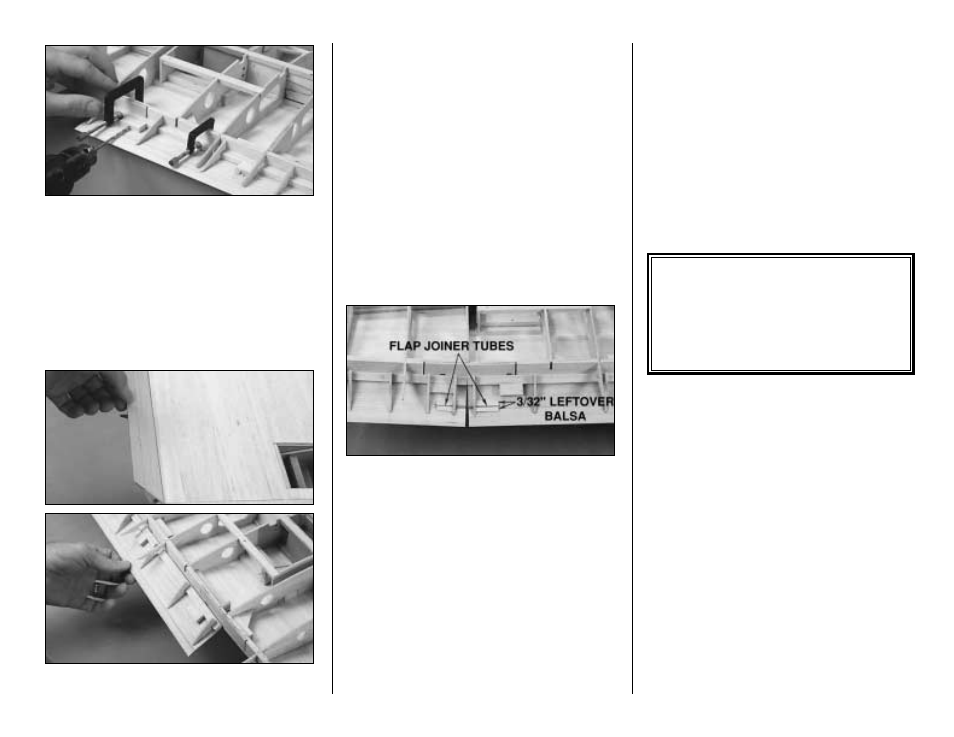
Let’s connect the outer flaps to the center flap. It’s easy...
Refer to this photo and refer to the flap detail on the
wing plan while you join the flaps.
❏
12. Roughen the outside of the 3/32" x 1-1/4" brass
flap joiner tubes and remove burrs from the ends. Use a
file to remove burrs from the ends of both 1/16" x 2-3/4"
flap joiner wires as well. Bend the flap joiner wire in the
middle to match the bend in the wing.
❏
13. Drill a 3/32" hole in the flap ribs at the joining ends
of the flaps to accommodate the joiner tubes. Move your
drill in and out to slightly enlarge the hole in one of the
ribs to allow for positioning.
❏
14. Insert the joiner wire and both joiner tubes. Hold
them in place with your fingers as you actuate the flaps.
Check for smooth movement. Bend or straighten the joiner
wire or adjust the position of the joiner tubes as necessary.
❏
15. Glue the joiner tubes to the flap with a dab of
medium CA. Actuate the flaps once again to check for
smooth operation. Glue pieces of leftover 3/32" balsa to
both sides of the joiner tubes with medium CA.
❏
16. Join the other outboard flap to the other end of the
center flap the same way. From now on, you will have to
remove all three flaps from the wing together. You may
leave the flaps in position for the rest of the wing
construction
(that gives you a chance to show them to your
friends when they come over to check your progress).
MOUNT THE SERVOS IN THE WING
❏ ❏
1. Cut the opening in the bottom of the left side of
the center section for the die-cut 1/16" plywood servo
hatch cover. Start by cutting the opening under size
and carefully enlarge it using a fresh #11 blade and a
straightedge until the hatch cover fits.
Hint: As you
zero-in
on the final shape of the hatch
opening, use the hatch cover itself as a template to
finalize the exact shape and size of the opening.
❏ ❏
2. Place the hatch cover on the servo hatch rails
making sure it is in the correct orientation as shown on
the plan. Drill 1/16" holes through the punch marks in
the hatch cover into the rails.
DC-3
Fact
It usually took about five days or less to build a
DC-3. Between 1935 and 1947, the Santa
Monica, Long Beach, and Oklahoma City plants
produced a total of 10,654 DC-3 and C-47
variants—a success well beyond the wildest
dreams of Douglas.
- 45 -