Fact, Dc-3 – Top Flite TOPA0500 User Manual
Page 26
BUILD THE BOTTOM OF THE FUSELAGE
❏
1. Place your fuselage upside down in a stand so you
can work on it. We prefer the Robart
Super Stand
. You
can see it in many of the following photos.
❏
2. Gather the die-cut 1/8" plywood fuselage formers
F1A through F11AD for the bottom of the fuselage. Glue
former F5AD to F5A. From now on the F5A/F5AD
assembly will be referred to as F5A.
❏
3. Use a ballpoint pen to mark a line 1/16" inside the
edge of former F1A. Bevel the edge of F1A to this line.
❏
4. Glue formers F1A through F12A to their respective
formers. Use a straightedge to align the “A” formers with
the top formers as you glue them in place. From now on
the top and bottom former assemblies will be referred to
as just
formers
(for example, F4 and F4A will be referred
to as F4). Add the die-cut 1/8" plywood inner wing
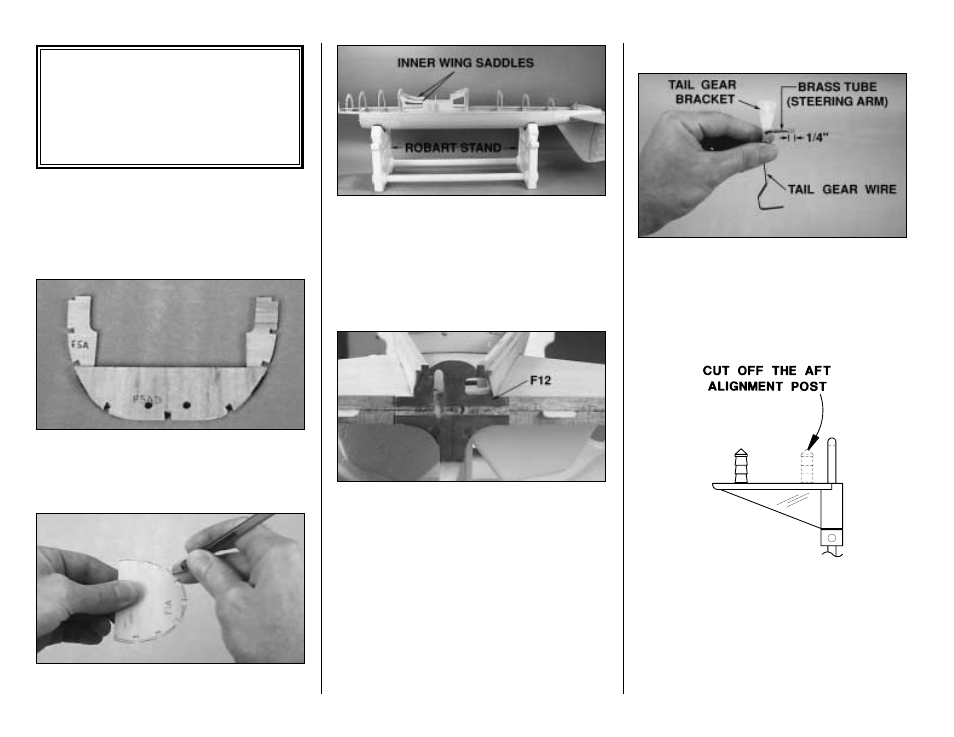
saddles to the assembly and glue them in place.
For this photo, we darkened F12 and removed the joiner
wire to illustrate how F12 should look when you’re done.
❏
5. Use a rotary tool or a hobby knife to cut former F12
to accommodate the elevator joiner wire and the horn on
the joiner wire. Test fit the elevators with the joiner wire
to make sure you’ve allowed enough clearance.
INSTALL THE PUSHRODS
Refer to this photo for step 1 and 2.
❏ ❏
1. Cut the aft
alignment post
off the nylon tail gear
bracket. Use pliers to flatten 1/4" of one end of the 1/8"
x 1-1/8" brass tube. Slide the tube onto the tail gear
wire and place the assembly over the plan to make sure
it is the correct length.
❏
2. Read the Hot Tip that follows and silver solder the
brass tube to the tail gear wire.
DC-3
Fact
It was not long before the U.S. military became
interested in the DC-1. The Army Air Corps had a
need for a modern cargo/troop transport aircraft.
Although impressed with the DC-1 after test pilots
put it through its paces, the military opted to wait
for the improved DC-2 before placing orders.
- 26 -