Top Flite TOPA0500 User Manual
Page 39
❏ ❏
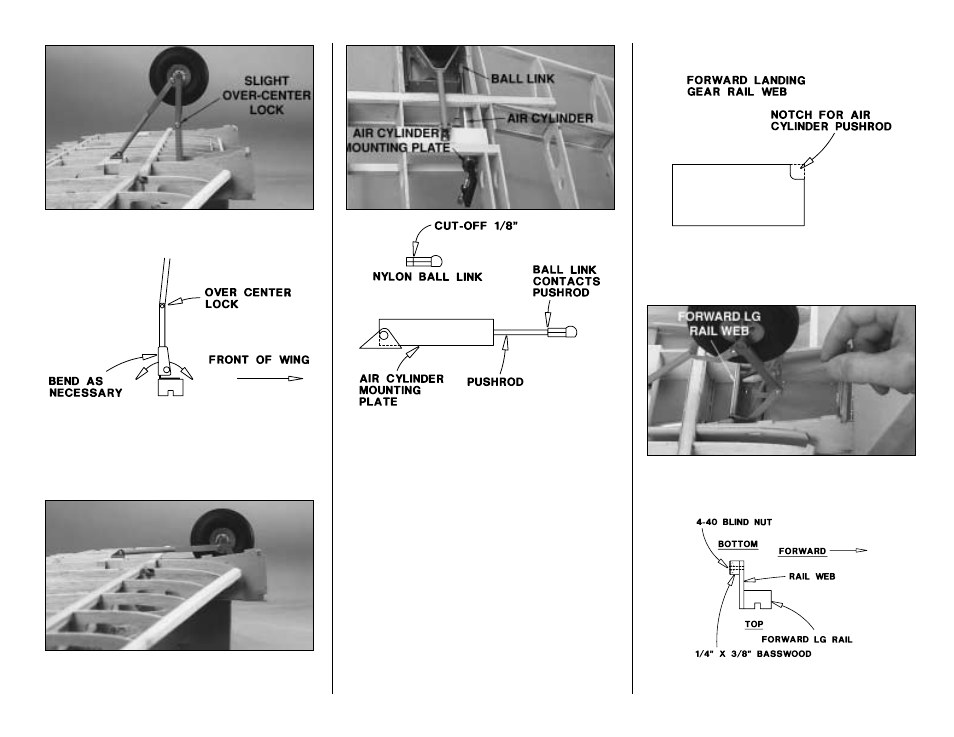
R8. If necessary, adjust the front retract mount by
bending it so you can achieve a slight
over center
lock
when the gear is extended.
❏ ❏
R9. Retract the landing gear and make sure
everything works well and there is no binding or
interference with the airframe.
❏ ❏
R10. Cut 1/8" from the end of a nylon ball link (not
included). Cut the threaded portion from the threaded
brass coupler that came with your ball link package (not
included). Screw the nylon ball link all the way onto the air
cylinder with the threaded rod (or use a 1" threaded rod
purchased separately). Snap the ball link onto the ball on
the landing gear. Hold the air cylinder mounting plate to
the air cylinder mounting rail with a small C-clamp.
Retract and extend your gear by hand. Make adjustments
if needed so the air cylinder is in the correct position and
none of the moving parts interfere with the airframe.
NOTE: Carefully check the position of the front air fitting.
If it interferes with the spar, rotate the air cylinder 90
degrees. Do not notch the spar to clear the fitting. Mount
the air cylinder to rib W3 instead of the rail. Use leftover
1/4" x 3/8" basswood on the back of the rib to secure the
mounting screw.
❏ ❏
R11. Mount the air cylinder to the air cylinder
mounting rail (or rib W3) with a #4 x 1/4" screw (or cut
1/8" from a #4 x 3/8" screw) (not included).
❏ ❏
R12. Glue the aft landing gear rail and the servo
hatch rails in place.
❏ ❏
R13.
Notch
the 1/8" x 1-5/16" x 2-13/16" plywood
forward landing gear rail web as required so the air
cylinder pushrod will not interfere with the web when you
fit it in position where shown on the plan.
❏ ❏
R14. Position, then mark the rail web for the outer
mounting holes in the vertical part of the landing gear
mount (don’t bother with the middle hole).
❏ ❏
R15. Remove the rail web. Glue a piece of leftover
1/4" x 3/8" basswood to the back of the rail web over the
- 39 -