LAARS NeoTherm LC NTV1700 - Install and Operating Manual User Manual
Page 68
LAARS Heating Systems
Page 64
Boiler 1
(Lead/Lag Master)
Boiler 2
Secondary Primary
TB9, pin 7
connect to
TB9, pin 1
TB9, pin 8
connect to
TB9, pin 2
TB9, pin 9
connect to
TB9, pin 3
TB9, pin 10 connect to
TB9, pin 4
TB9, pin 11 connect to
TB9, pin 5
TB9, pin 12 connect to
TB9, pin 6
3. Repeat the process for Boiler 2 and 3, and
Boiler 3 and 4. The connections to the other
boilers follow the pattern we just described.
Use Fig. 79 as your reference.
4. Connect the drain wires from all of the wire
assemblies together and ground the drain wire
on one end of the assembly only.
5. Turn on the power to all of the boilers when
you are finished.
Job I – Set the Parameters Used by the
Lead/Lag System
(This is a Lead/Lag function – do this once for the whole Lead/
Lag system. Use the controller set up as the Lead/Lag Master –
usually the Primary controller on Boiler 1.)
We have already explained how the Lead/Lag
Master controls the operation of the Lead/Lag
system. Your job at this point is to enter the control
values that the Lead/Lag system will use.
Fig. 80 - ‘home’ screen
1. From the ‘home’ screen (Fig. 80), press the
Lead Lag Master button. Figure 81 shows the
screen that follows.
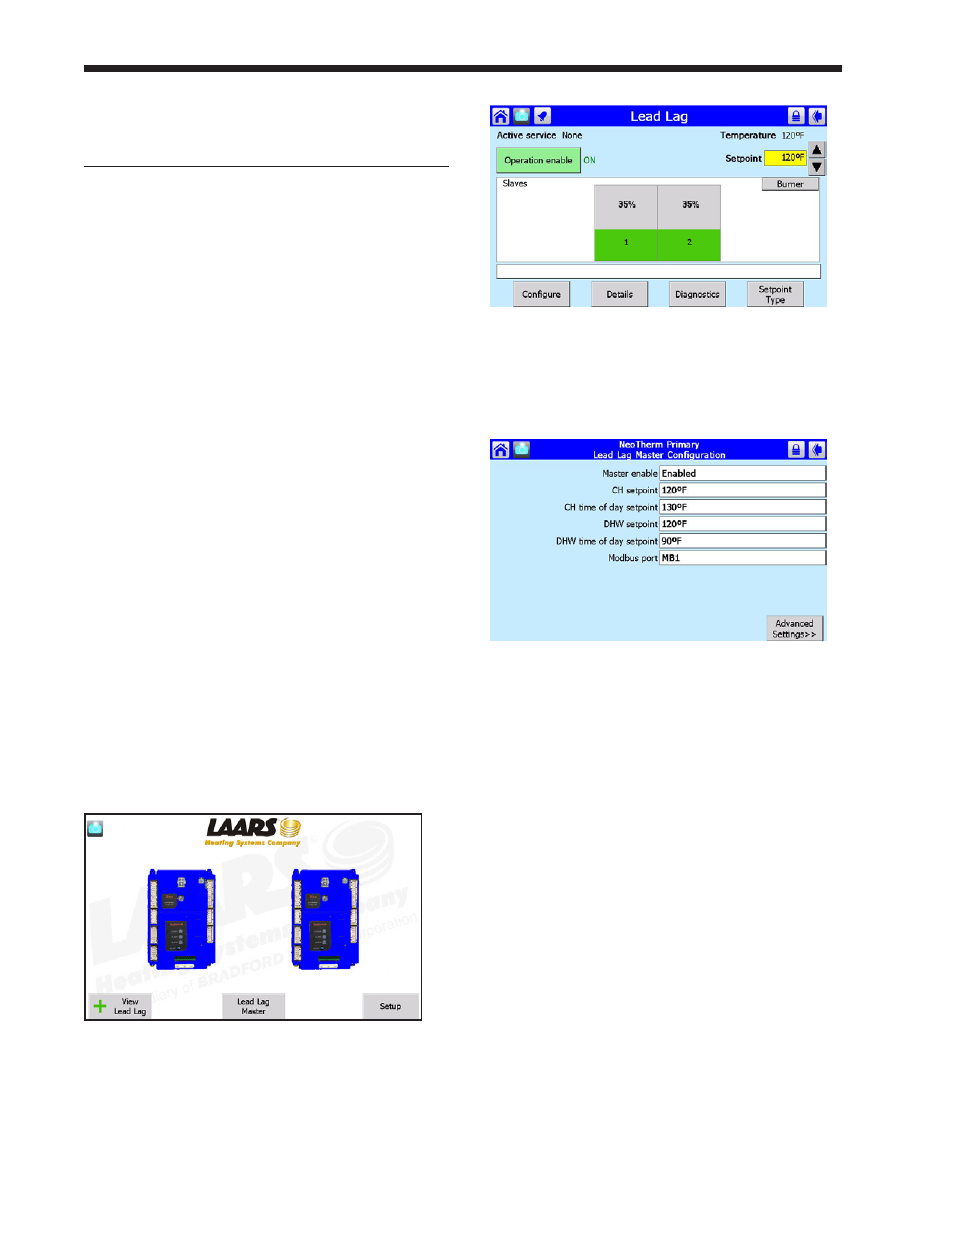
Fig. 81 – Lead/Lag Master Screen
2. Press the Configure button. The display will
present the Lead/Lag Master Configuration
Screen (Fig. 82).
Fig. 82 – Lead/Lag Master Configuration
3. This screen shows the most important settings
for the Lead/Lag system. The settings can be
changed from this screen. Some of them will
require passwords.
Here are the settings on this screen:
Master enable -
Enabled = Lead/Lag system enabled
CH setpoint -
Setpoint for LL Central Heating
CH time of day setpoint -
Separate Time-of-Day Setpoint for Central
Heating (See the material on “About the
‘Time of Day’ Function at the end of this
section)
DHW setpoint -
Setpoint for Domestic Hot Water