LAARS NeoTherm LC NTV1700 - Install and Operating Manual User Manual
Page 59
NeoTherm LC Boilers and Water Heaters
Page 55
9.4
Installation Jobs
Note – To install your system, you will not need to do
all of the installation jobs listed here. Please refer
to Section 9.3 for a list of specific installation jobs
necessary to install your system.
Job A – Note for Systems Using Common
Venting
If multiple NeoTherm LC’s share a single vent, the
system must be engineered by a competent venting
specialist. The design involves the selection of
draft-inducing equipment, hardware and controls to
properly balance flue gas pressures. Do not common
vent NeoTherm LC’s unless the vent system meets
this requirement. NeoTherm LC’s are never
permitted to share a vent with Category I appliances.
Job B - Naming the Controllers
(This is an individual function – do this for each of the controls.
Use the separate Touch Screen on each boiler.)
Each boiler includes two separate controls, as shown
in Fig. 48. In a system with four boilers, there will
be eight separate controls. See Fig. 49. The first job
is to name each of these controllers.
1. We will start by entering a name for the first
controller in the line – the Primary controller
on Boiler 1. Start at the “Home” screen. Press
the icon for the Primary control.
Fig. 52 – ‘home’ screen
2. The system will present the Status Summary
screen for that controller. See Fig. 53.
Fig. 53 – Status Summary Screen
3. Select the “Configure” button in the bottom
left-hand corner of the display. Figure 54
shows the Configuration menu.
Fig. 54 – Configuration Menu
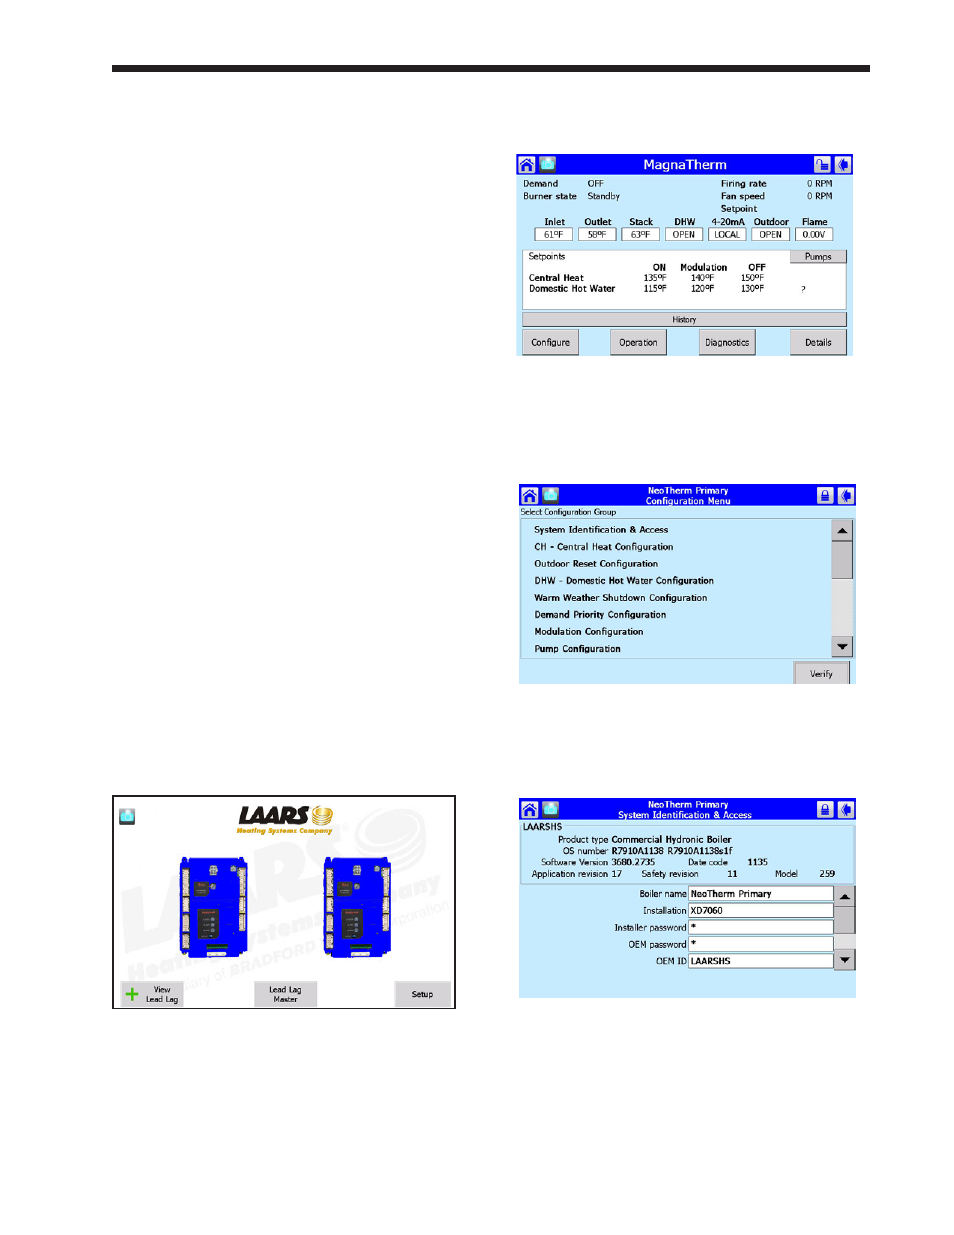
4. Select the line for System Identification and
Access.
Fig. 55 - System Identification and Access
5. Go down to the line for Boiler Name to change
the name of the control. In this example,
we are working with the Primary control on
Boiler 1, so the name here should be “Boiler
1 Primary.” To change the entry, press on
the line for Boiler Name. The system will