Great Planes P-51D Mustang 40 Kit - GPMA0175 User Manual
Page 8
D 3. Check the shaped balsa elevators and sand if neces-
sary to match the plan.
D 4. Draw a centerline all around the edges of the stab
and elevators.
D 5. Sand both sides of the elevators to a taper as shown
on the plans. The trailing edge should end up approximately
3/32" wide and have a rounded shape (do not sand to a sharp
edge). Sand the leading edge to a "V-shape" as shown on the
plan.
D 6. Temporarily tape the elevators to the stab.
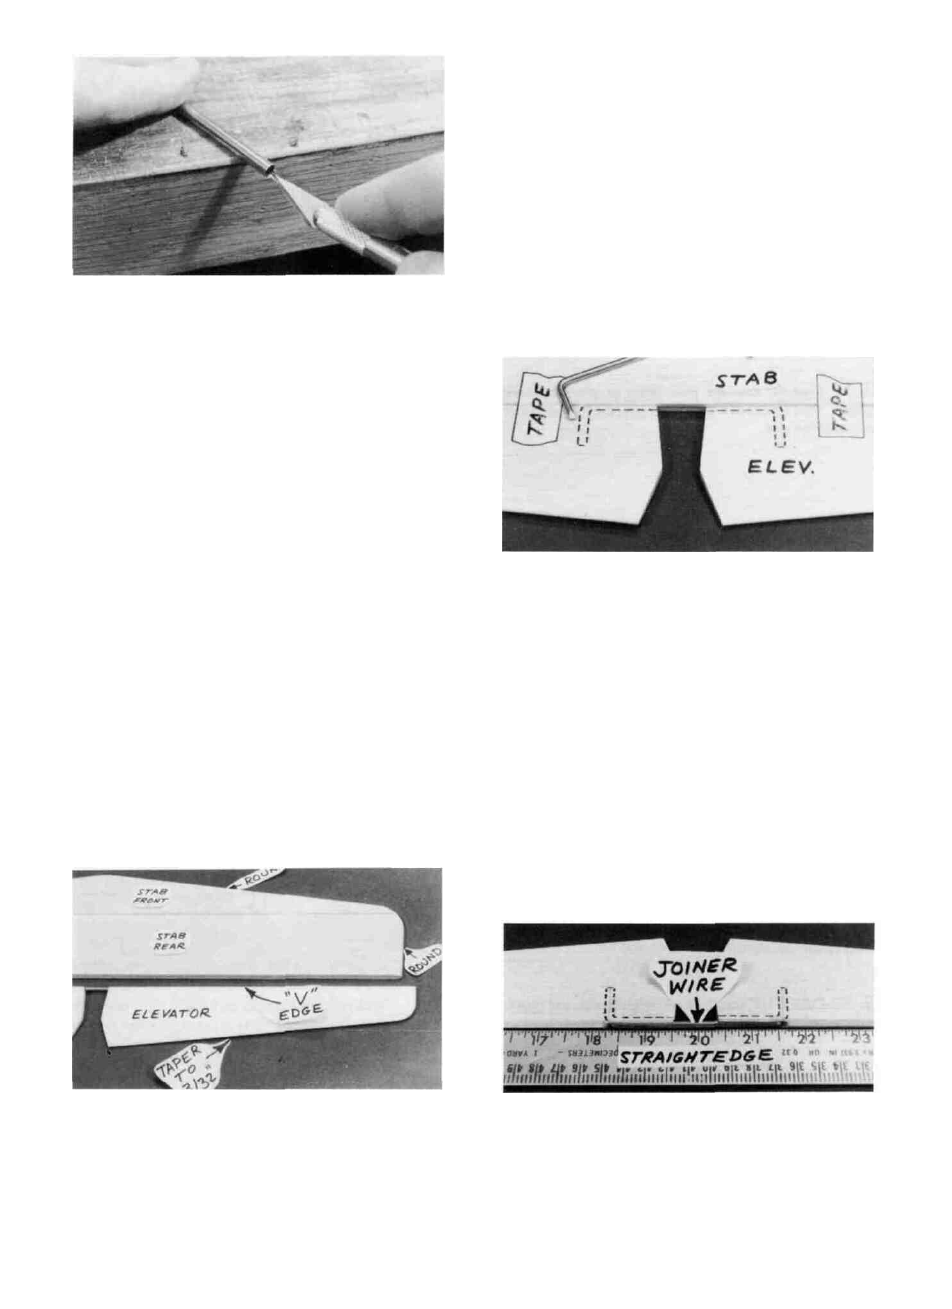
HINT: Using an Xacto knife, sharpen the inside of one
end of a 1/8" diameter brass tube, and use it to cut the groove
in the leading edge of the rudder.
*NOTE: The tailwheel location and installation shown
on the plan is designed for easy installation and durability.
and for the best possible ground handling characteristics.
However, if you are building your P-51 for sport scale
competition, you may want to install a tailgear (fixed or
retractable) in the "scale location" shown on the plan.
These instructions do not cover such a modification, but
the location is shown for your convenience.
BUILD THE STABILIZER AND
ELEVATORS
To build the stab and elevators you'll need the following:
1/4" shaped balsa stab front
1/4" shaped balsa stab rear
1/4" shaped balsa elevators
1/8" bent wire elevator joiner
D 1. Glue the stab front to the stab rear. Sand the
outline of the stab to match the plan, then sand both sides of
the stab smooth.
D 7. Lay the 1/8" wire elevator joiner in place on the
elevators and mark its outline using a fine point felt-tip pen.
D 8. Accurately drill holes in the elevators for the 1/8"
wire joiner. Begin by drilling a 1/16" or 5/64" pilot hole, then
drill the final hole to a depth of 7/8" with a 9/64" drill bit.
(The hole is drilled slightly oversize to allow for positioning,
and to create a hard epoxy "sleeve" around the wire).
D 9. Using an Xacto knife, sharpen the inside of one end
of a 1/8" diameter brass tube and use it to cut grooves in the
leading edge of the elevators to accept the joiner wire.
D 10. Roughen the joiner wire with coarse sandpaper, then
clean the wire thoroughly with alcohol to remove any oily
residue.
D 2. Sand the leading edge and ends to a rounded shape.
(Leave the center portion of the LE square).
D 11. Trial fit the joiner wire into the elevators, then glue
it in using 5-minute or 30-minute epoxy. Work plenty of
8