Fuselage assembly – Great Planes P-51D Mustang 40 Kit - GPMA0175 User Manual
Page 21
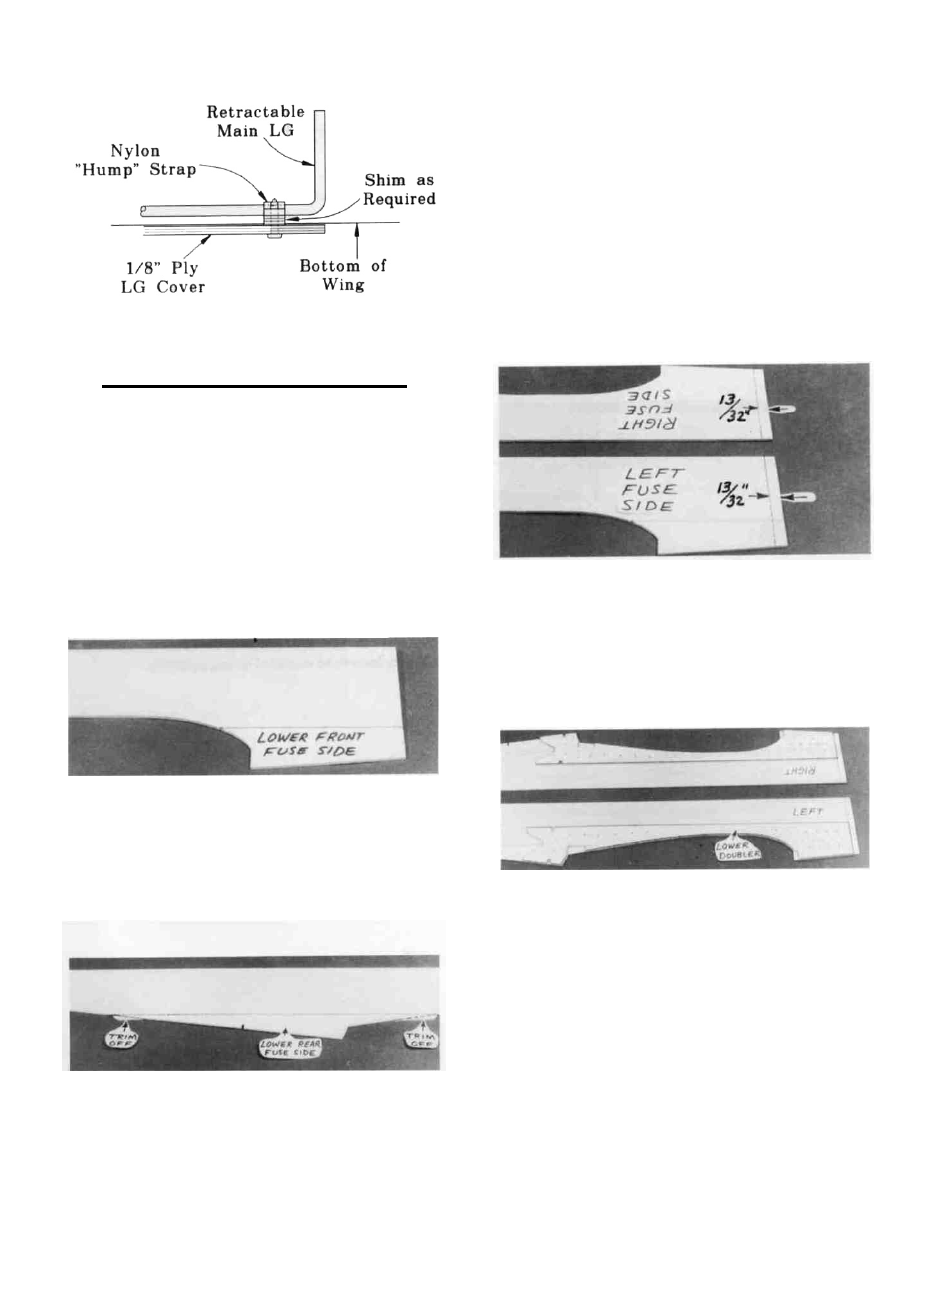
cover and the nylon straps, to raise the L.G. cover flush with
the surface of the wing.
D 4. Trim and sand off the die-cut "bumps" from the front
and rear portion of the lower rear fuse side, blending with the
upper fuse side.
D 5. Inspect the glue joints for gaps, adding thick CA
glue if necessary. Sand the glue joints smooth on both sides
using a T-bar and 100-grit sandpaper, then repeat the above
steps to make the other fuse side.
D 6. Place the two assembled fuse sides together. Sand
the edges as necessary to make the two sides identical.
FUSELAGE ASSEMBLY
PREPARE FUSE SIDES
D 1. Lay one of the shaped 1/8" balsa fuselage sides in
place on the fuselage plan side view. Carefully position the
fuse side so the front edge lines up with the front of F-1 on the
plan. Tape or pin the fuse side so it can't move. NOTE: The
fuse side may be a little longer at the rear than indicated by the
plan. This is as it should be.
D 2. Carefully position the die-cut 1/8" balsa lower front
fuse side so the rear edge lines up with the front of the wing
saddle opening on the plan (the rear edge of F-2A). You may
have to lightly sand the top edge of the die-cut 1/8" balsa for
a good fit against the bottom edge of the fuse side. Edge glue
the lower front fuse side to the fuse side. NOTE: Use waxed
paper under the balsa to avoid gluing to the plan.
D 3. Carefully position the die-cut 1/8" balsa lower rear
fuse side so it lines up with the plan. Edge glue the lower rear
fuse side to the fuse side.
D 7. As shown in the above photo, designate the fuse
sides "RIGHT" and "LEFT". From the front edge of both
sides, accurately measure back 13-32" and draw a line
parallel with the front edge.
D 8. Find the die-cut 1/8" balsa lower fuse side dou-
blers. Position them on the fuse sides, carefully lining up
their front edges with the 13/32" lines you previously drew.
Line up the aft portion of the lower doublers with the bottom
edge of the fuse sides.
REMEMBER: You must make a LEFT and a RIGHT
fuse side!
Glue the lower doublers to the fuse sides by applying thin
CA all around the edges while holding the doubler firmly in
place. The thin CA will not penetrate far enough from the
edges, so you must also apply a few drops of thin CA in each
of the pinholes in the doublers (see the dots in the photo).
21