Center l.e. vertically on front of ribs – Great Planes P-51D Mustang 40 Kit - GPMA0175 User Manual
Page 11
slightly too long. Center the spar on the plan so an equal
amount protrudes on both ends.
D D 10. Place the ribs on the spar in their approximate
position, but do not glue. NOTE: Make sure ribs W-3 and
W-4 are installed with the LG notches down, and W-l is
installed with the servo opening pointing up.
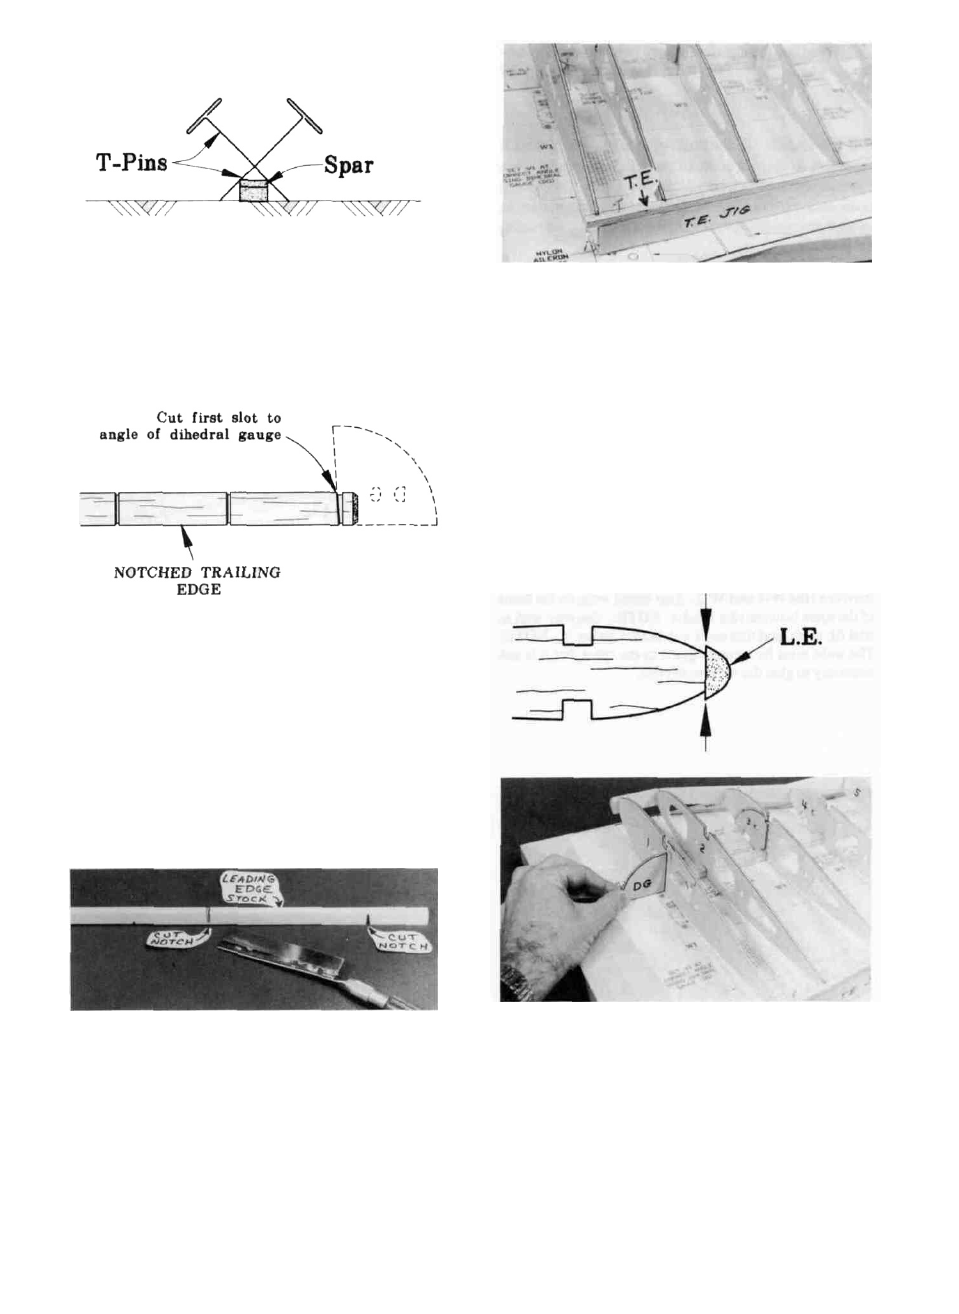
D D 11. Examine the shaped, notched balsa trailing edges.
Notice that the notches at one and of each TE are only 1-7/8"
apart. These are the notches for W-1 and W-2. Also notice
that all notches in the TE are vertical; however, rib W-l will
be installed at a slight angle using the Dihedral Gauge.
Therefore, you should now modify the notch for W-l by
cutting it to the angle of the rib. You may determine the
approximate angle of the cut by holding the Dihedral Gauge
(DG) against the TE as shown above.
D D 12. Examine the shaped, notched balsa leading edges.
Notice that one end does not have notches, this is the root end.
Use a razor saw to cut notches in the leading edge as shown
in the "Leading Edge Detail" on the wing plan. These
notches will aid in "breaking" the leading edge in the correct
locations.
D D 13. Insert the rear ends of the ribs into the notches in
the TE, then block up the TE with the 1/4" balsa TE Jig
supplied. NOTE: The narrow end of the TE jig is at rib
W-ll. Pin the jig to the building surface.
D D 14. Pin the TE to the TE Jig, making sure the ribs line
up with the plan.
D D 15. Glue ribs W-2 through W-ll to the TE. (Apply
glue sparingly, to avoid gluing the TE to the TE Jig).
D D 16. Bend (break) the leading edge at the notches
which you previously cut, then insert the front ends of the ribs
into the notches in the LE. NOTE: Position the LE as shown
here
CENTER L.E. VERTICALLY
ON FRONT OF RIBS
D D 17. Make sure the ribs are fully down on the plan and
ribs 5 -11 are inserted into the LE notches. Glue ribs 2-11
to the LE and bottom spar. Angle rib W-l slightly using the
dihedral gauge (DG). Glue W-l to the TE, LE and bottom
spar. NOTE: Thin CA glue may be used in tight-fitting
joints, but to insure strong joints we recommend that you
follow up by also applying medium or thick CA to all joints.
11