Great Planes P-51D Mustang 40 Kit - GPMA0175 User Manual
Page 13
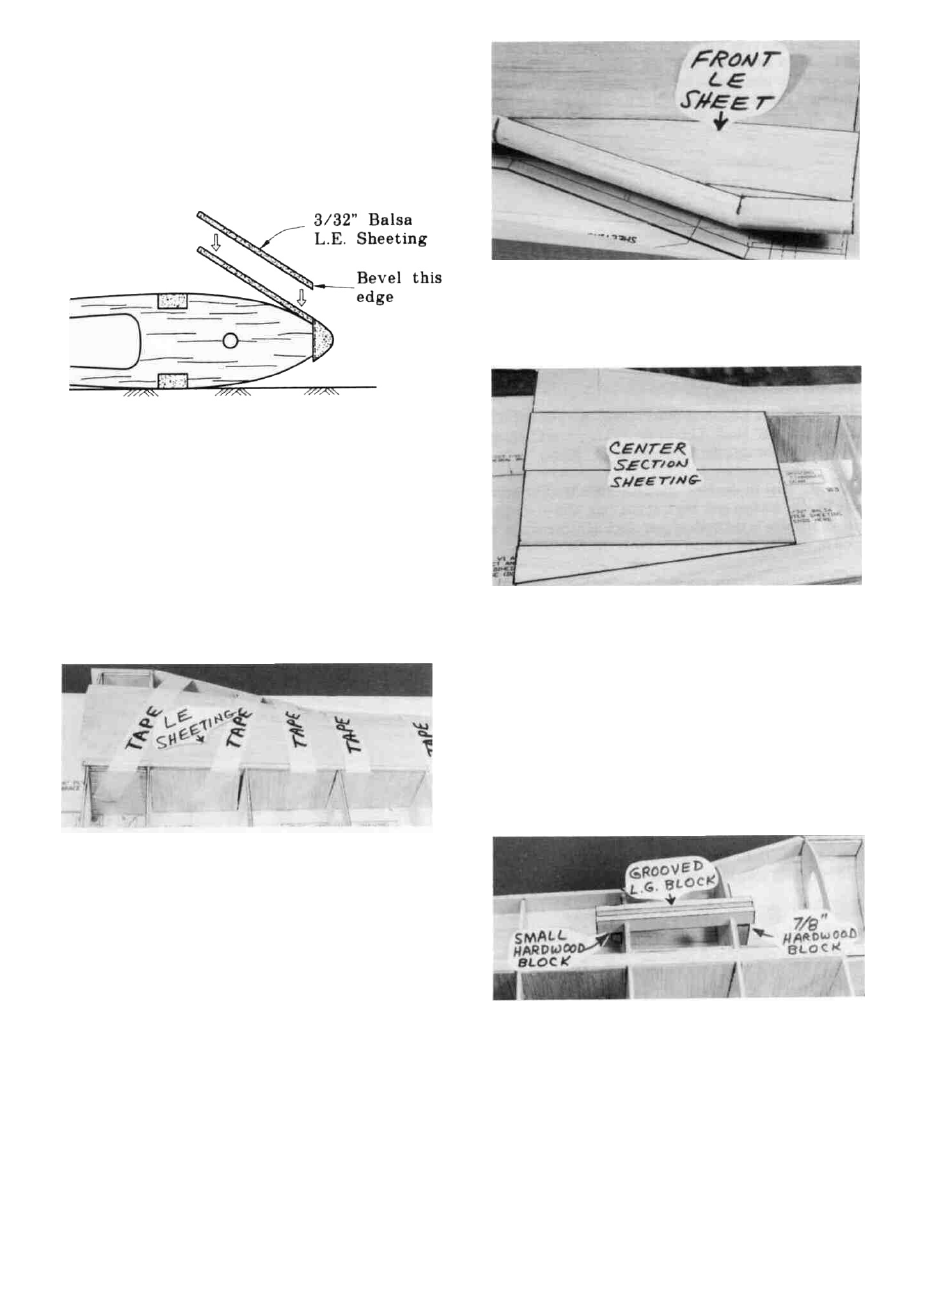
D D 23. Before applying the leading edge sheeting in the
next step, use your T-bar to lightly sand off the edges of the
shear webs and smoothly blend the ribs to the spar.
D D 24. Prepare the 3/32" balsa leading edge sheeting by
sanding the front edge to a slight bevel so it will fit snugly
against the back of the leading edge (this is only done in the
area from rib W-4 to the tip).
NOTE: It will be helpful to have the following items
handy for the next step... thin CA, thick CA, a wet cloth
and twelve 8-inch strips of masking tape. Read through
the following step and go through a "dry run" before
actually gluing.
bending over the ribs. Any small gaps and irregularities may
later be sanded or filled with balsa filler.
D D 27. Using the 3/32" x 3" x 7-7/8" balsa sheets and the
scraps which you trimmed from the LE sheeting, glue the top
center section sheeting in place as shown on the plan.
NOTE: If you are installing retracts, disregard steps
28 through 31.
D D 25. Apply thick CA glue to the top edge of the ribs and
to the front half of the spar. Working quickly, position the
leading edge sheeting at the rear edge of the notched LE so
there is an equal amount protruding on both ends of the wing.
Using thin CA, glue the front (beveled) edge of the leading
edge sheeting to the back edge of the leading edge. Now wet
the top surface of the sheeting so it will bend easier, then
immediately bend the sheeting down onto the ribs and spar.
Hold the sheeting down with long strips of masking tape until
the glue has set.
D D 26. Using four of the 3/32" x 3" x 7-7/8" balsa sheets,
cut pieces to complete the LE sheeting from W-1 to W-4, and
glue in place. You'll have to wet this sheeting to permit
D D 28. Remove the wing from the building board and
trial fit the long grooved hardwood LG block into the notches
in ribs W-3 and W-4 (see the landing gear detail drawing on
the wing plan for proper positioning). File the notches if nec-
essary for a good fit. Now use epoxy to securely glue the
block in place.
13