Great Planes P-51D Mustang 40 Kit - GPMA0175 User Manual
Page 12
D D 18. Glue the top spar in place (with the spar doubler
facing down), making sure you do not change the angle of
W-l.
IMPORTANT: In the following steps you'll find it
necessary to remove some of the pins holding the wing
down to your building board. As you do, take other steps
as necessary to continue holding the wing down. such as
by applying weight to the top of the wing, or by relocating
the pins.
D D 19. Glue the pre-cut 3/32" balsa vertical grain shear
webs to the rear edge of the spars in all rib bays except
between ribs W-l and W-2. Also install webs on the front
of the spars between ribs 1 and 4. NOTE: You may wish to
trial fit, mark, and trim each web before gluing in. NOTE:
The webs must be securely glued to the spars, but it is not
necessary to glue the webs to the ribs.
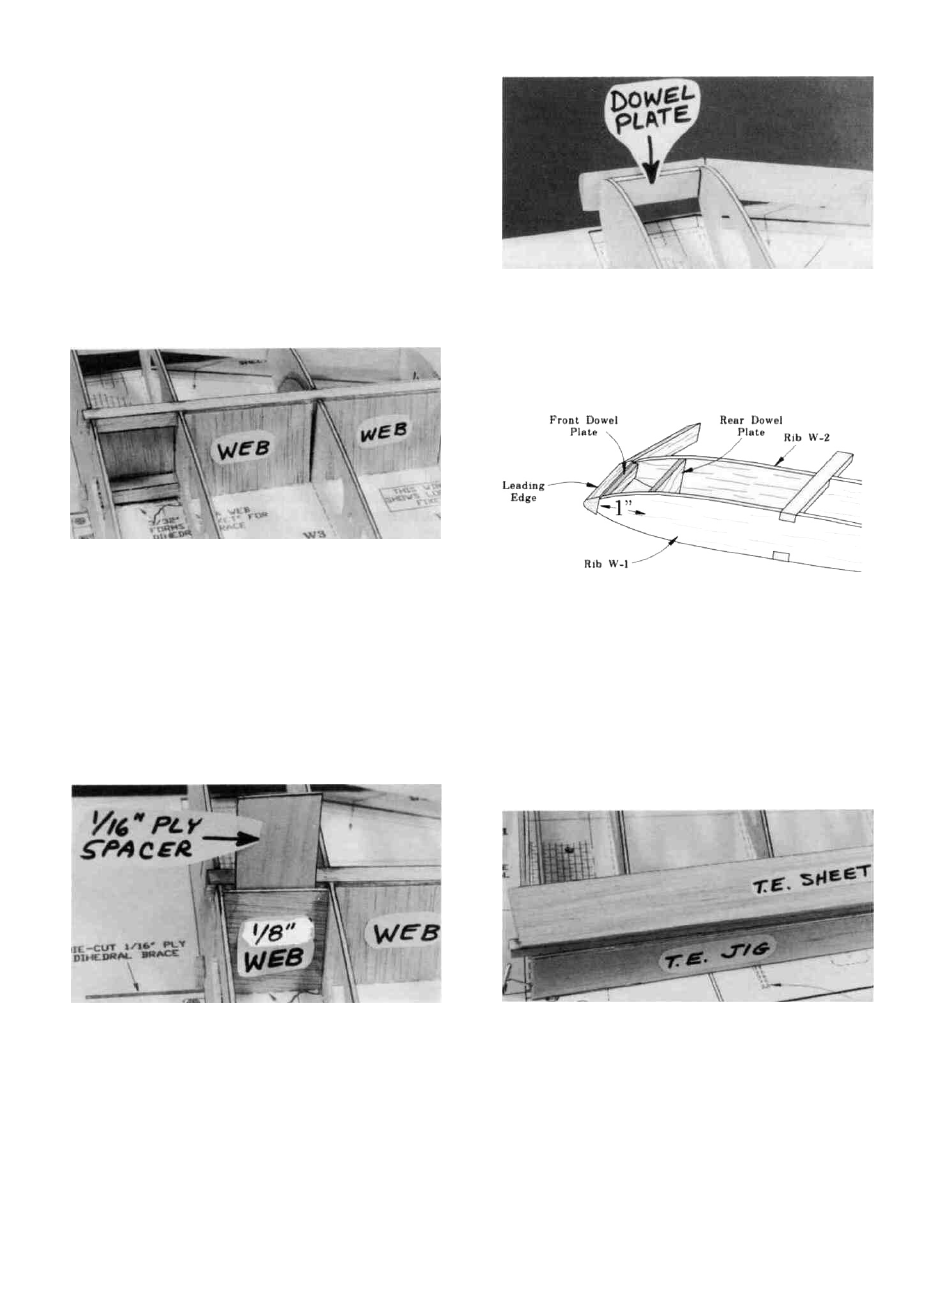
D D 21. Securely glue the die-cut 1/8" ply dowel plates
into the wing. The small dowel plate glues to the back edge
of the leading edge and to ribs W-l and W-2. The large dowel
plate is located 1" behind the small dowel plate, and is glued
to ribs W-l and W-2. NOTE: The photo shows only the small
dowel plate.
NOTE: In the next steps, maintain straightness by
keeping the wing down on the flat surface and on the
TF Jig.
D D 20. You will now make a "pocket" for the 1/16" ply
dihedral brace by installing a 1/8" die-cut balsa (horizontal
grain) web 1/16" behind the spars. The die-cut web is very
close to the correct size, but sand it as necessary for a good fit
between W-l and W-2. Using a scrap of 1/16" ply as a
temporary spacer, glue the 1/8" web to W-l and W-2.
D D 22. Lightly sand the tops of the ribs to blend with the
notched trailing edge; then glue one of the 3/32" x 1-3/8" x
28" balsa trailing edge sheets in place. NOTE: The edge of
the TE sheet may not be exactly straight, but just position the
sheet so it slightly overlaps the TE, and any overlap can be
sanded off later.
12