Great Planes P-51D Mustang 40 Kit - GPMA0175 User Manual
Page 10
BUILD THE WING PANELS
NOTE: If you will be installing a retractable landing
gear, disregard Step 6.
NOTE: It will be helpful to build the wing on a piece of
"Celotex"* or other semi-soft (and flat) surface, into
which you may easily stick pins to firmly hold down the
wing parts while building, to avoid warps. *Available
from lumber companies and home centers.
D 1. Tape the plan to your flat work surface, and cover
the wing drawing with waxed paper (so you won't glue the
wing to the plan!). NOTE: If your work space is limited, you
may cut the left and right wing half drawings apart.
D 2. The shaped and notched wing leading edges (LE)
and trailing edges (TE) are fastened together by thin strips of
balsa. Separate them by folding until the balsa breaks, or by
cutting. Sand away the excess balsa that remains along the
edges after breaking them apart, using a T-bar with 100-grit
sandpaper.
D 3. Before using the 1/4" x 3/8" x 28" hard balsa spars,
examine them carefully for possible imperfections. Look for
knots, soft spots, diagonal grain and any other imperfections.
If possible, position each spar so the imperfections (if any) are
on the outer half of the wing panel (toward the tip), where they
will be least affected by high stress. If the spars are warped
slightly, try to "balance them out" by installing the warped
spars in opposite directions (see sketch). NOTICE: If you
feel that any of the wing parts are unusable due to severe
warps or other defects, give us a call and we'll replace the
parts.
T W O WARPED SPARS INSTALLED
THIS W A Y WILL RESULT IN A
STRAIGHT WINO
TWO WARPED SPARS INSTALLED
THIS W A Y WILL RESULT IN A
WARPED WING
D 6. Note that the wing plan shows the location of the
main landing gear blocks. Note also that Ribs W-3 and W-4
have partial cutouts for the grooved landing gear block. If
you are building your plane with a fixed (not retractable)
landing gear, finish cutting out the notches in these ribs. (If
you will be installing retracts, do not cut out these notches).
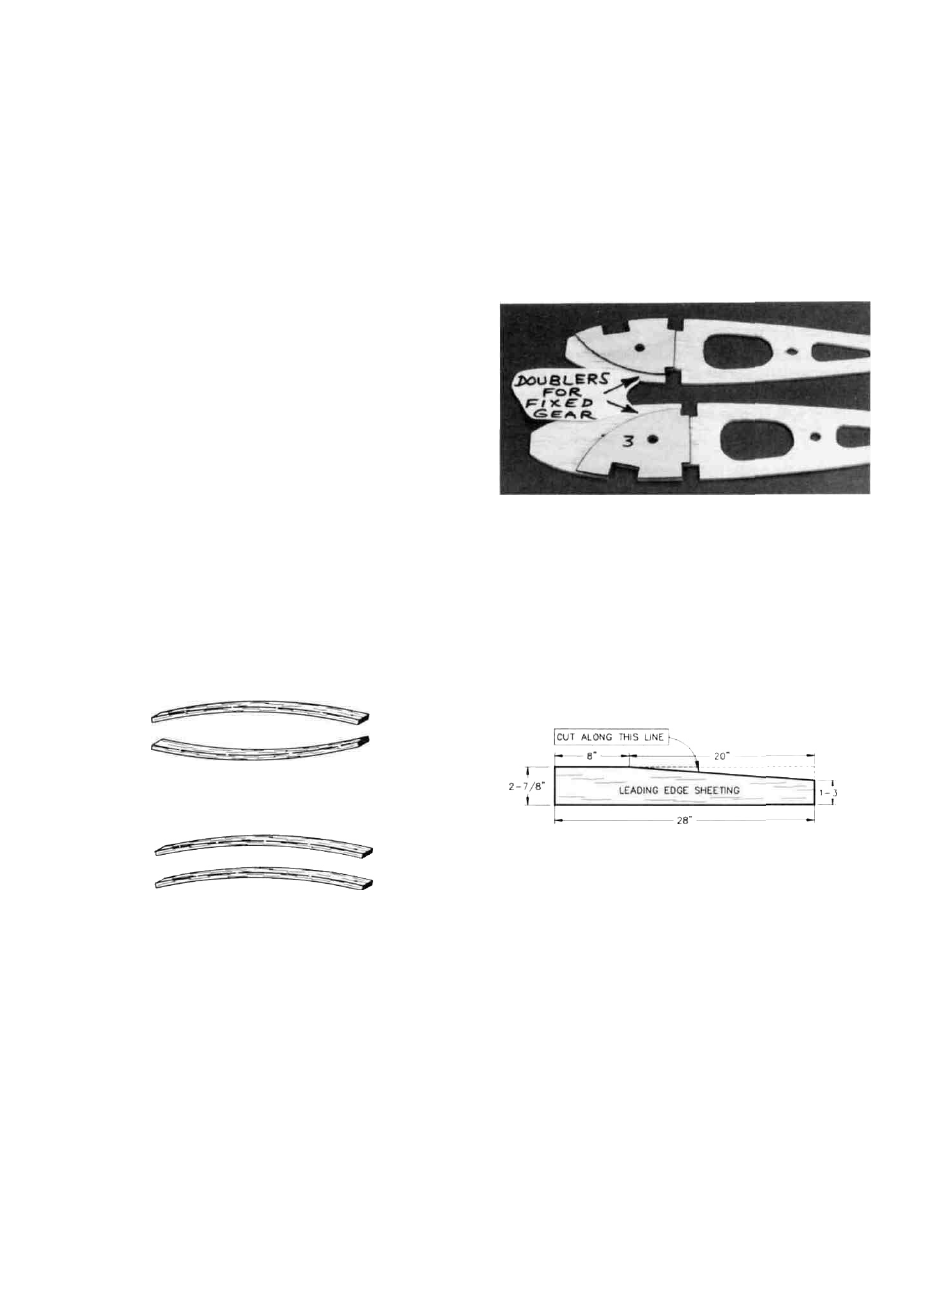
D 7. Glue the die-cut 1/16" ply notched landing gear
doublers to ribs W-3 and W-4 (for fixed gear only). If
installing retracts, you will later glue the other set of 1/16" ply
"nose rib doublers" to ribs W-4 and W-5. Be sure to glue them
to the correct side of the ribs, as shown on the plan (make a
right and a left set). Sand the doublers even with the edge of
the ribs.
D 8. Prepare the leading edge sheeting by trimming the
3/32" x 2-7/8" x 28" balsa sheets as shown in the following
sketch.
D 4. Find the four 1/8" x 3/8" x 13" hard balsa spar
doublers. Sand one end of each spar doubler to a taper as
shown in the "Wing Spar Detail" on the plan. Glue the spar
doublers to the spars, and sand off any excess glue.
D 5. Carefully punch out all the die-cut 3/32" balsa wing
ribs. Sand the edges slightly to remove any die-cutting
irregularities.
NOTE: Follow steps 9 through 36 to build the
RIGHT wing panel, then repeat these steps to
build the LEFT wing panel.
D D 9. Pin one of the spars to the plan with the spar
doubler up and toward the root. NOTE: The spars are cut
10