Great Planes P-51D Mustang 40 Kit - GPMA0175 User Manual
Page 15
sheeting around the LG block as necessary. IMPORTANT
NOTE: To insure a straight wing, you must pin or weight
the TE securely down on the TE jig while the bottom
sheeting is glued in place!
*As you apply the bottom LE sheeting, remember to
mark the sheeting in the exact areas of the retract mechanism,
LG wire, and wheel well locations, so you can easily find and
trim the sheeting from these areas later.
(Retracts): Trim away the sheeting in the area of the
retract and wheel well.
NOTE ON RETRACTS: Additional instructions and
photos covering installation of retracts will be found at
the end of the Wing section, on page 20.
D D 34. From the 3/32" x 1/4" x 30" balsa sticks, cut and
glue cap strips to all exposed ribs, top and bottom. HINT:
For easier positioning of the cap strips, first mark the location
of each rib on the LE and TE sheeting.
D D 35. Trim the sheeting flush with ribs W-l and W-11
and sand the entire wing panel smooth. Sand the leading edge
to smoothly blend with the LE sheeting (see note below).
IMPORTANT: The shape of the leading edge
will affect the way this airplane performs snap rolls
and spins. A blunt, rounded leading edge will
"soften" the stall, making the plane very docile
when flying slowly, enabling it to flare nose-high
for very slow landings; however, this may cause
the plane to be a little sluggish when trying to enter
a snap roll or spin. A sharper leading edge will help
the plane enter snap roll and spin maneuvers more
crisply, while sacrificing only a little of the low
speed stability. The leading edge has been
approximately pre-shaped, but we recommend
that you cut out the Leading Edge Template, and
use it as a guide when sanding the leading edge to
final shape. To avoid tip stalls, make sure the
leading edges of both wing panels have the same
shape.
D 37. Now go back and repeat Steps 9 through 36 to build
the left wing panel.
JOIN THE WING PANELS
NOTE: Read steps 1 through 4, then make a "dry run,"
practicing these steps before actually proceeding.
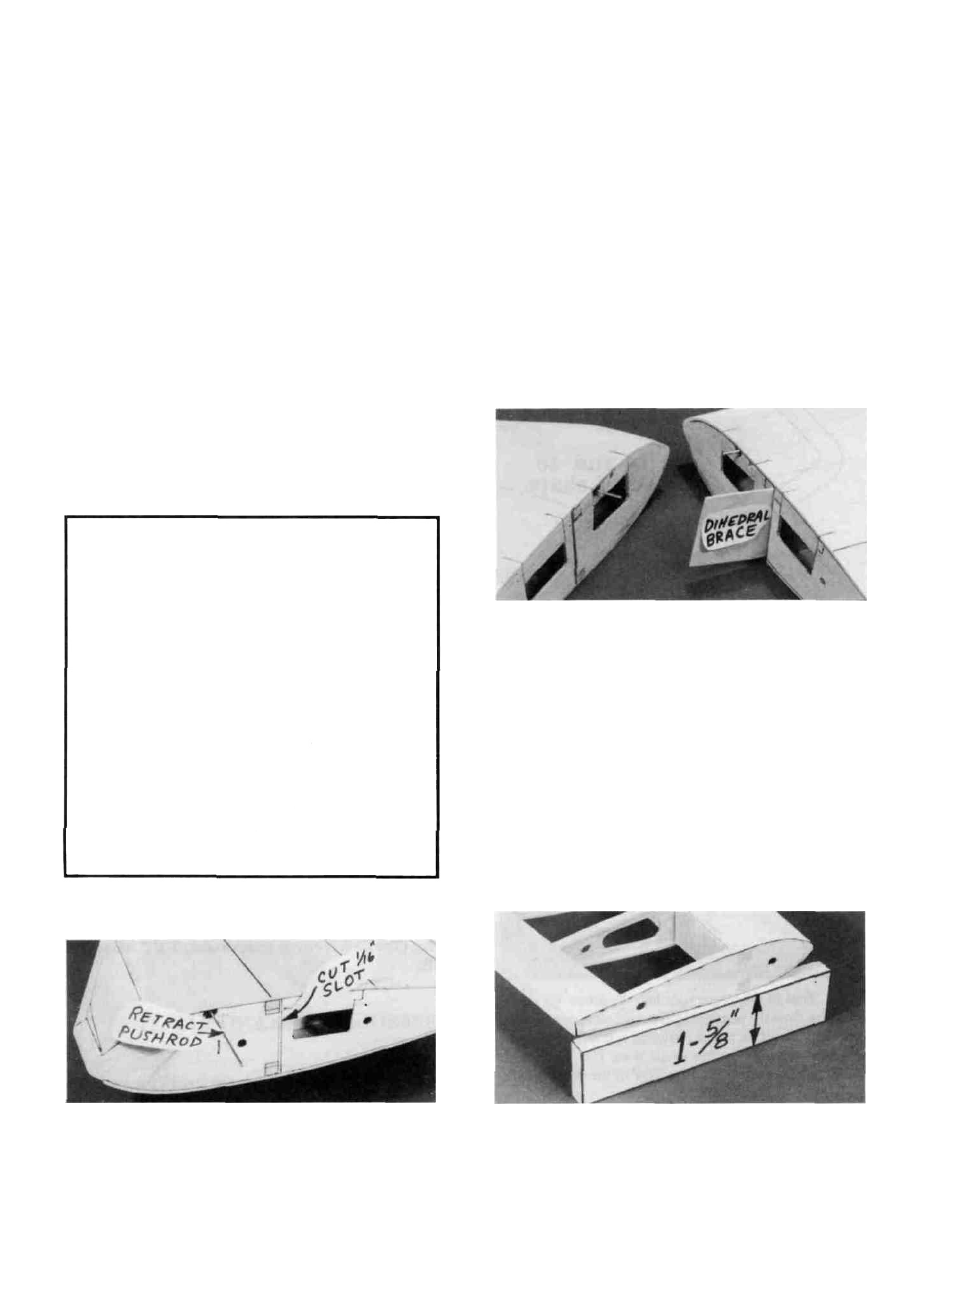
D 1. Lay a piece of waxed paper down and place the two
wing panels, right side up, so that the W-l ribs are together.
Using wood scraps, make two blocks similar to that shown in
the photo, and use them to block up both wing tips 1-5/8 inch.
Sand the wing panels at the center so they will fit together
without a gap.
D 2. Trial fit the die-cut 1/16" ply dihedral brace to
make sure it will readily slide into place.
NOTE: 30-minute epoxy is strongly recommended
for the wing joining process.
D 3. Mix up a batch of 30-minute epoxy and push some
into the dihedral brace slots. Smear epoxy on the spar ends,
and on both sides of the 1/16" ply dihedral brace. Slide the
dihedral brace in place, push the wing panels together and
immediately proceed to the next step.
D D 36. Mark and cut out a 1/16" slot in W-l just behind
the spars, for the dihedral brace.
D 4. With the wing tips blocked up 1-5/8 inch, carefully
align the LE and TE of both wing panels at the center and,
15