Great Planes P-51D Mustang 40 Kit - GPMA0175 User Manual
Page 24
D 5. Insert F-6 upside down in the rear of the slot in the
stab base. Sand the edges of F-6 slightly to match the angle
of the fuse sides. Align F-6 perpendicular to the stab base and
glue it in place.
D 6. Accurately position the 1/8" die-cut ply fuse top on
the plan and hold it securely in place with pins, tape or
weights (or you may spray it lightly with 3M "77" spray
adhesive, to hold it firmly but temporarily down on the plan).
NOTE: There is a right and a wrong way to install the fuse
top! It must line up with the aft edge of F-l.
D 7. Trial fit (do not glue) the following parts together:
Fuse top, fuse sides, die-cut 1/8" ply F-2, F-3, F-4, F-5 and
F-6. Check the fit of all parts and trim, file or sand as
necessary for a good fit. Pull the aft ends together and re-sand
the 1/4" triangles if necessary.
D 8. Once you have everything fitting properly, re-as-
semble the above parts, using clamps, pins, tape and weights
to hold everything together and flat on the workbench. Make
sure F-2 is pushed as far forward as possible. There should
be waxed paper underneath to prevent gluing the fuse to the
plan. Apply medium or thin CA glue to the joints, then follow
with thick CA glue in all joints. NOTE: It is difficult to get
sufficient glue down to the stab bed, so make a mental note to
add glue in that area after removing the structure from the
workbench.
D 9. Sand the bottom of the fuse to remove any excess
glue, and to provide a flat surface for the sheeting.
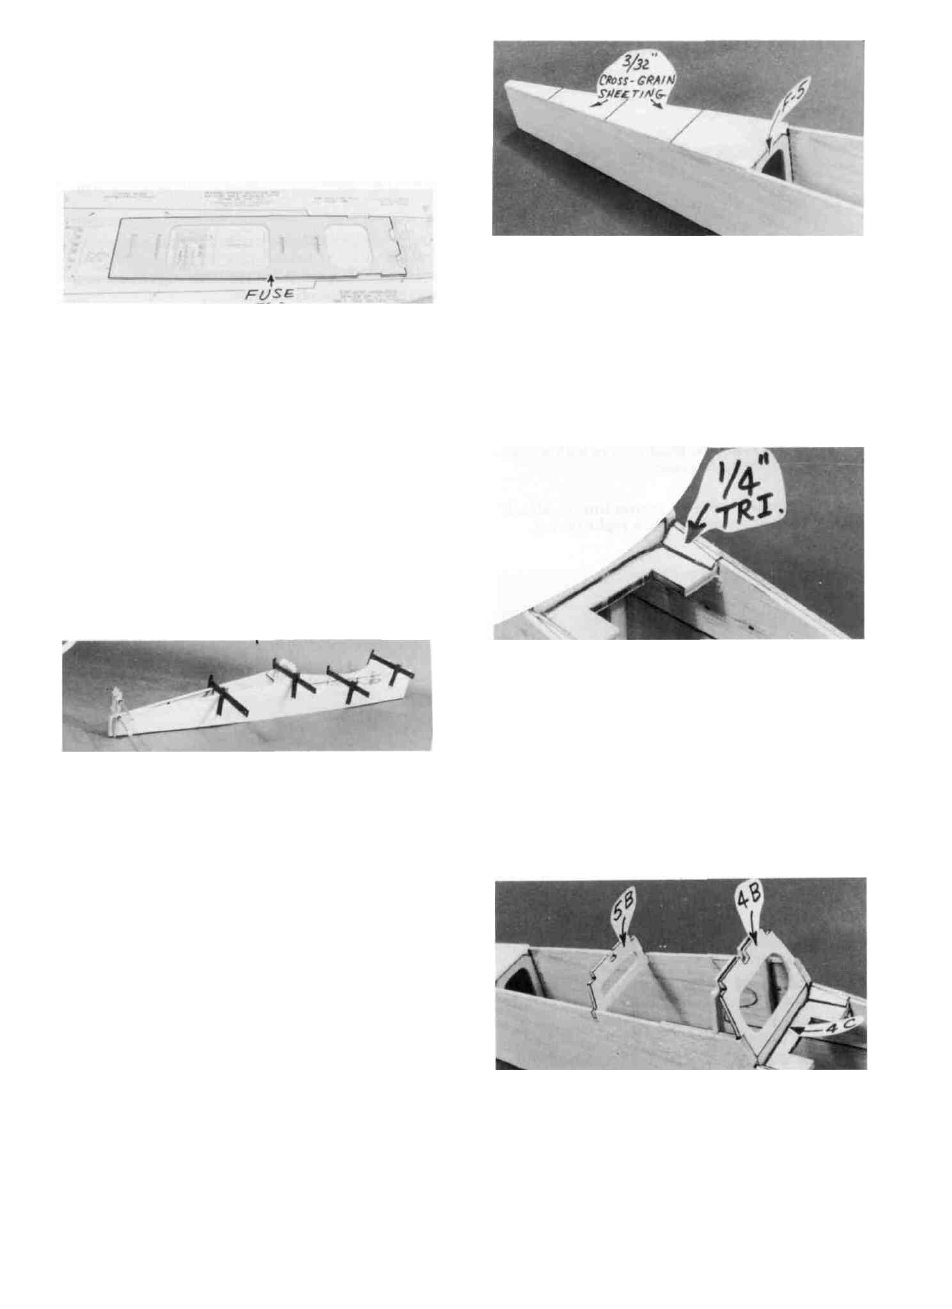
D 10. From the 3/32" x 3" x 24" balsa sheet, cut and glue
pieces of cross-grain sheeting to the bottom of the fuse,
beginning at the middle of F-5 and running to the aft end of
the fuse. The photo for this step is at the top of the next
column.
D 11. Now you may remove the fuselage from the work
surface and sand the edges of the bottom sheeting flush with
the fuse sides.
D 12. Find the 1/4" ply wing hold-down block and trial fit
it into the notches in the fuse side doublers, sanding as
necessary for a good fit. Glue the hold-down block in place
securely, using 30-minute epoxy, then cut pieces of 1/4"
balsa triangle and glue them in place only between the wing
hold-down block and the wing saddle. Sand the triangles
flush with the wing saddle.
D 13. Glue the die-cut 1/8" ply formers F-4B, and F-5B in
place. Now find the die-cut 1/8" balsa former F-4C and glue
it in place behind the wing hold-down plate.
24