Great Planes P-51D Mustang 40 Kit - GPMA0175 User Manual
Page 31
the sheeting around the formers and onto the stringers.
HINT: This requires about 5 sets of "hands," so use several
long pieces of masking tape to pull the sheeting together;
then, working a small section at a time, add CA and press the
sheeting to the stringers.
D 8. Trim and sand the sheeting flush with the front of
F-4T and the rear of F-6T.
a razor plane (or a sharp wood chisel) and a sanding block
with 50-grit sandpaper for rough shaping the top block. Do
not yet blend the fuse sides into the aft deck sheeting.
ASSEMBLE FRONT DECK
D 9. Using a long T-bar or sanding block with 80-grit
sandpaper, sand the sheeting and stringers flush with the top
edges of the formers.
You'll need the following parts: Die-cut 1/8" balsa
F-1T, F-2T, and the DASH; also the 1/4" x 1/4" x 30" balsi
sticks, the 3/32" x 2-5/8" x 20" balsa front deck side sheet-
ing, and the 1/4" x 2-1/4" x 11-1/2" balsa front deck top.
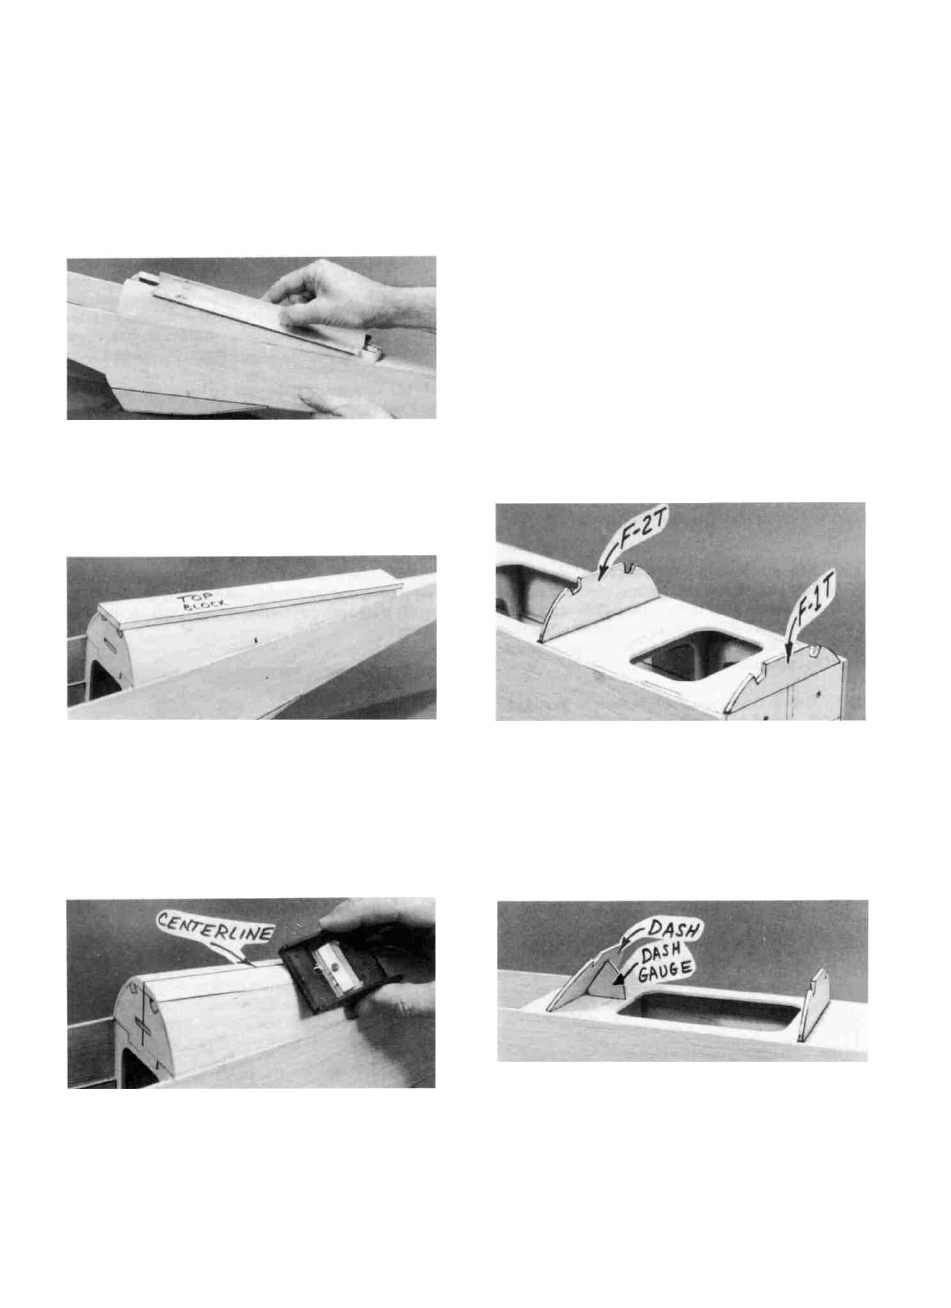
D 1. Glue the die-cut 1/8" balsa F-1T former to the top of
F-l. The front of F-1T must line up with the front of F-l.
NOTE: Center F-1T between the left and right fuse sides.
D 10. Glue the 1/4" x 1-3/8" x 13-3/4" balsa aft deck top
block to the tops of the formers, stringers and sheeting, then
trim the ends of the top block flush with F-4T and F-6T.
HINT: In the next step it will be helpful in keeping the top
block symmetrical if you first mark a fuselage centerline on
the top of the top block from front to back (this is a line from
the centerline of F-4T to the centerline of F-6T).
D 2. Glue the die-cut 1/8" balsa F-2T to the fuse top.
using the notch provided for positioning.
D 11. Carve and sand the top block to blend smoothly with
the sheeting (see the cross-sections on the plan). HINT: Use
D 3. Glue the die-cut 1/8" balsa DASH in place in the
wide notch in the fuse top. Use the small die-cut 1/8" ply dash
gauge only for setting the dash at the correct angle.
31